| Status | ||||
|---|---|---|---|---|
|
Instructions
...
RocketChat is an open source messaging platform that enables secure team collaboration. It competes with Slack but allows different hosting options, including self-hosting and SaaS cloud hosting.
JEMHCloud supports RocketChat notifications from Issue Events and Post Functions. You will be able to notify your RocketChat Channels when JEMHCloud detects an issue change.
Configuring the RocketChat Connection
In order to send RocketChat notifications from Issue and Post function events, you need to set up a Personal Access Token RocketChat. JEMHCloud will use that access token to authenticate to your RocketChat service when sending notifications.
RocketChat provides an open instance for anybody to quickly try their services without installing or requiring a trial. The instance is https://open.rocket.chat. We will use the open cloud instance when integrating RocketChat with JEMHCloud and Jira.
To set up your own RocketChat instance, follow RocketChat's documentation.
Configure RocketChat's Personal Access Token
For this step, we are assuming that you have a RocketChat server already configured. The server can be one you have installed in your infrastructure or the one cloud instance RocketChat hosts.
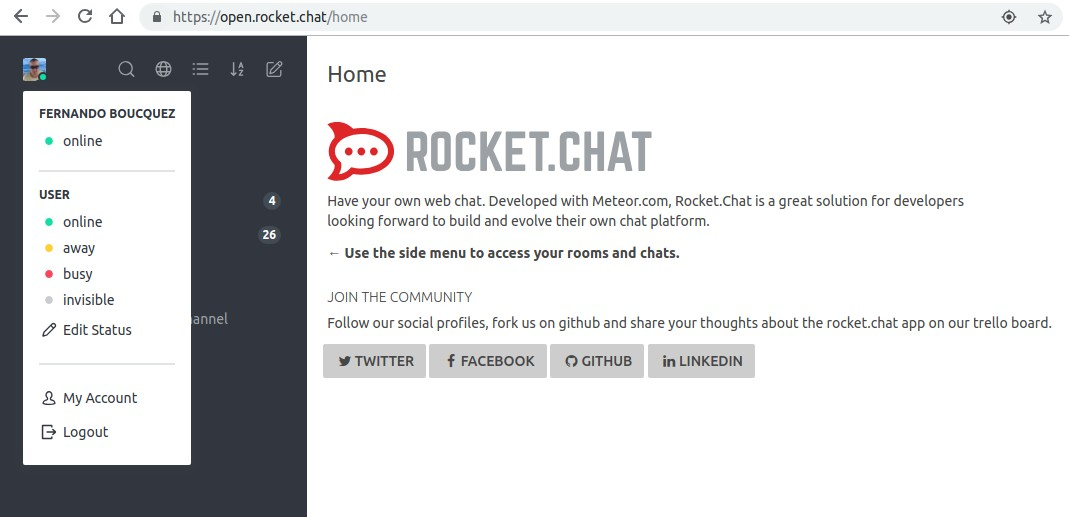
- To create a new Personal Access Token, log into your RocketChat instance (https://open.rocket.chat in our case).
- Click on your avatar → My Account → Personal Access Tokens
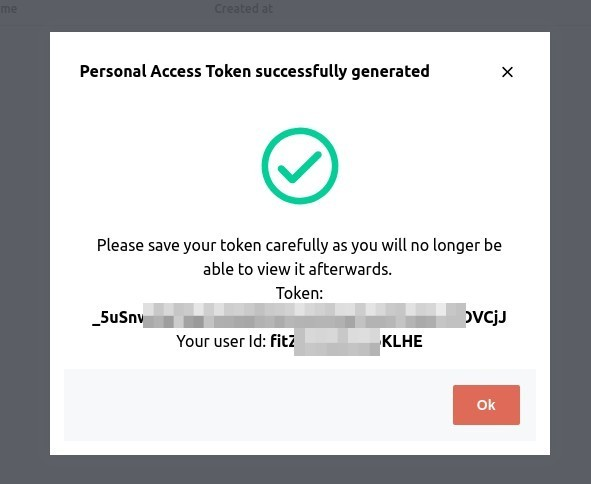
- Enter a name to the token a click Add

- A popup dialog will display your personal token credentials (user id and token). Copy and paste them somewhere safe. JEMHCloud will require those credentials.
| Info |
|---|
Note: The author of the messages will the user that owns the personal access token. If you want a different more generic name, you would need to create the RocketChat integration user (for example Jira or JEMHC) and create the personal access token using that user. |
Create a test channel
If you are using the open RocketChat instance, it's recommended that you create a private channel so the Jira tests messages are not shown to the world!!! To create a private channel,
- Go back to the home page of RocketChat and click on the edit icon:

- Enter a channel name and keep it private. Click on create

- Now you have a channel where JEMHCloud can send messages to.
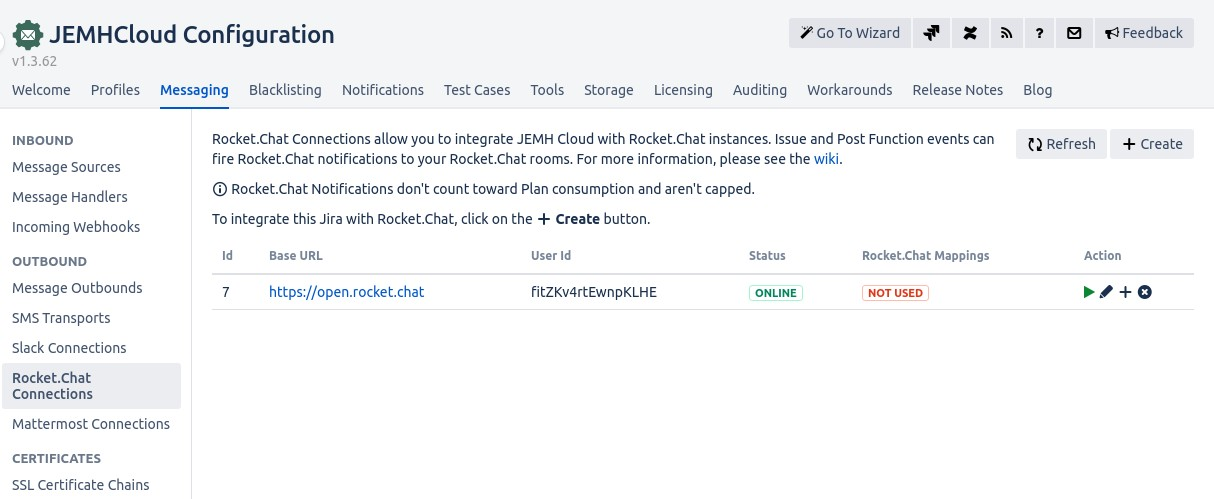
Create JEMHCloud's RocketChat Connection
- Go to JEMHCloud → Messages → RocketChat Connections
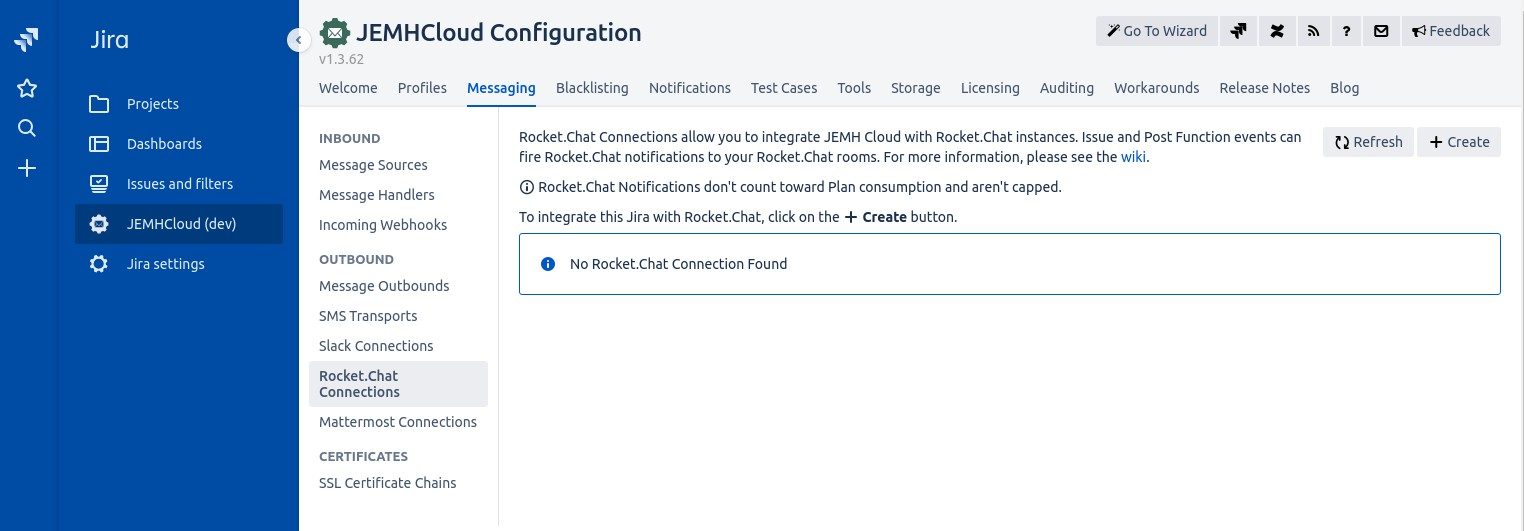 Click on Create button.
- Once in the RocketChat Connection form, enter the rocket chat base URL (https://open.rocket.chat in our case), the user id and token created in the Personal Access Token sections of RocketChat.
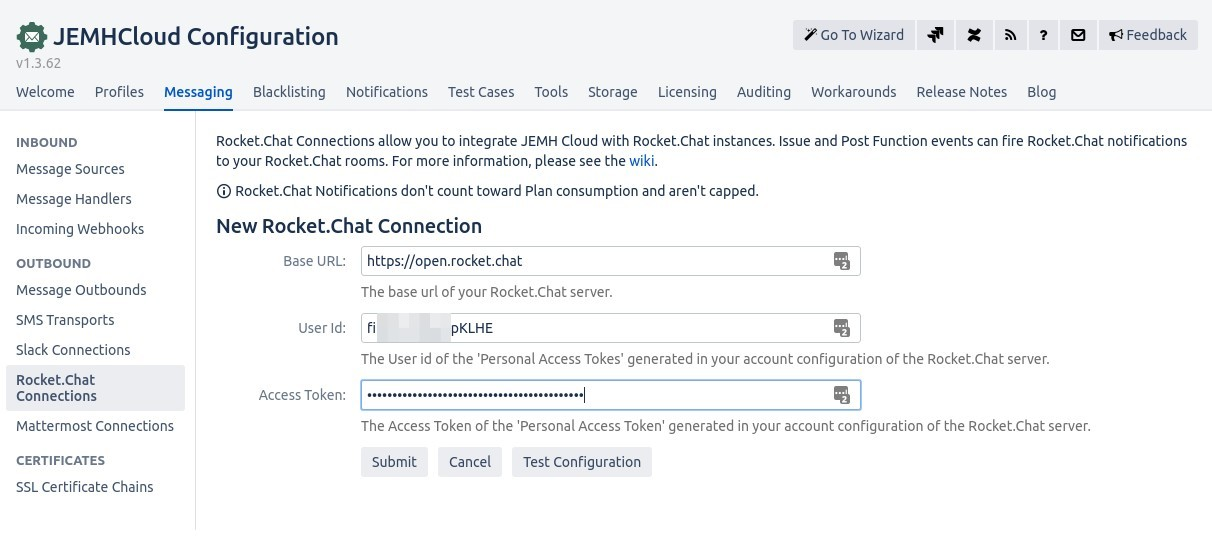
- Submit. If the configuration is ok, you should see a test message in RocketChat's room/channel

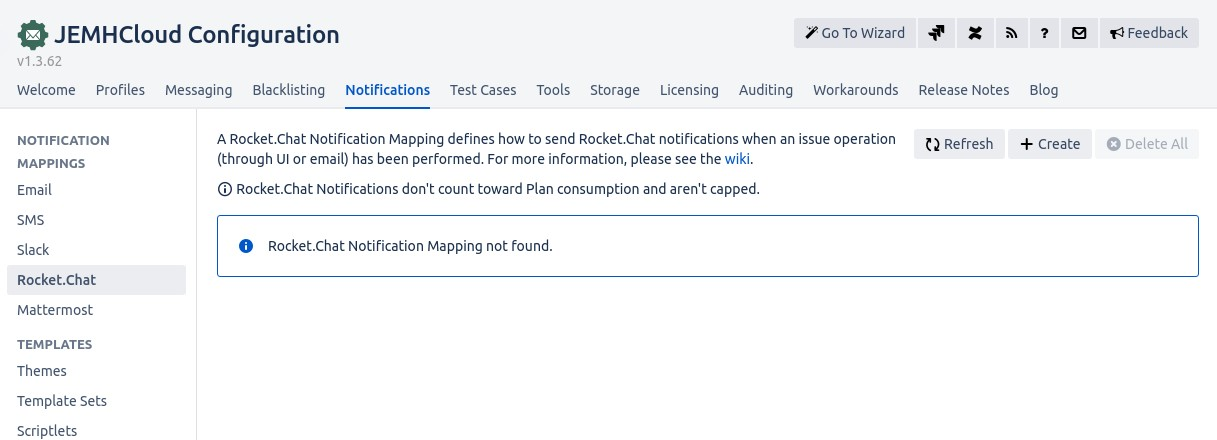
Create JEMHCloud's RocketChat Notification Mapping
Like Email and SMS Notification Mapping, RocketChat Notification Mapping is in charge of sending RocketChat messages from Issue events through the RocketChat Connection.
Creating a RocketChat Notification Mapping:
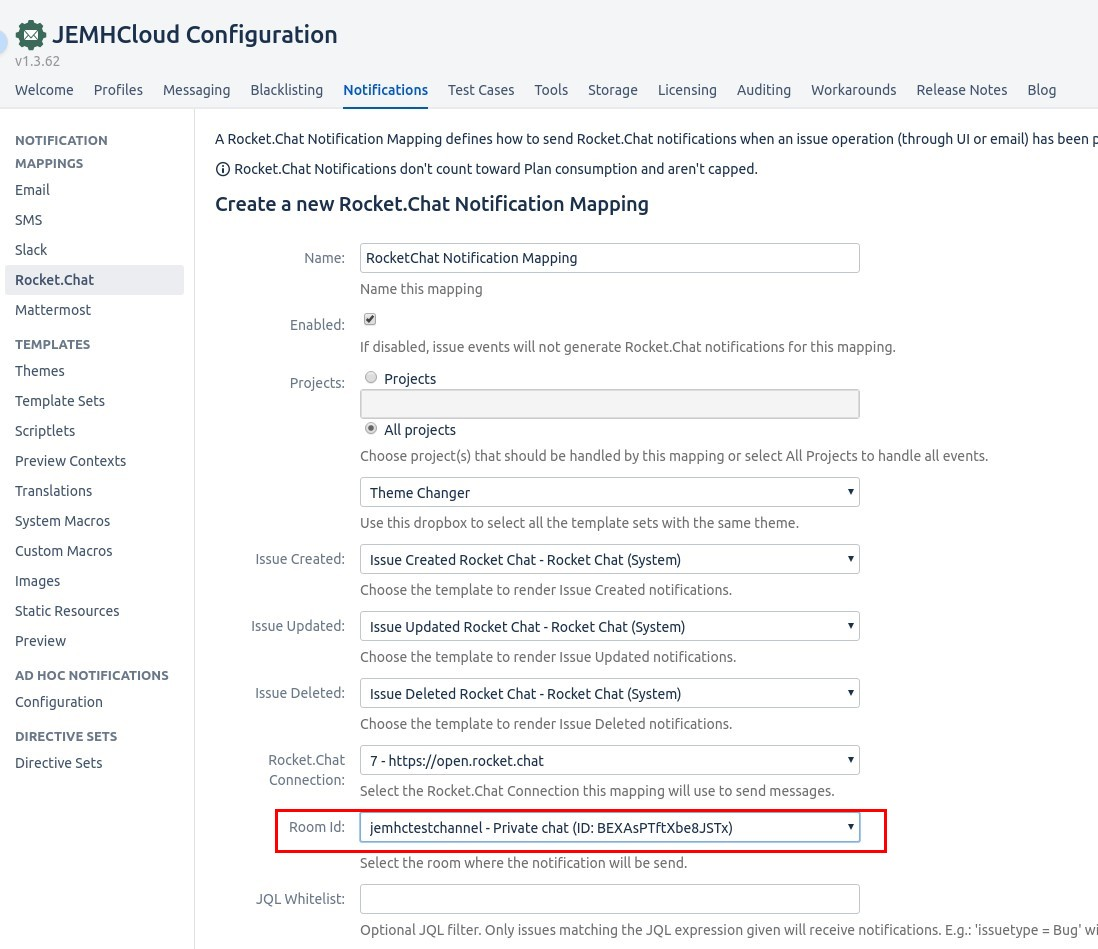
- Go to JEMH Cloud → Notifications → RocketChat → Create
- Complete the form, select the nominated project, select the RocketChat Connection and the newly created channel/room. Enter a velocity script if you want to modify the notification behavior at runtime (more below).
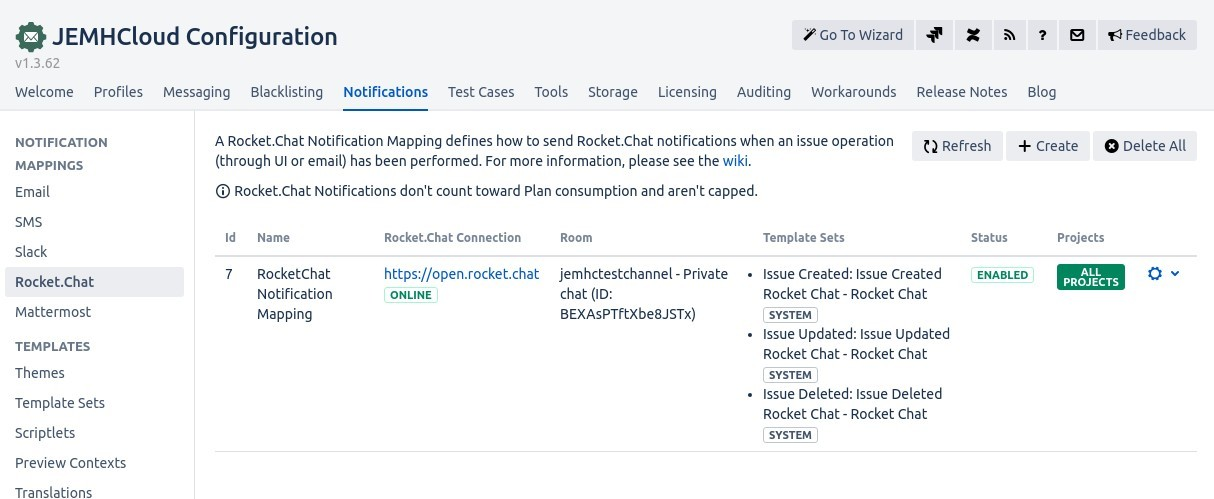
- On Submit, you should see the new RocketChat mapping
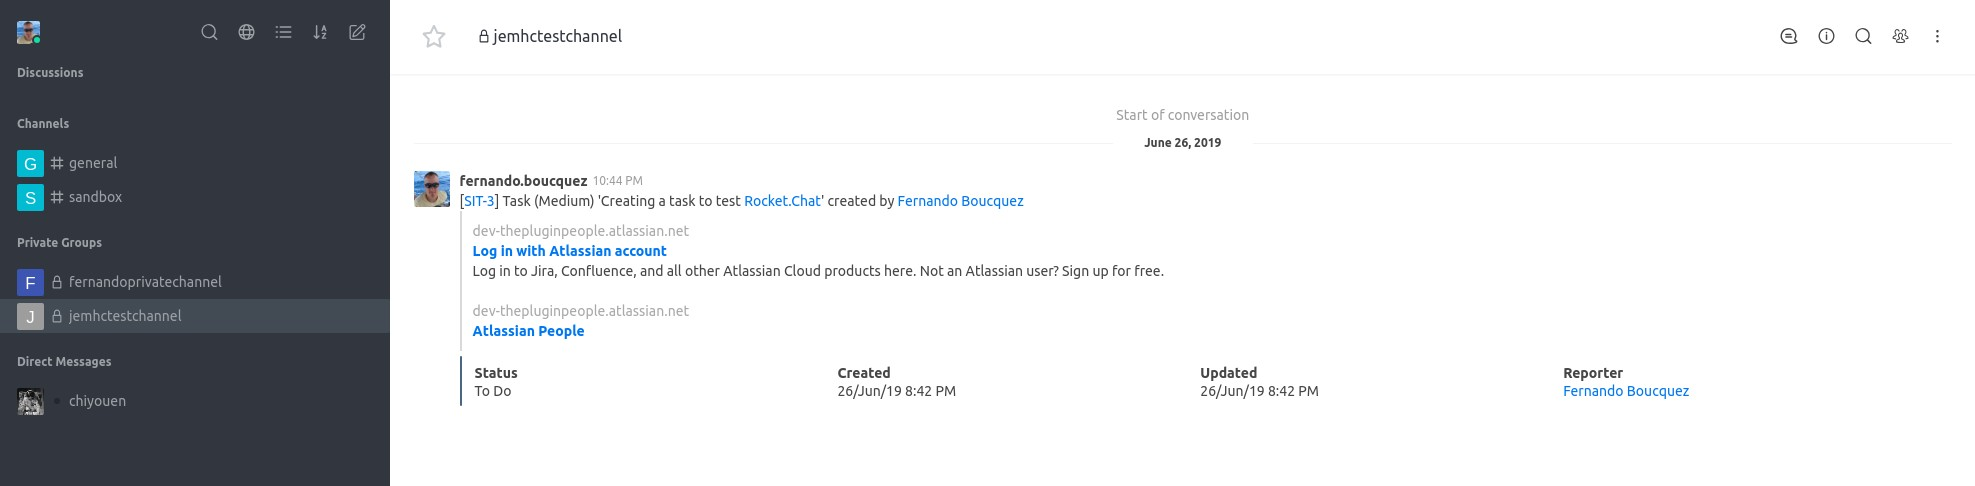
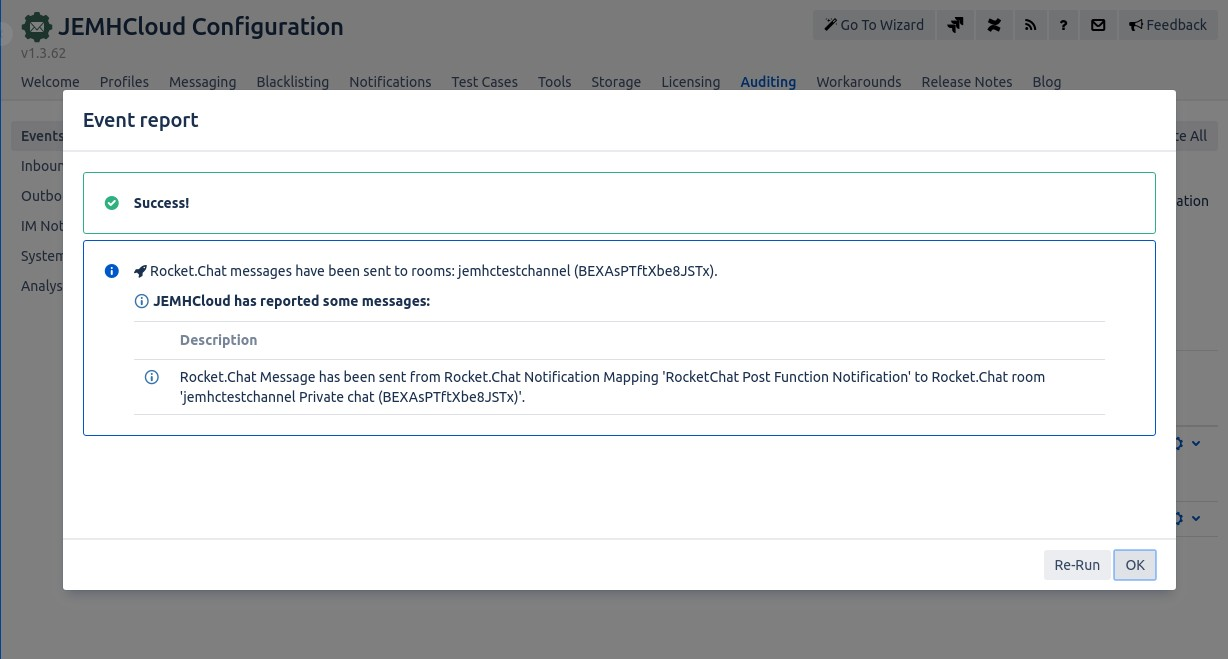
- To test the mapping, create an issue in the nominated project and go to Auditing → Events
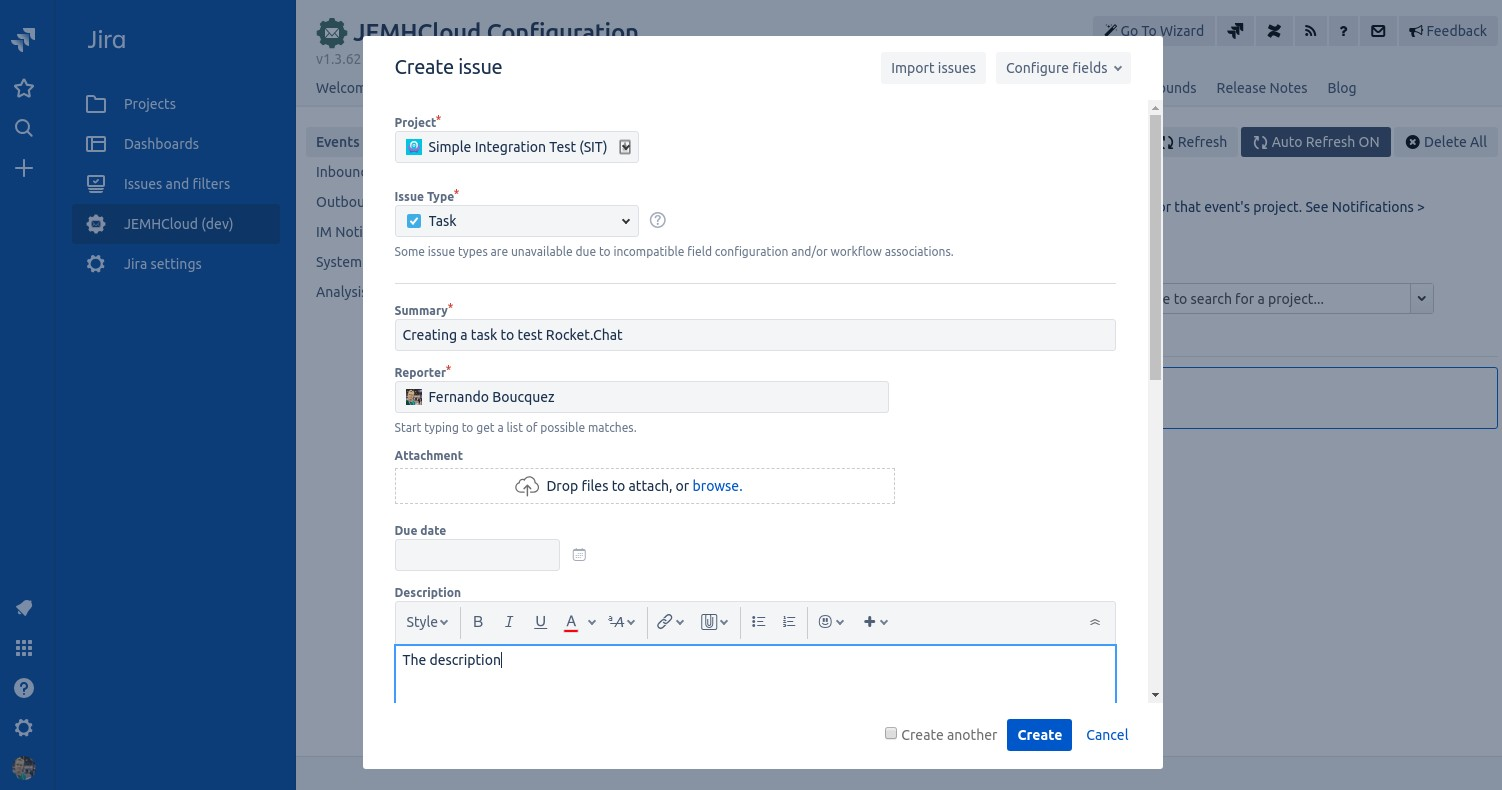
- You should see the issue created event in the queue. When the event has been processed, the configured channel in the mapping should have received a RocketChat message
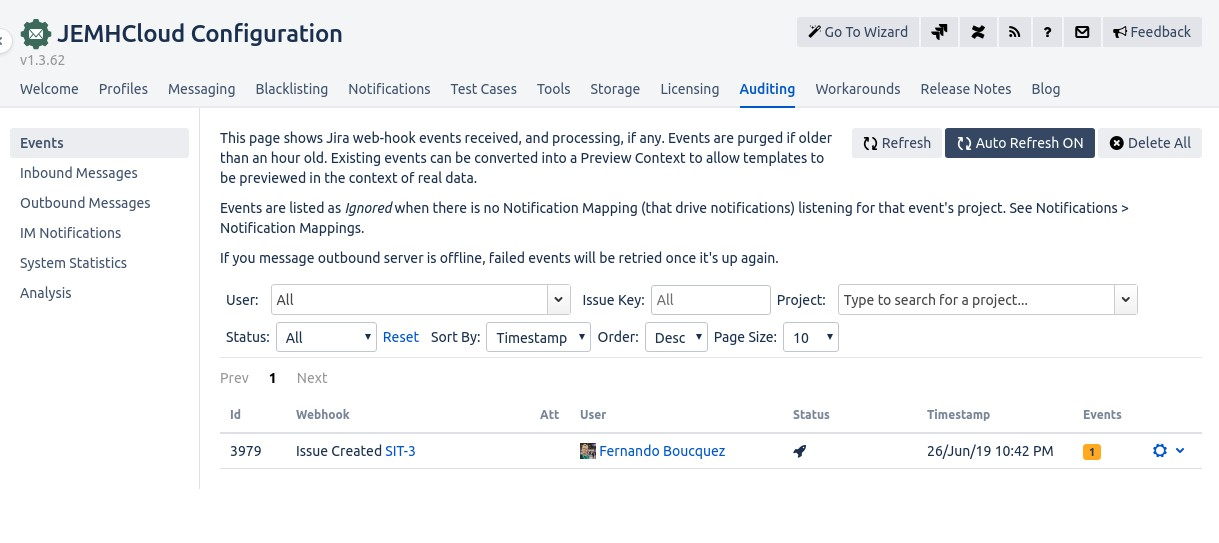
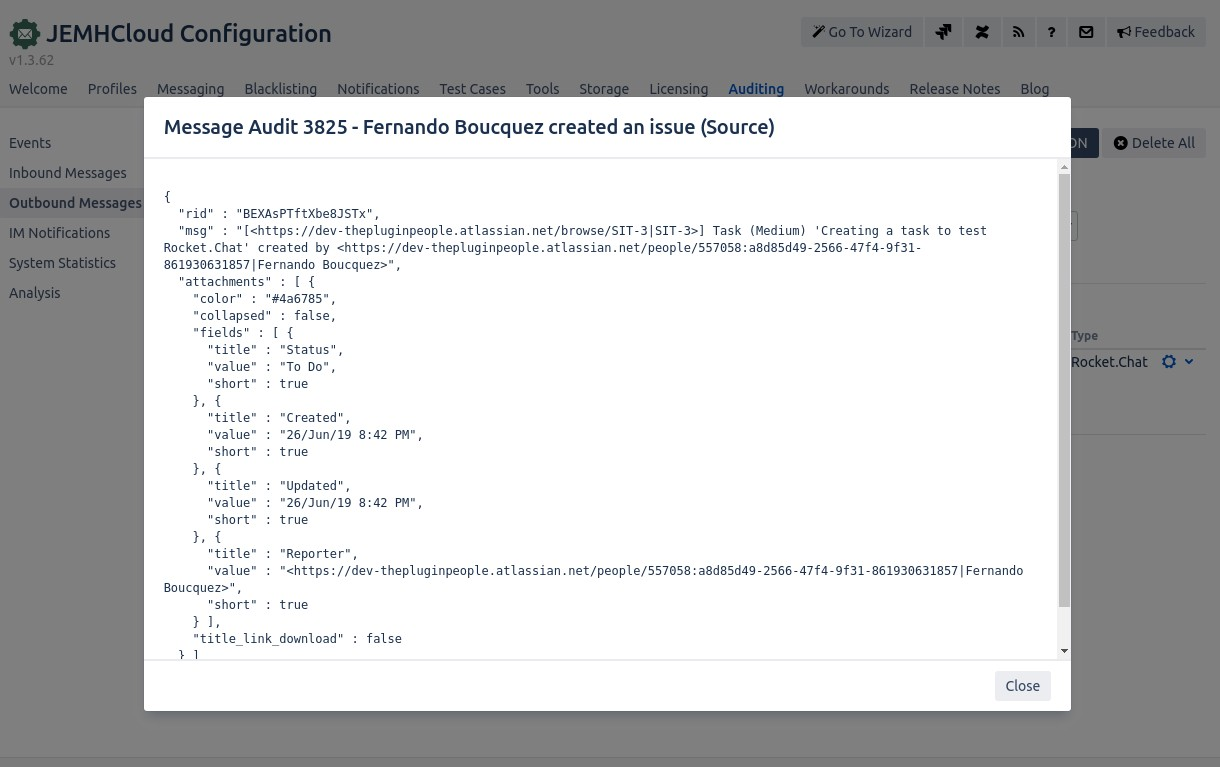
- The report of the event should confirm the message sent
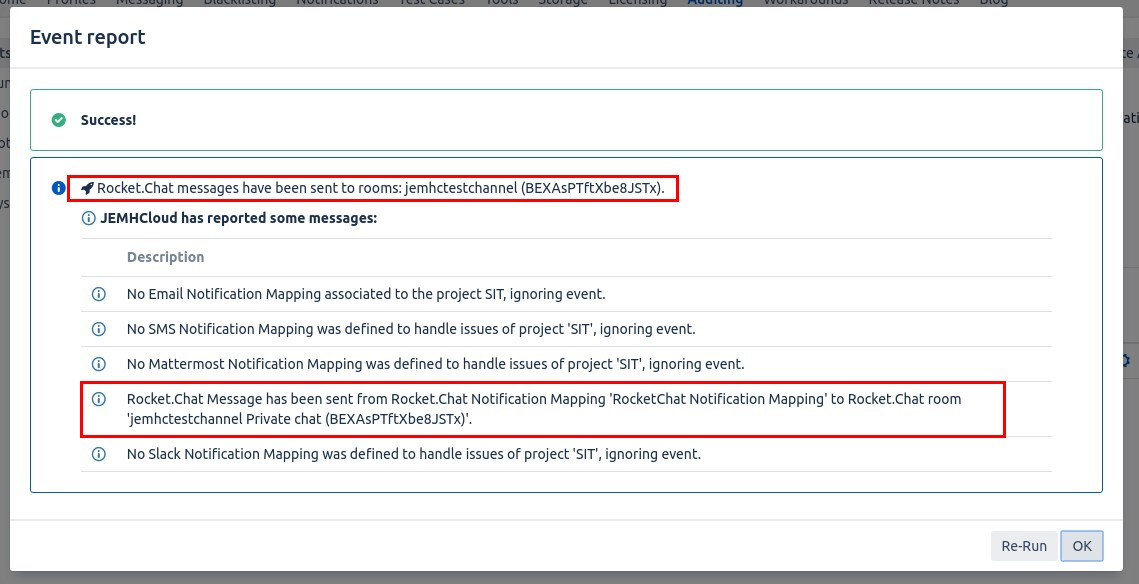
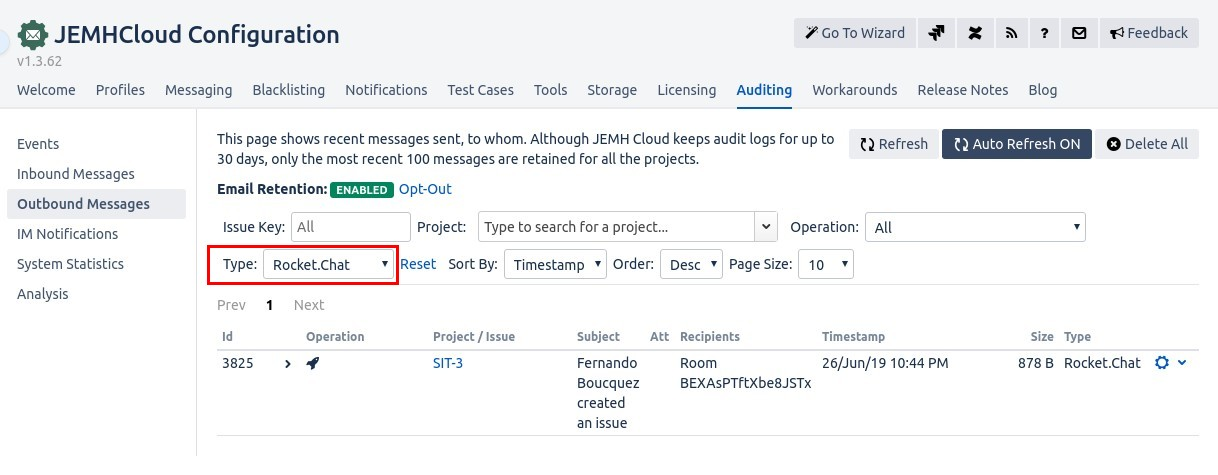
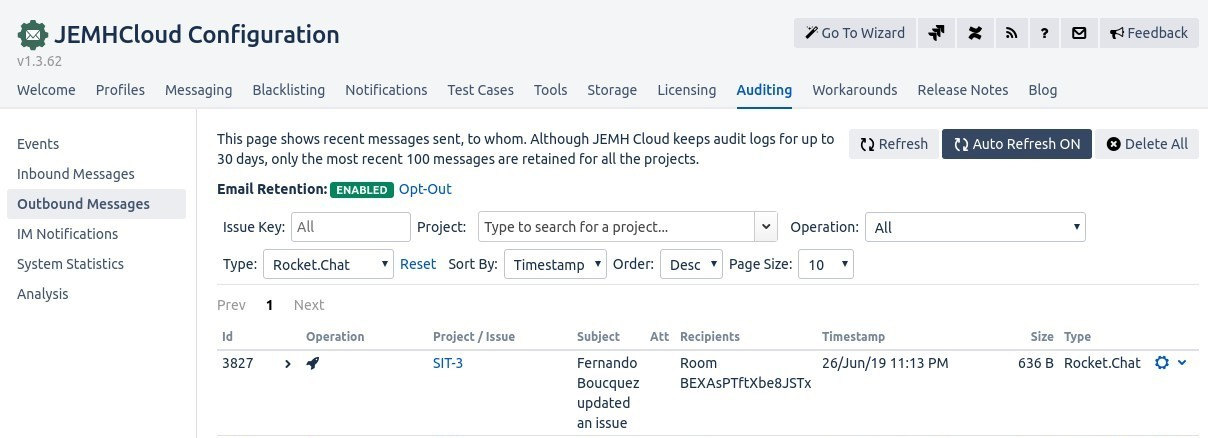
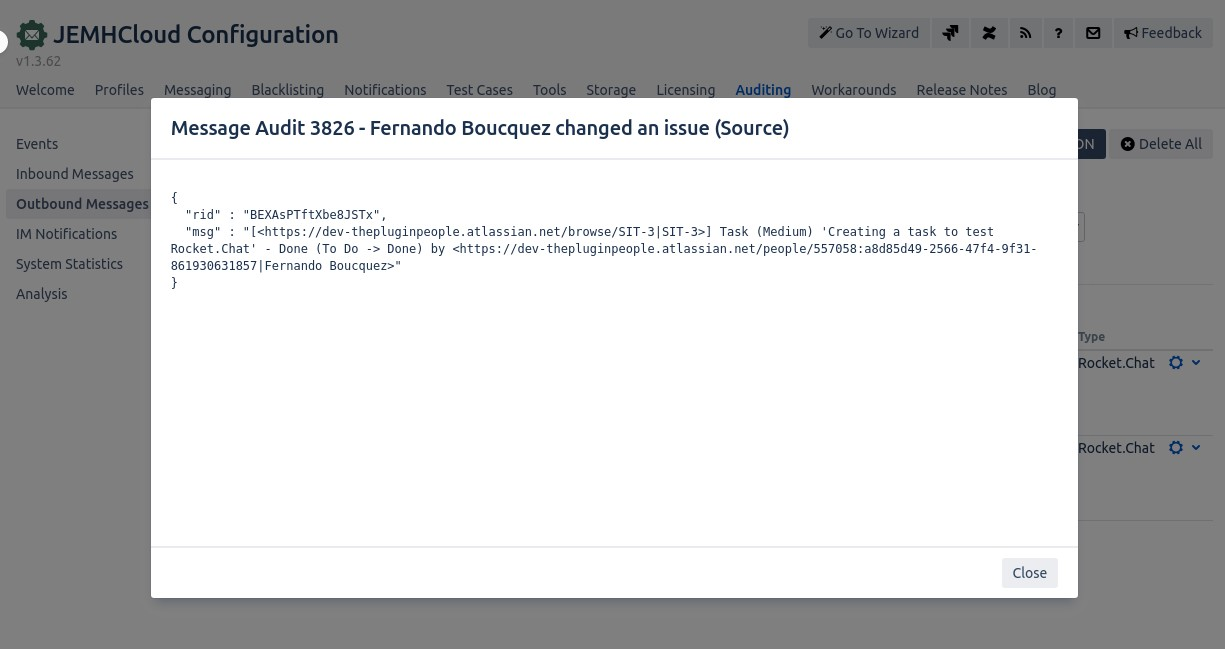
- In Auditing → Outbound Messages → Type RocketChat, the table should show the Rocket.Chat messages sent and the cog icon should show their contents.
Send RocketChat Notifications from Post Functions
JEMHCloud allows you to send RocketChat notifications when Issue transitions are performed through JIRA Post Functions.
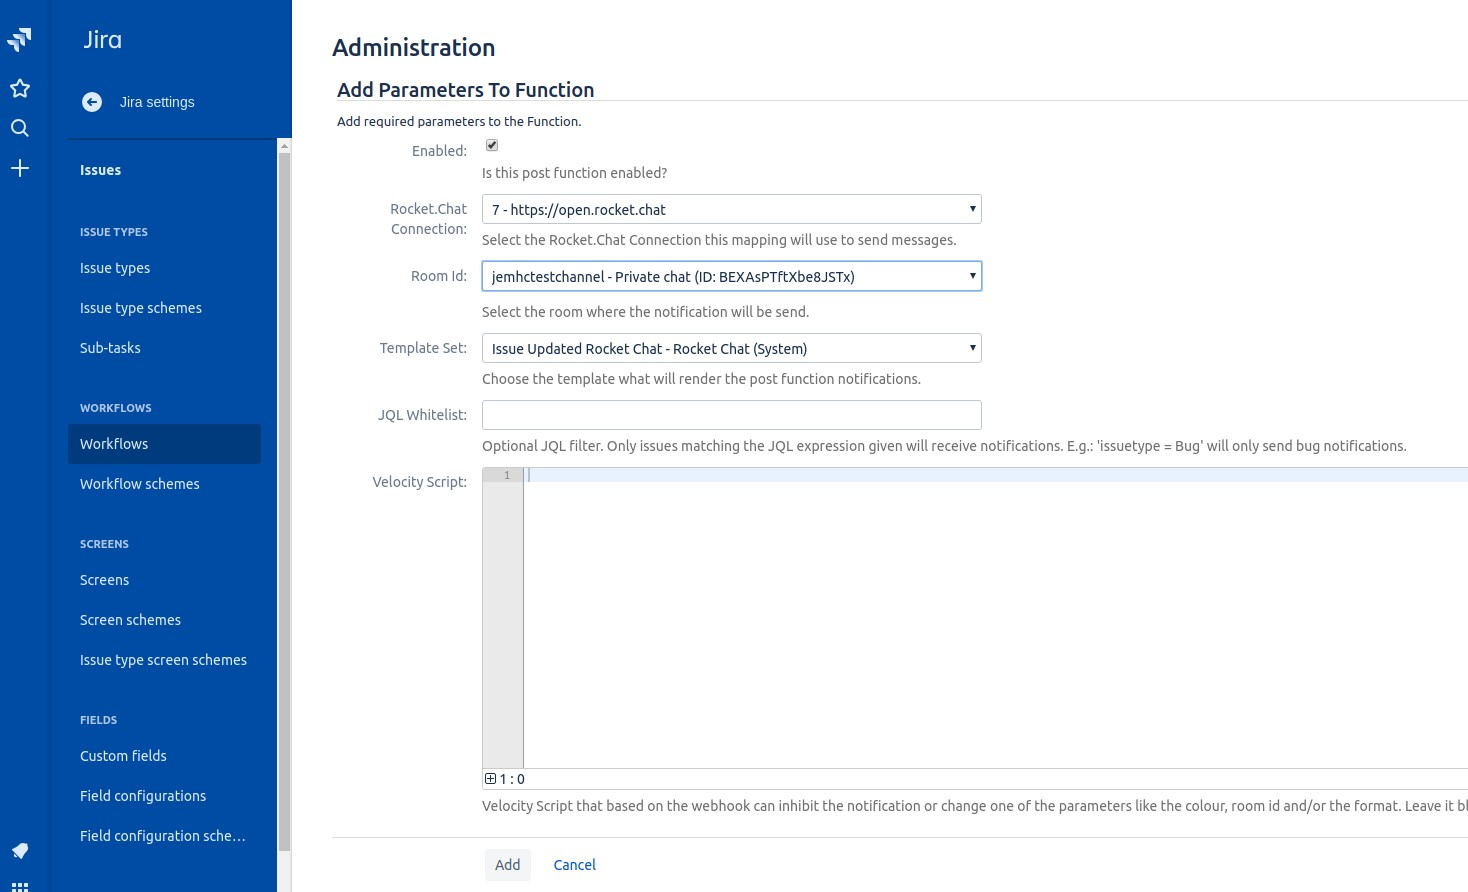
Adding the RocketChat Notification Post Function to workflow transition:
- Go to right corner Cog → JIRA Administration → Issue → Workflows. Edit the workflow of the project you want to add the Post Function
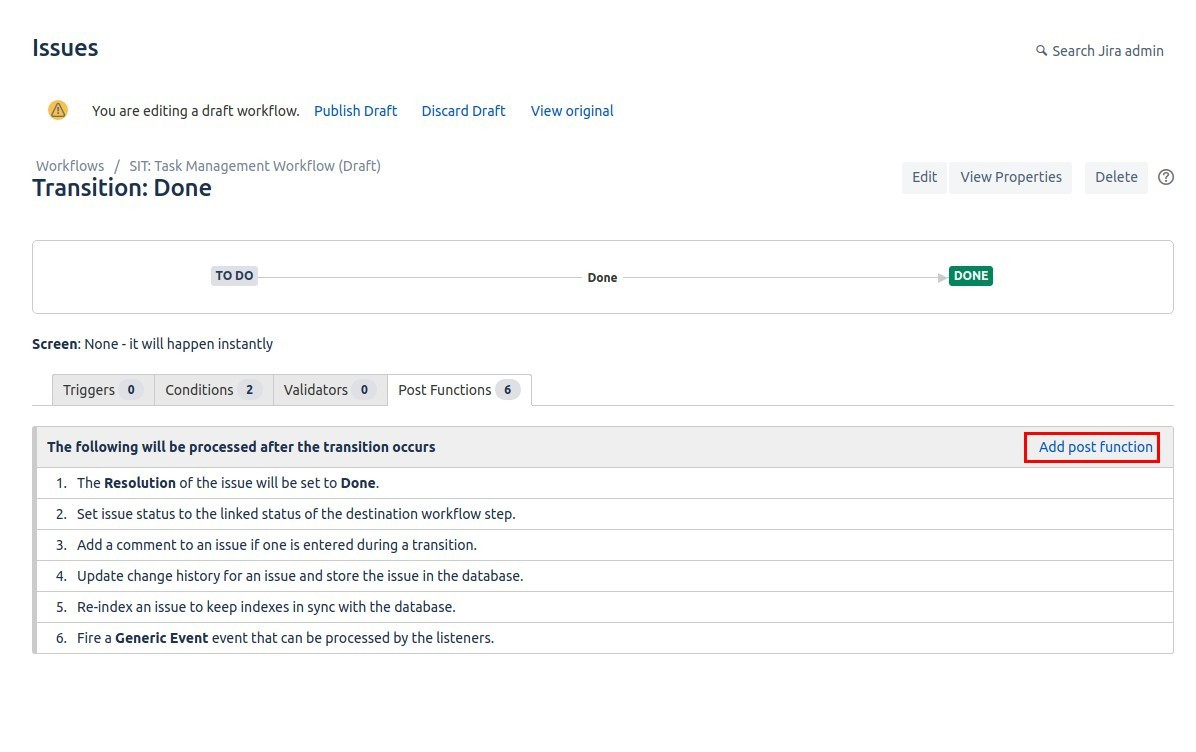
- Click on the transition you want to change and select the Post Functions tab. Click on Add post function
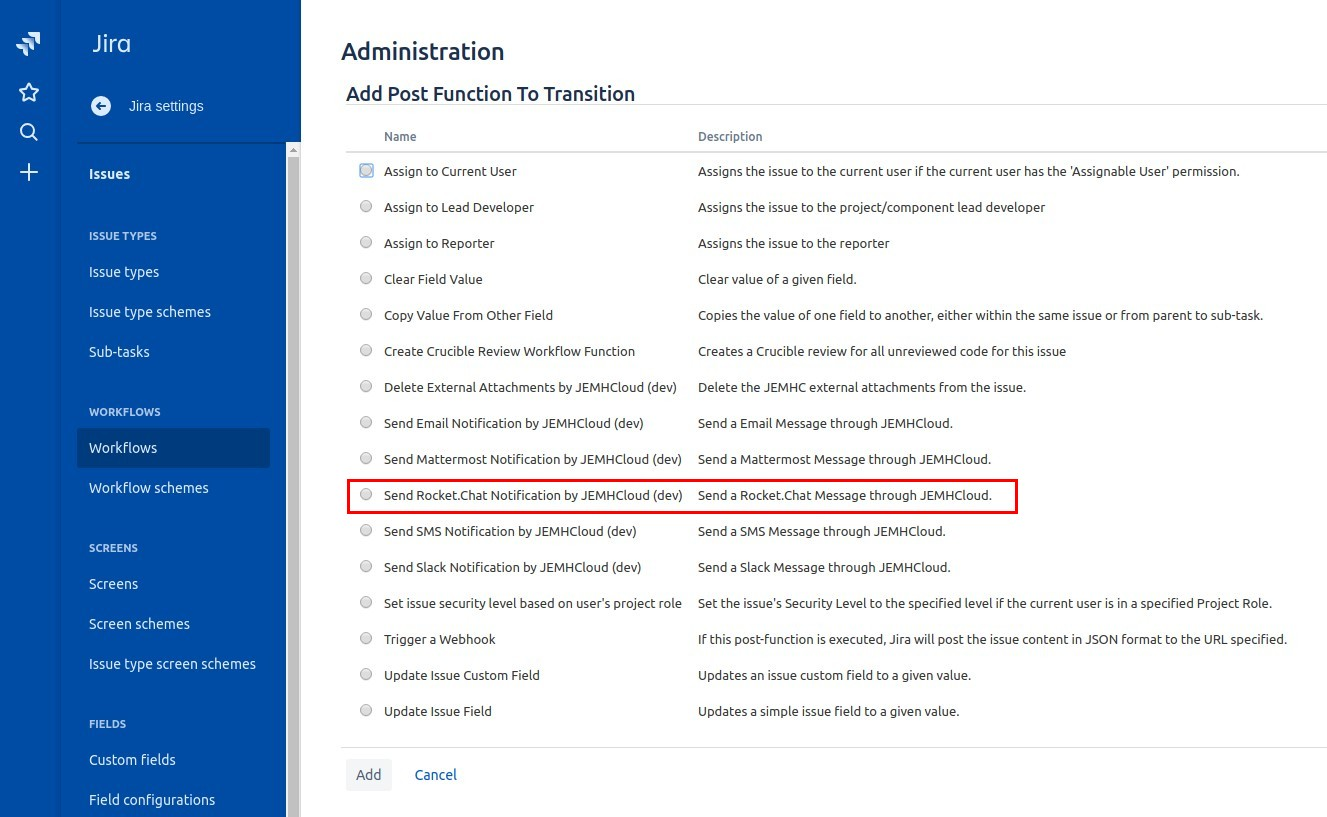
- Select Send RocketChat Notification by JEMHCloud and click Add
- Set the RocketChat Connection and Velocity script if necessary. Press Add/Update
- Once the Post Function is in the right position, publish the workflow draft.
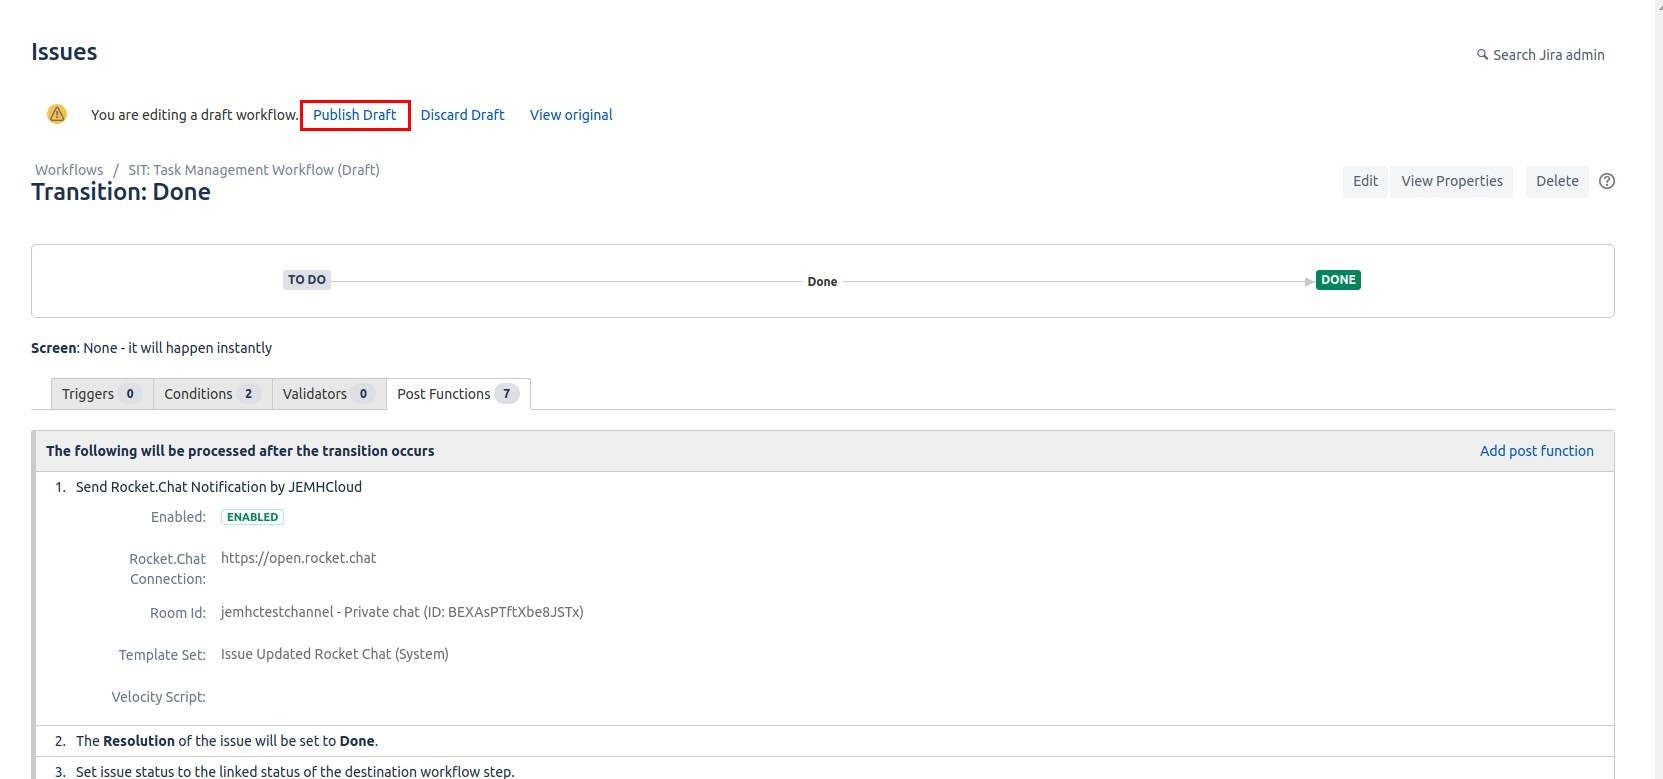
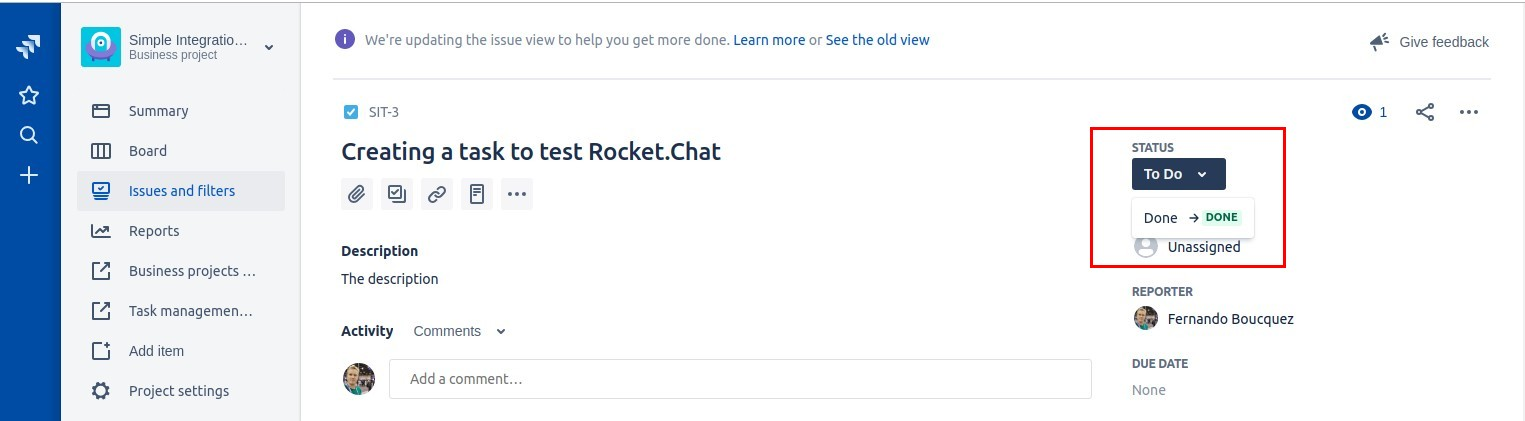
- To test the post function, go to an issue of the given workflow and perform the transition that will fire the post function.
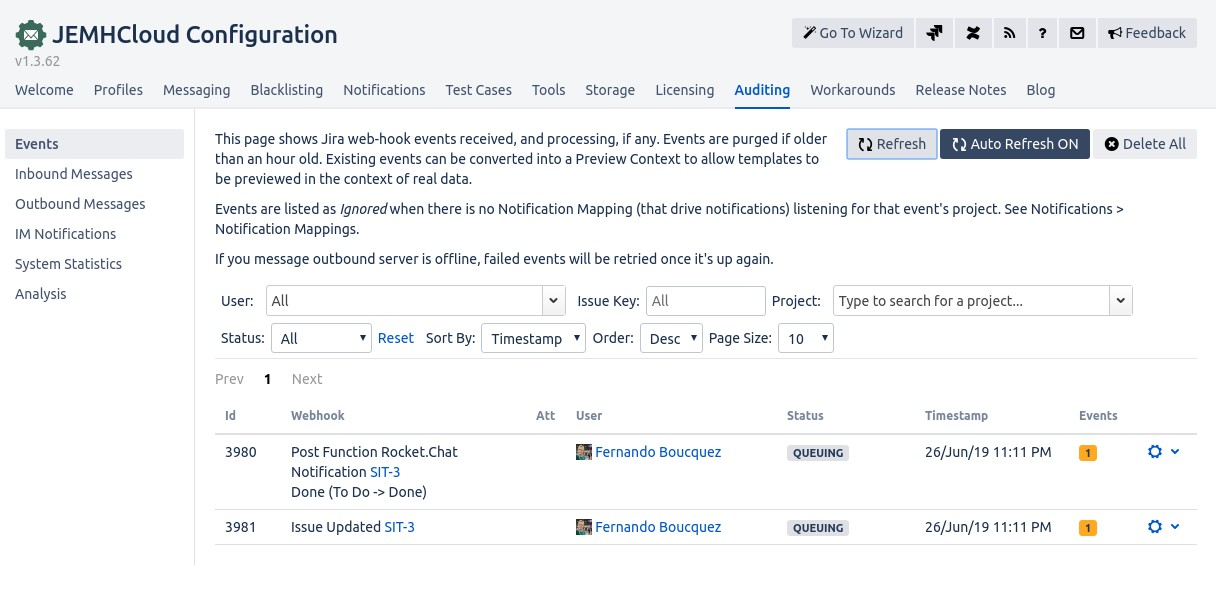
- Post function event should appear in JEMH Cloud → Notifications → Events.
- The event report should show the used incoming webhook URL (part of the URL is hashed for security reasons)
- The message in RocketChat:

- In Auditing → Outbound Messages, the table should show the RocketChat messages sent and the cog icon should show their contents.
Filter Scripts
Both RocketChat Notification Mapping and RocketChat Post Function behavior can be changed at runtime with a Velocity Script. The script can use the event data or be time-based to change how notifications are performed.
Change Channel
| Code Block | ||
|---|---|---|
| ||
#if ($context.issue.fields.priority.name.textValue() != 'Critical')
$RocketChatNotificationUtils.setRoom('anotherRocketChatRoom') ## JEMHC to send the message to a Rocke.Chat room. It can be the room id or the room name. |
Restrict notifications to specific time ranges
| Code Block | ||
|---|---|---|
| ||
#if (!$dateTimeUtils.betweenHours("18:00", "06:00"))
   $rocketChatNotificationUtils.inhibitNotification() ## RocketChat messages are not sent during business hours **
#end |
Restrict by priority
| No Format |
|---|
#if ($context.issue.fields.priority.name.textValue() != 'Blocker')
   $rocketChatNotificationUtils.inhibitNotification()
#end |
| Warning |
|---|
Velocity Script cannot be validated at configuration time (for example the dynamic room). You should test the script by re-executing events in Auditing → Events |
Related articles
| Filter by label (Content by label) | ||||||||||||||||||
|---|---|---|---|---|---|---|---|---|---|---|---|---|---|---|---|---|---|---|
|
...