...
Next, we will configure our JEMH profile. We are going to add a project mapping to the profile, then add a rule to the mapping.
Go to JEMH>Profiles JEMH > Profiles and configure your chosen profile
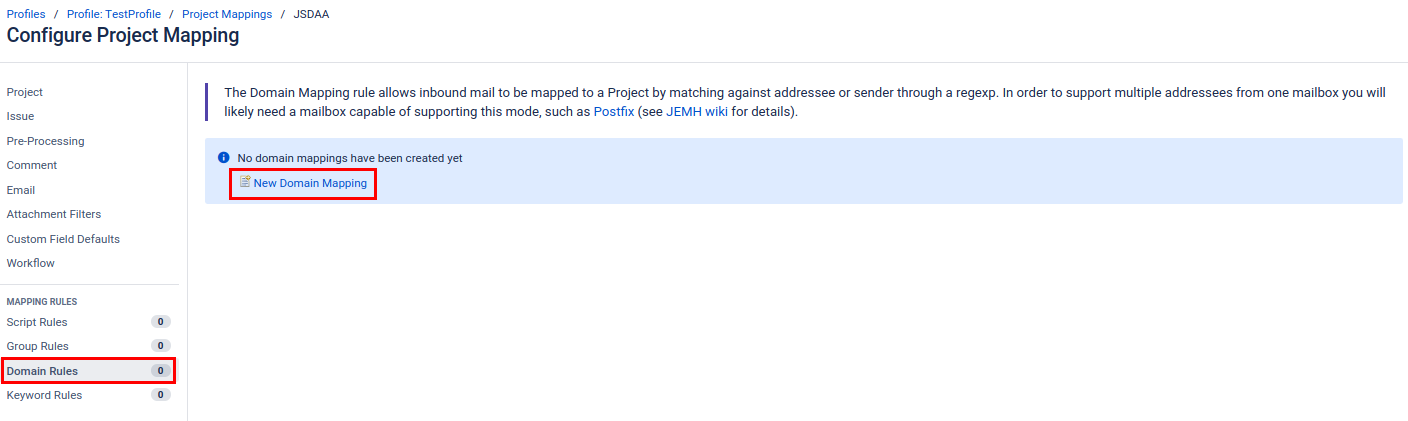
Go to the Project Mappings section and click EditClick New Project Mapping
Select the Project that you want in Mapped Project field and Save it.
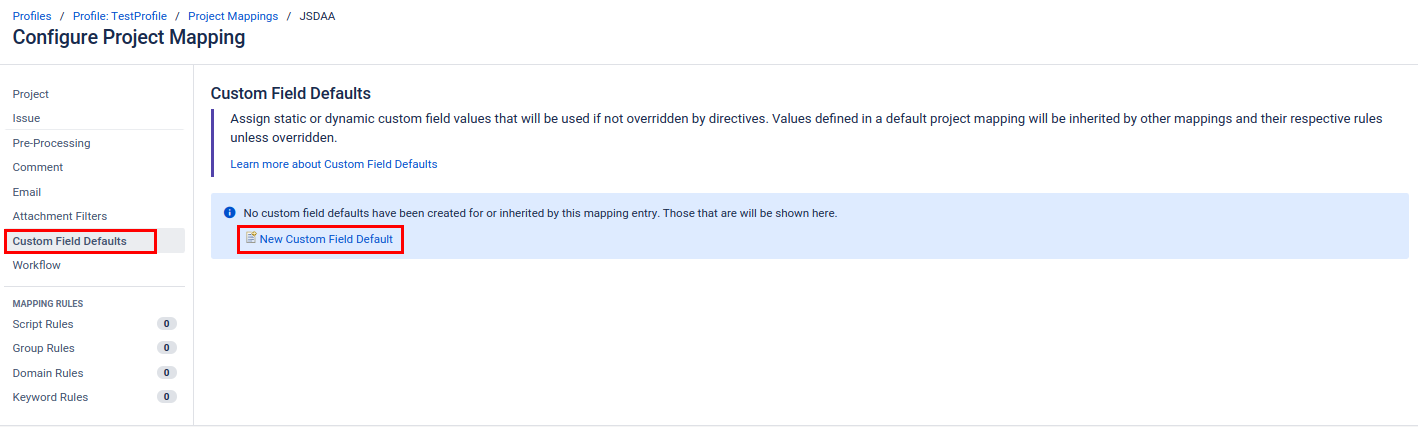
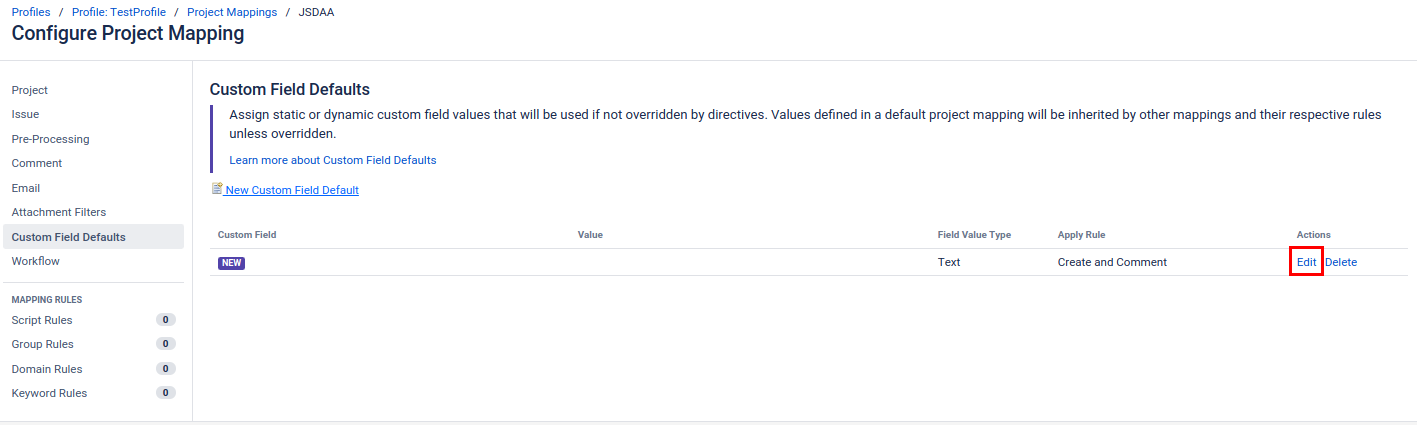
Go to Custom Field Defaults and click New Custom Field Defaults then edit it.
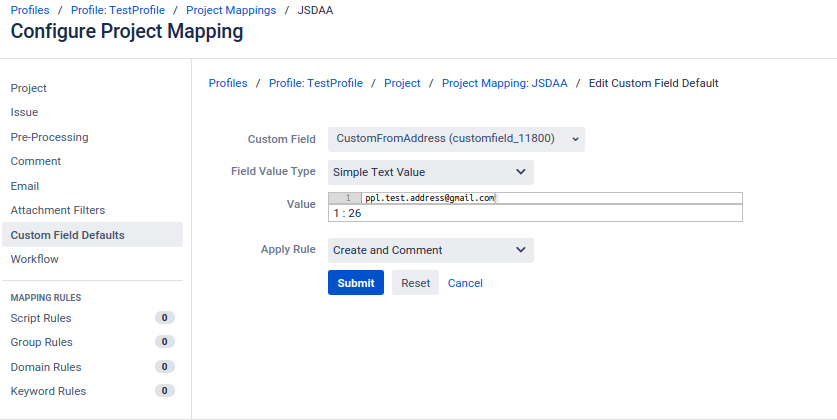
We are now going to set a value for our custom address, so that when this project mapping is used the custom field will be given this value:.
...
| Info |
|---|
The custom field we are using can be set at either project mapping level, or project mapping rule level. Setting the custom field at project mapping level means that when an incoming issue is associated with the project, it has that custom field value regardless of the rule used to associate. Setting the custom field at project mapping rule level means that the custom field value can be set differently depending on what mapping rule is used to make the project association. |
Click Submit to save the changes, then click edit again on the mappingScroll to the bottom choose any of mapping rules from the MAPPING RULES section and click New Domain Mapping, New Group Mapping or New Keyword Mapping.
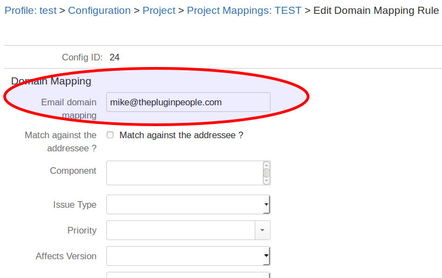
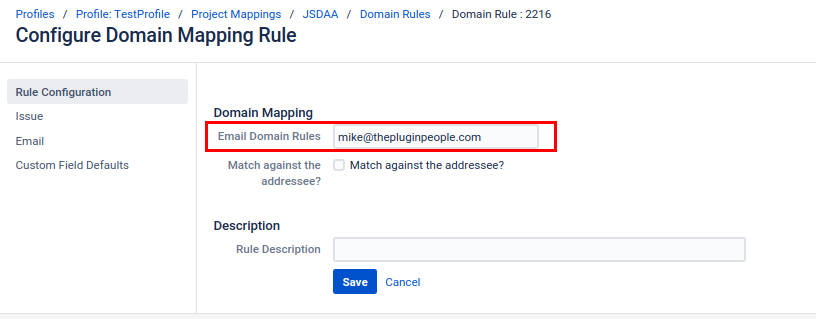
In this example, we will create a simple domain mapping rule that maps issues to our project when they are from a particular address:
Click Submit Save to save the changes
Event Listener/Notifications setup
| Note |
|---|
This guide assumes that you already have the event listener/Notifications enabled and basic settings configured to your needs. See How Do I Use Event Listener for Issue Events (now the 'Notifications' section) for more information on the configuration of the Event Listener. |
We will now set up our project's Event Listener mapping in order for it to use the custom field. We will be setting up the custom From address for the non-Jira user notifications. The same steps can also be applied for Jira user notifications.
Go to JEMH>Event Listener JEMH > Notification (Event Listener in the old JEMH versions)
Click Edit on your project event listener mapping
You will see a From: and Reply To: section. We are focussing focusing on the From address, however both can be set up in the same way by following this guide
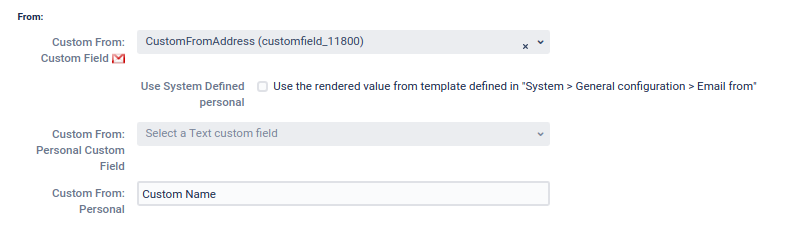
For the setting Custom From: Custom Field, select the custom field that we gave a value in the profile project mapping
The Personal (name) used by the outgoing mail can also be set with either a custom field or a static text entry
Here is what our set up looks like:
Click Submit to save all changes
...
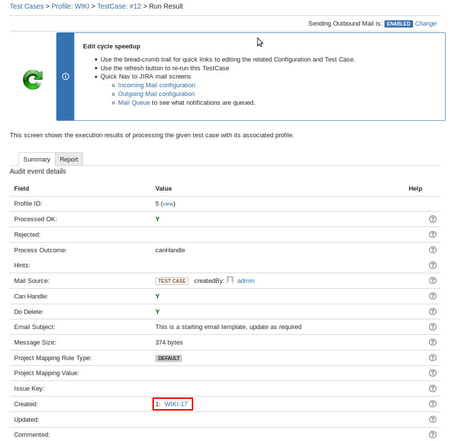
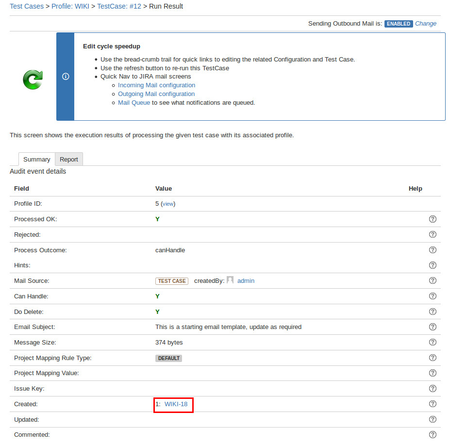
Expected result of both the Jira and non-Jira user test cases:
...
...
The issue created with the Jira user has the reporter ‘jemh’ (a Jira account) and the issue created by the non-Jira user was created by the Default User 'testadmin':
...
Determining the From address
...