...
...
...
...
| Table of Contents | ||
|---|---|---|
|
Welcome!
Hi! This guide will take you through all the configuration necessary to setup JEMH for Jira Cloud (JEMHC). This will take 20 - 35 minutes depending on what you need.
...
In order to successfully complete this guide, you will need the following:
An active Jira Cloud instance that you have administration rights for
For inbound email processing:
A valid Jira project
An external mail source, for example a POP or IMAP server visible by JEMHC - Setup JEMHC Inbound mail
For outbound email notification:
An SMTP mail server - note that using the standard Atlassian mail server associated with your Jira Cloud instance is not supported
Installing the app
First we will show how to install JEMHC on your Jira Cloud instance. Open the Apps drop-down menu from the top Jira navigation bar. Click Find new apps.
...
Jira will then show you an app search screen. Search for the term JEMH using the search field provided. In the search results you should see Enterprise Mail Handler for Jira (JEMH). Clicking the search result item will show you a Marketplace listing for the app.
...
Click the Try it free button to begin an evaluation of the app. Atlassian will then ask for confirmation.
...
After confirming, JEMH will then be installed.

...
Once installation is completed, click the Get started link. This will bring you to the JEMH Cloud startup wizard, which will assist you with creating a basic configuration.
...
Later, this wizard can be revisited via a link on the Welcome page. For the purposes of this guide, we will choose to configure both inbound and outbound aspects of JEMHC. You can choose what is best for your needs.
...
Now we will configure JEMHC to process emails retrieved from an incoming mail server. Firstly, we will select our first project that emails should create issues in. Do not worry, later on you can add additional projects to the configuration - this is just for initial set up. You will also be asked for an issue type.
...
Next, we will set up our inbound mail server connection. Selecting Create new message source will allow you to specify your mail server connection details. Alternatively, if you are connecting to a Google or Microsoft email account via OAuth, you can use the respective sign in buttons. See Integrate with Gmail using OAuth and Integrate to Office365/EWS using OAuth for more information.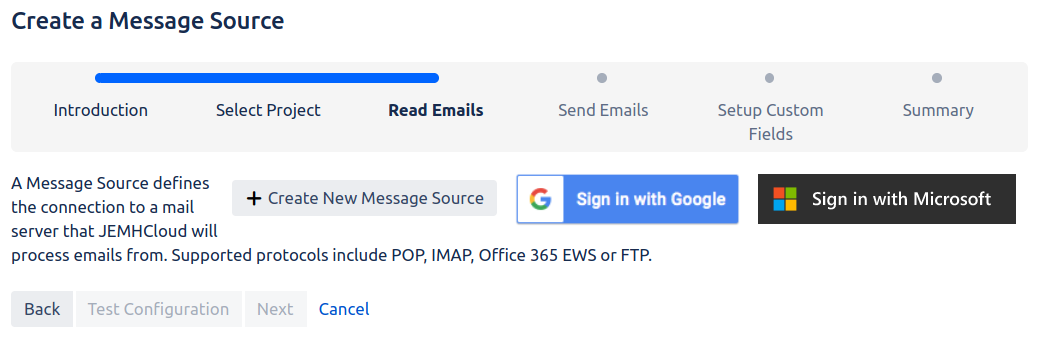
...
For the purposes of this guide, we will select Create new message source and connect to an example POP3 mail server. JEMHC provides some standard presets. You can choose Custom to pick your own specific hosts and ports, but its on you to ensure it is correct!
...
| Expand | ||||||||||||||||||||||||||
|---|---|---|---|---|---|---|---|---|---|---|---|---|---|---|---|---|---|---|---|---|---|---|---|---|---|---|
| ||||||||||||||||||||||||||
|
Once the server details have been entered, click the Test configuration button to validate the connection. If the connection is valid, you will receive feedback similar to the below:
...
If you are using Google Mail you may see the following message. If this happens, follow the link in the message and do as described.
...
Submit the connection settings once they have been successfully validated. Lastly, JEMH will ask you to enter the Inbound email address. Typically this would be the username used in the inbound mail server connection.
...
| Info | ||||
|---|---|---|---|---|
JEMHC is designed for maximum interoperability using the same mail protocols that Jira supports, namely POP/s and IMAP/s (as well as FTP). Native communication with Exchange using MAPI is not currently possible - Exchange does support POP/s and IMAP/s, so those services need to be enabled and surfaced through firewalls for JEMHC to access (see https://technet.microsoft.com/en-us/library/jj657728(v=exchg.150).aspx ) Gmail: POP/IMAP setup - https://support.google.com/mail/troubleshooter/1668960?hl=en Gmail: Use email clients with IMAP or POP - https://support.google.com/mail/topic/3398031?hl=en&ref_topic=3396281
If you have setup rules that auto label incoming messages, those messages are accessed via their path:
Exchange POP/IMAP setup - https://technet.microsoft.com/en-us/library/jj657728(v=exchg.150).aspx |
Setup outbound mail sending
| Info |
|---|
Exchange smtp server overview: https://technet.microsoft.com/en-us/magazine/2005.11.howitworkssmtp.aspx Exchange server errors: https://technet.microsoft.com/en-us/library/hh994900(v=exchg.141).aspx |
Now we will configure JEMHC to be able to send email notifications out to Jira users and also users without a Jira user account (we call them non-Jira users). The first thing to do is configure the outbound mail server connection.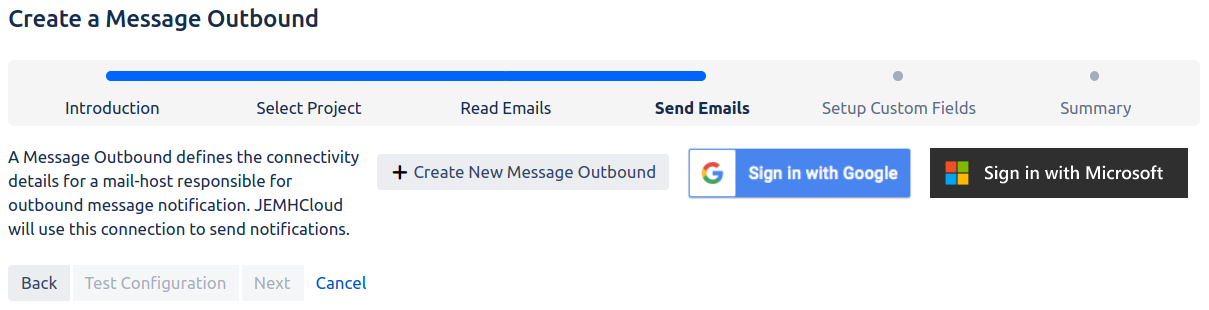
...
Similarly to inbound mail server configuration, we have the choice of manually defining a connection, or using single-sign-on with Google or Microsoft if desired.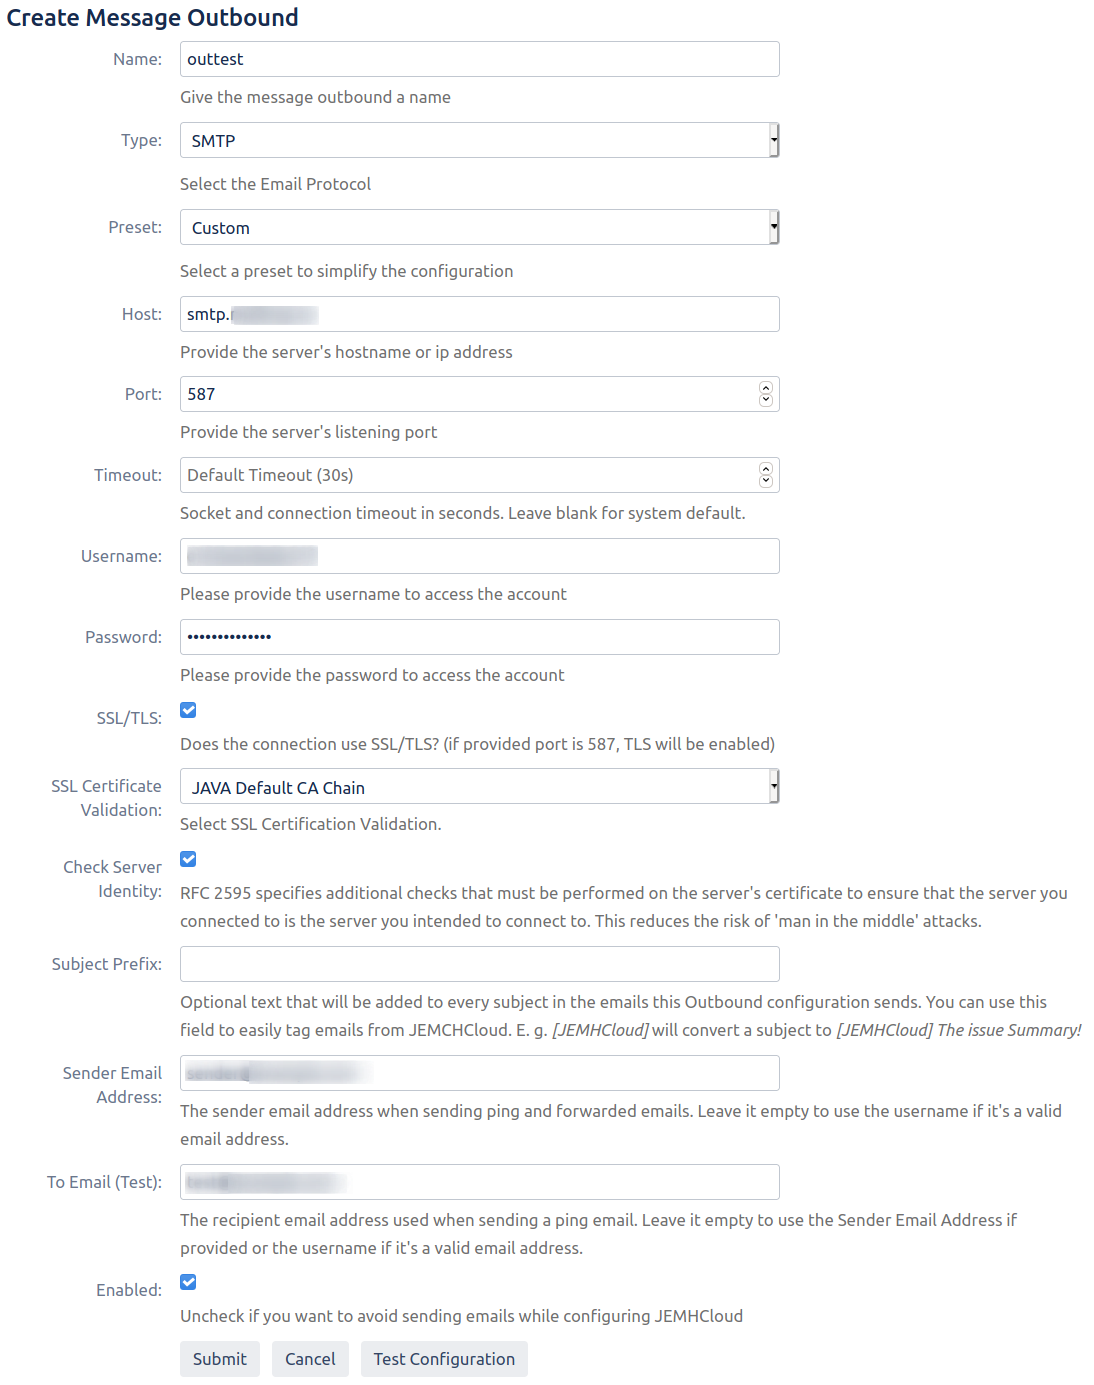
...
Use the Test configuration button and submit the configuration once it is validated.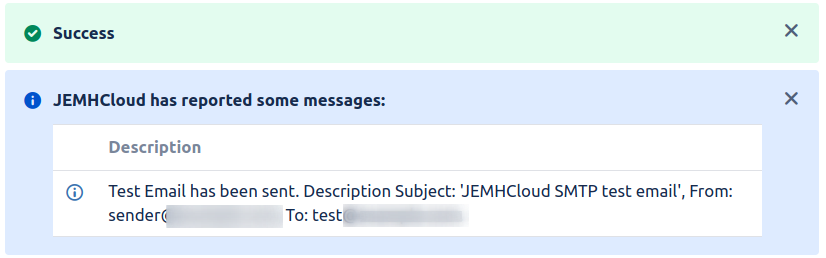
...
Click next to move on to the next wizard section.
Setup Custom Fields
JEMHC needs to store email addresses in custom fields, so that these non-Jira users can be notified later. On this screen, we can select what custom field is used to store a non-Jira email sender's name and address. We can also choose what custom field is used to store non-Jira user email recipients.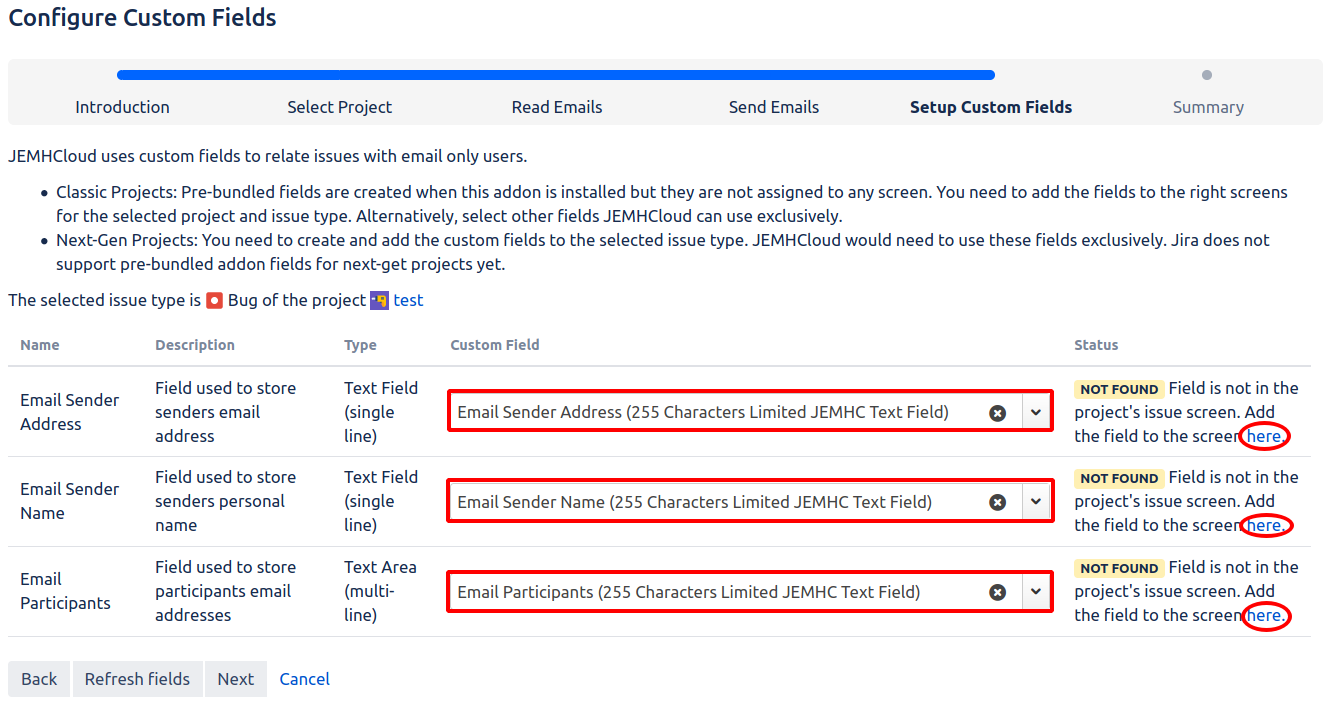
...
If JEMHC warns that a field is not present on the projects issue screen (as above), click the link in the message. You will then be able to associate the field with the appropriate screen related to your project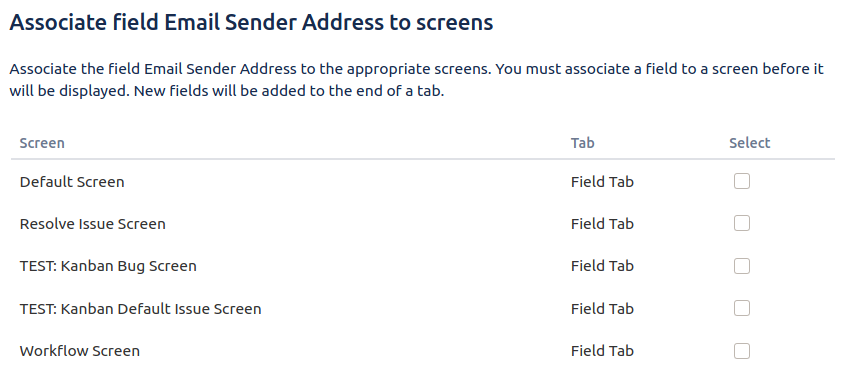
...
Repeat this process until all 3 custom fields of your choice are showing the status "found" in the wizard.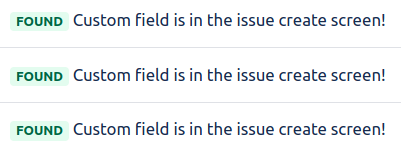
...
Click next once this is done. Finally, JEMHC will present you with a brief summary of the changes that will occur. Clicking submit here will complete the wizard.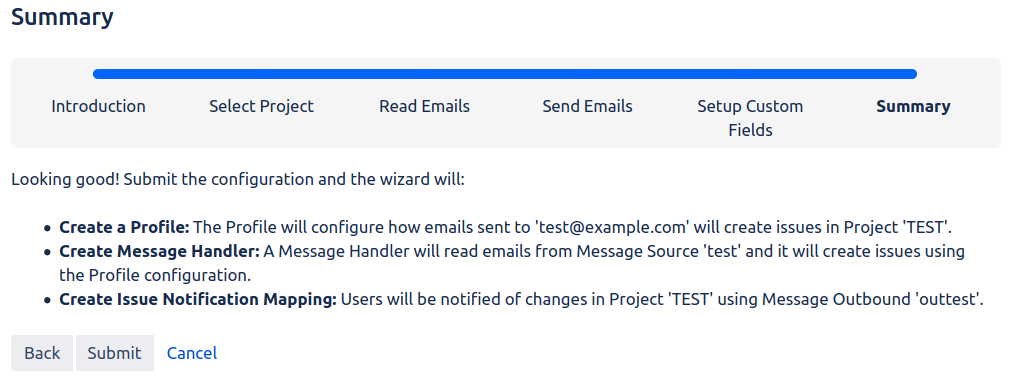
...
On the final screen, you are given some suggestions of what to do next. If you would like to be taken to the JEMH welcome screen at this point, click Go to configuration.
...
Outbound mail configurations are found under Messaging > Message Outbound: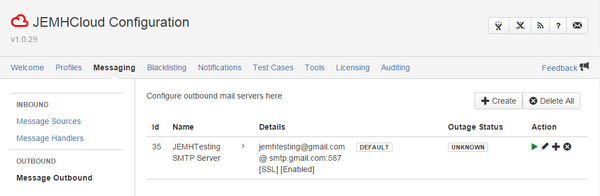
...
Until the mail server setting has been used, its status will be 'unknown'. To validate this, use the POLL action to send a test mail as before:
...
Outcome is that the SMTP server status is now Online (this would have happened anyway on first actual usage):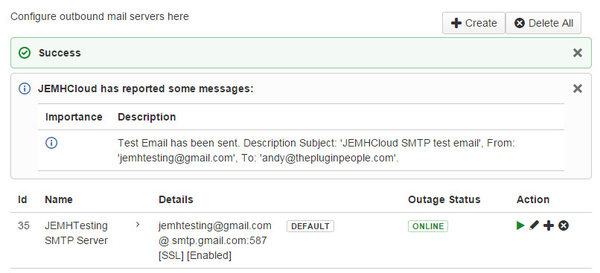
...
Issue Event Notifications
The configuration for controlling what Jira Projects will drive notifications is accessed through Notifications > Notification Mappings > Issue: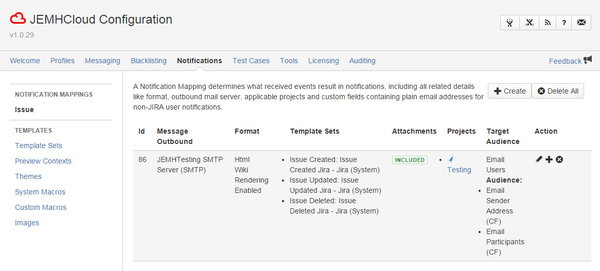
...
Testing outbound notifications
Recent outbound notifications can be reviewed through: Auditing > Outbound Messages, you can see the two ping messages already sent.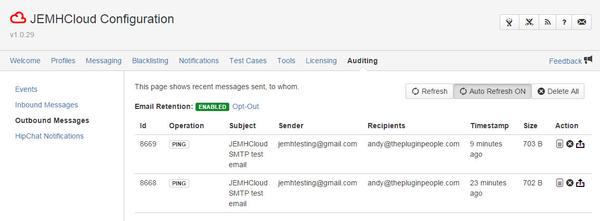
...
The Auditing > Events view shows the webhook events sent by Jira, and indicates whether they were handled or not. Commenting on the 'test' issue created earlier will be shown quite soon in the Events view: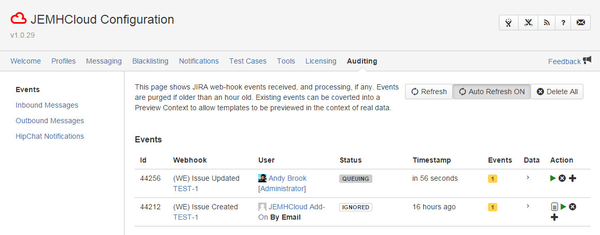
...
Soon after that (about a minute) the notification will be sent, shown in the updated Outbound Messages view: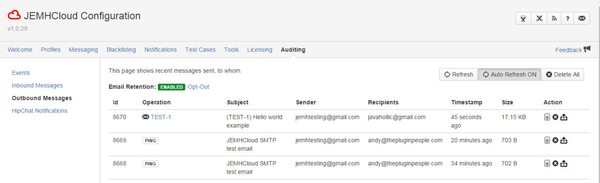
...
By default JEMHC will track all recent inbound and outbound notifications, retaining content of email in full in encrypted form within the database. At your option, you can opt-out of this retention, but diagnosing any formatting or processing issues will be much harder!
Finishing Touches
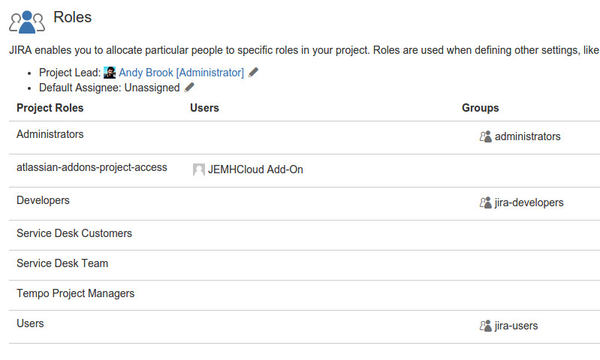
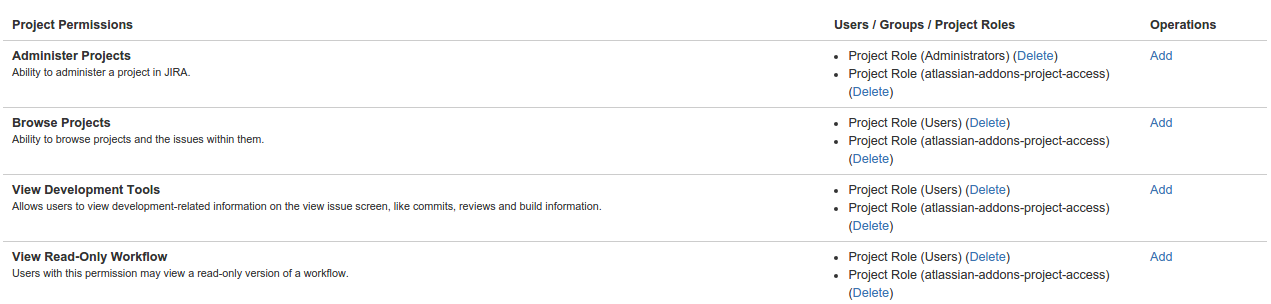
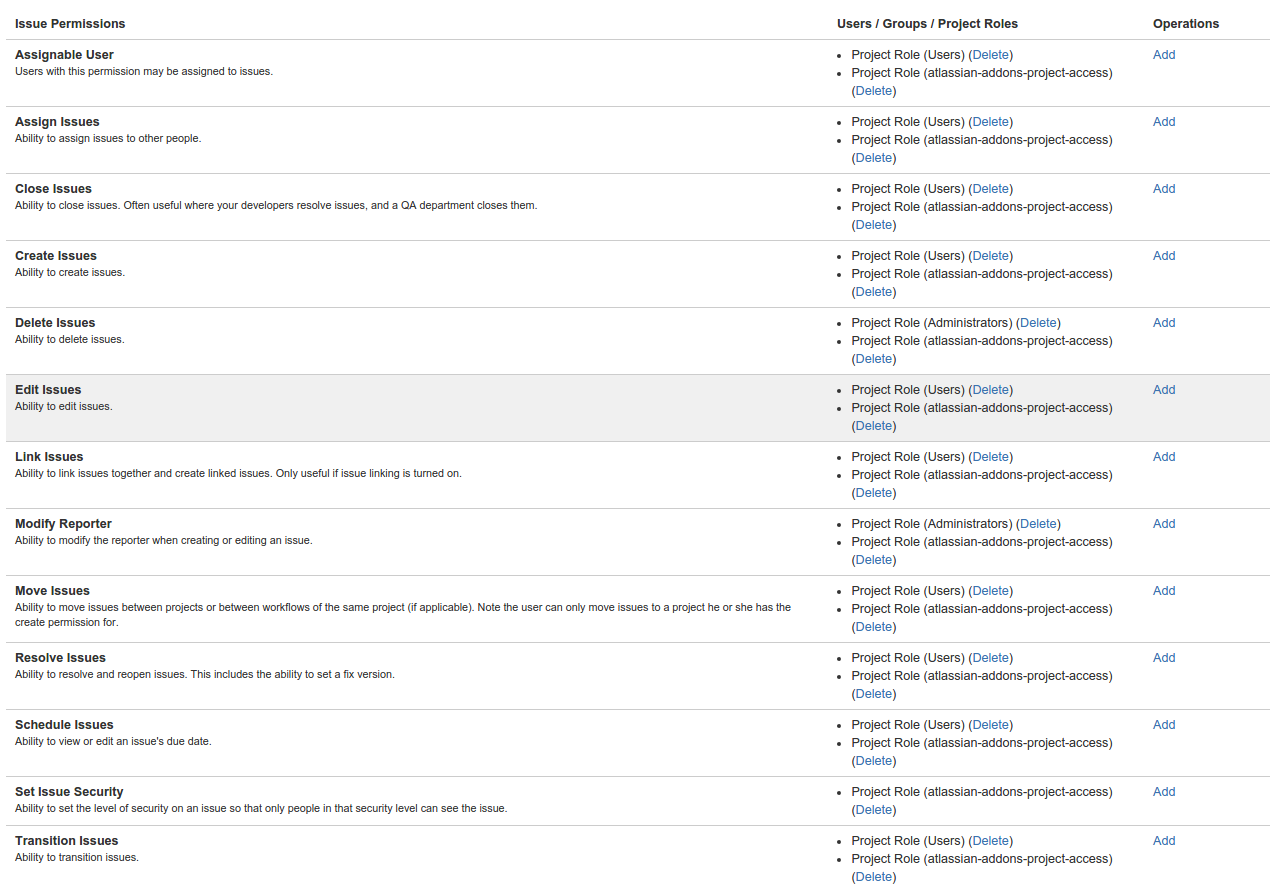
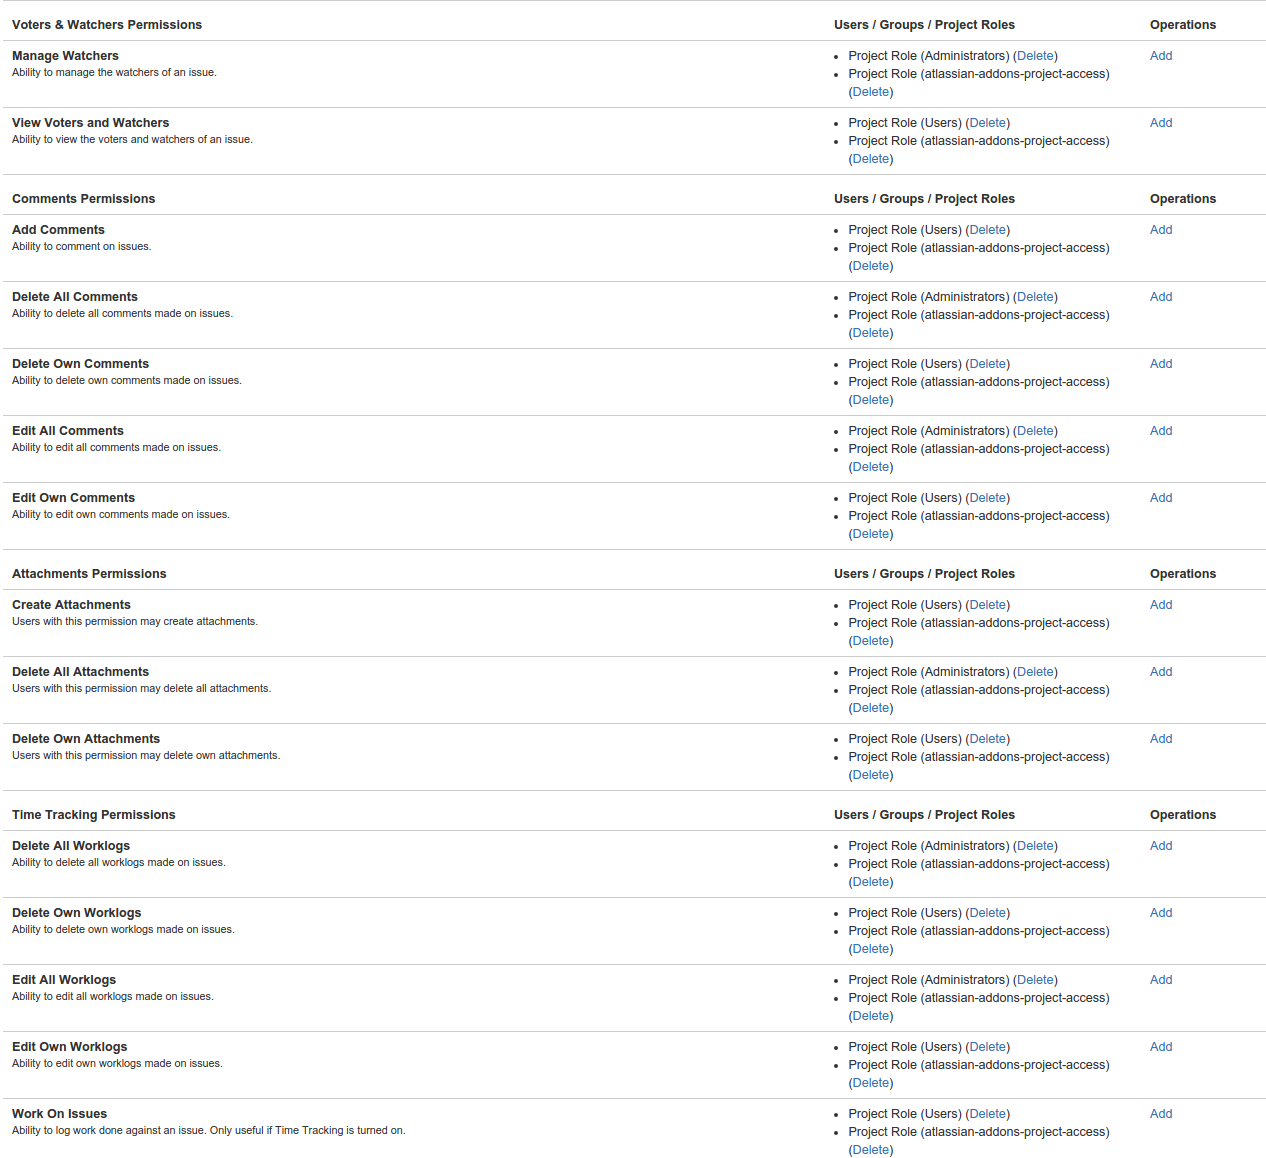
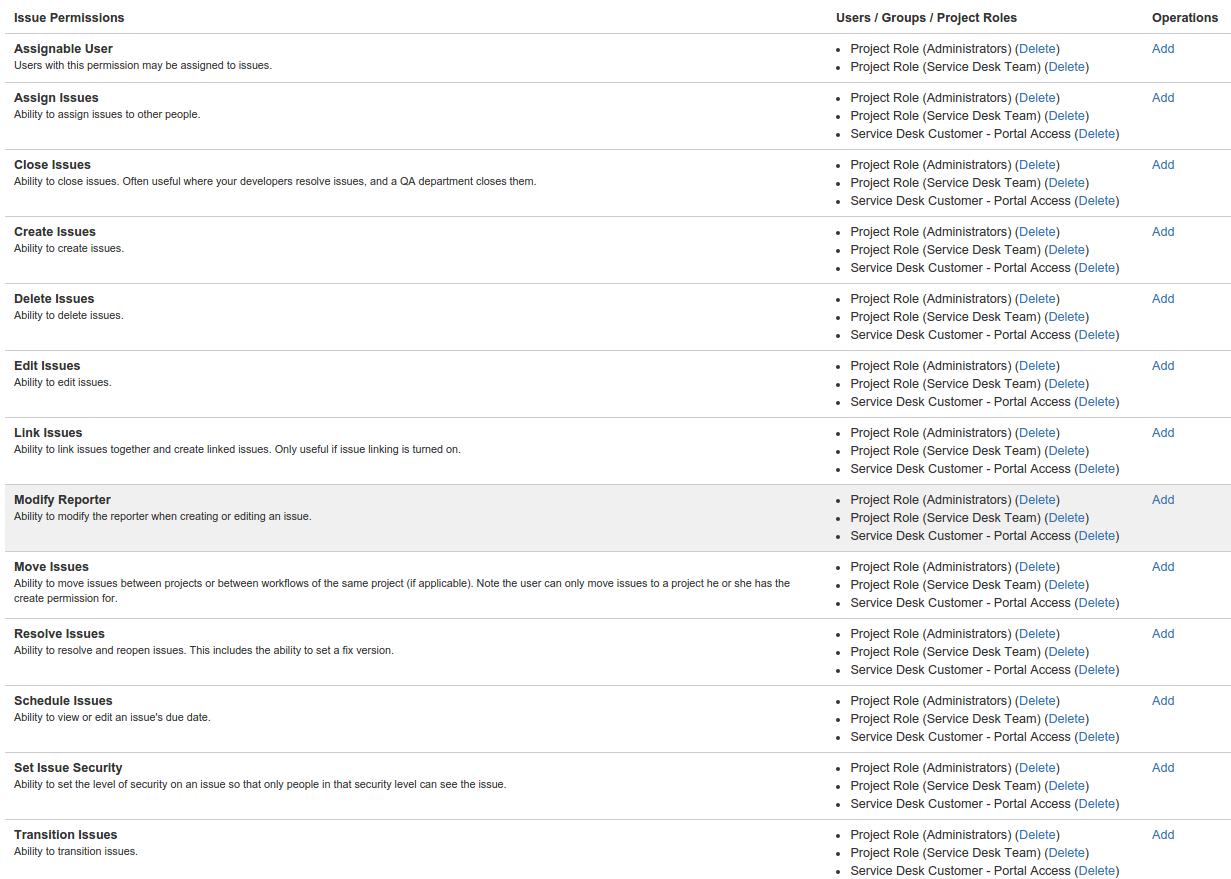
Default Project Roles
It may be useful to contrast default project permissions with your own project, in order to identify problems:
...
...
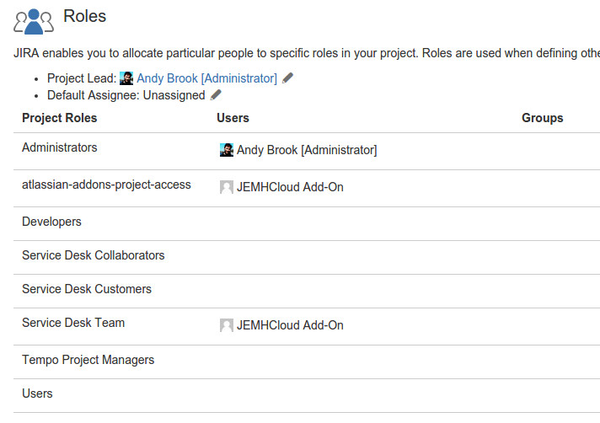
![]() Remember to make the JEMHCoud Add-On user a JSD Agent as well (see Common Problems#Fresh-Installconfigurationchecklist)
Remember to make the JEMHCoud Add-On user a JSD Agent as well (see Common Problems#Fresh-Installconfigurationchecklist)
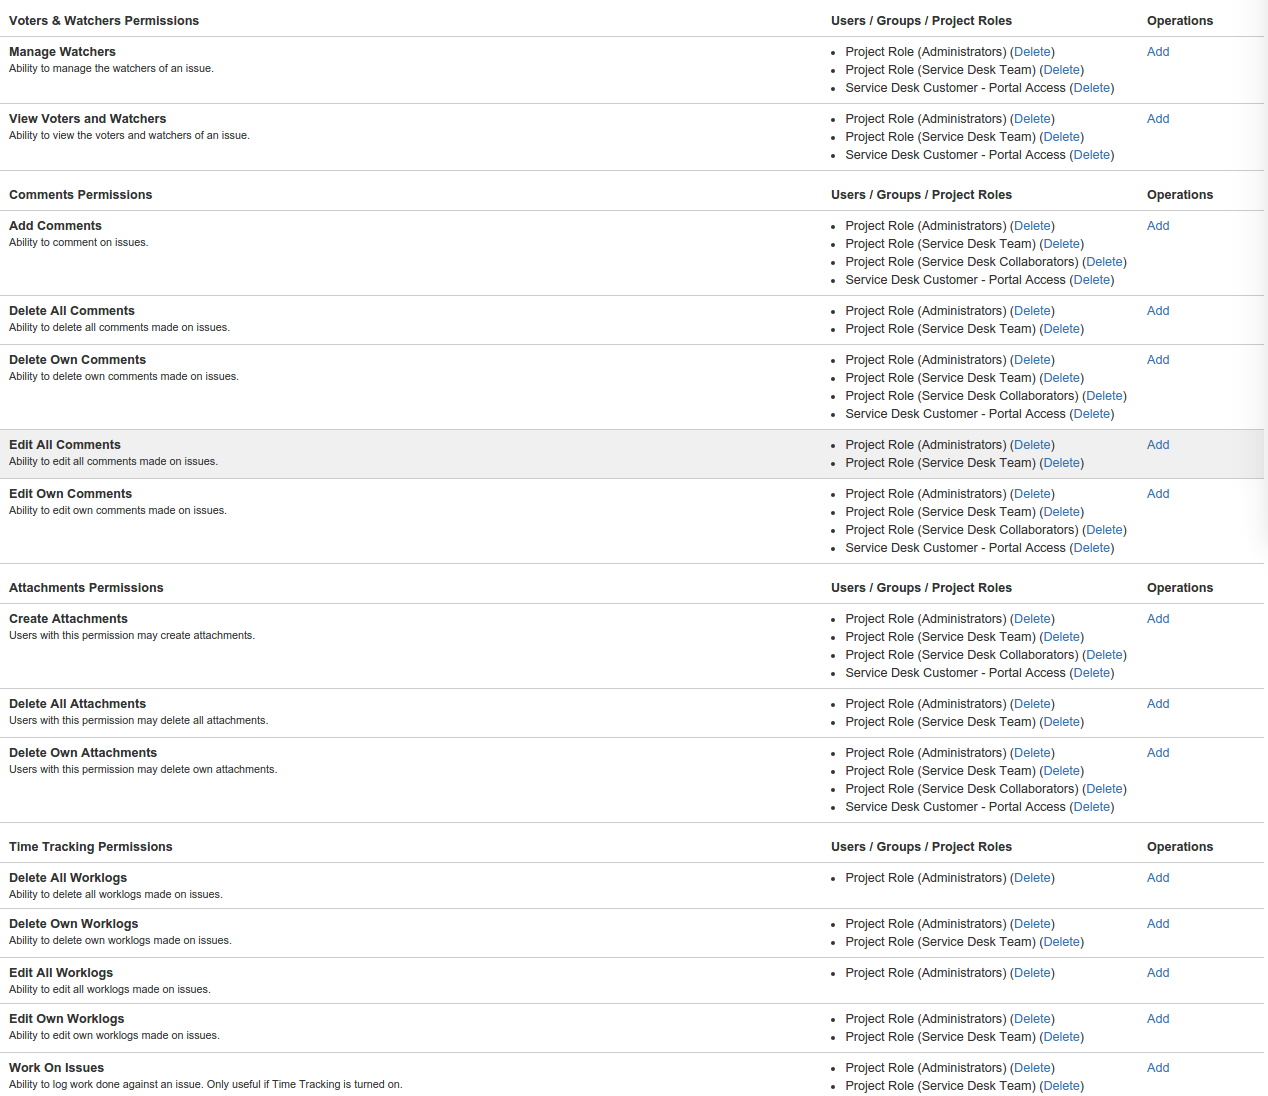
Default Permission Schemes
Standard Project
Jira Service Desk Project Permissions
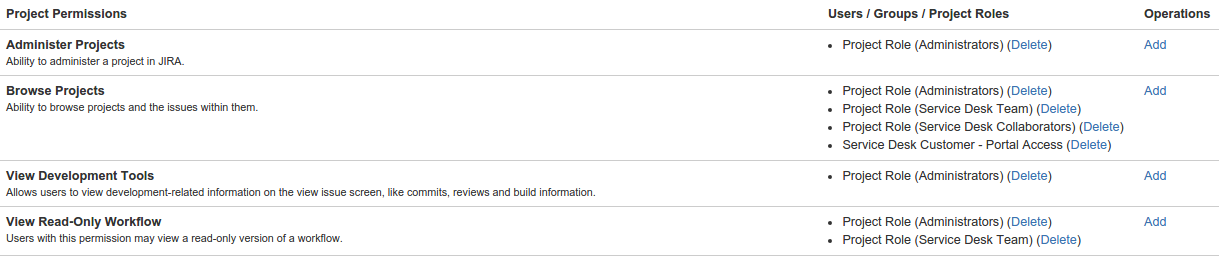
...
About the Workaround User
The Workaround User is required in order to lookup users, and to do some configuration time validation of some settings, such as validating a user is assignable in a project.
The credentials supplied in JEMHC > Workarounds > User Lookup must have the Jira Global Permission BROWSE_USER, inherited through a group membership.
The related user must also be in the Administrator role in the project, typically, this would mean a user in the administrators group.
The related user must also have Application Access in order to look up issues in the Lookup User Tester.
When everything is valid, setting a Username and a test Project, will result in confirmation: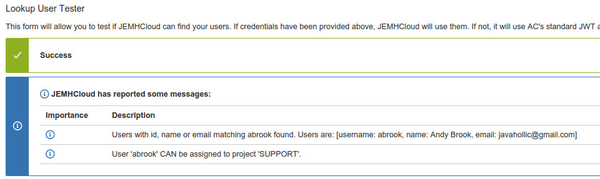
...
About Atlassian ID
Users created within Jira Cloud must now be validated as real users, this means that a valid email address will need to be provided during user creation. To create a user for the workaround user for example, follow the steps below:
Within Jira User Management press "Create User"
On the screen that follows, enter a valid email address, username and full name. To avoid creating an email account for the setup of the workaround user, you can set the email address as an aliased address of your own email account. With an example email account of yourusername@gmail.com you could use yourusername+workaround@gmail.com where "workaround" is the username of the created workaround user. Using the +workaround address will create a unique address for the workaround user that will actually be an alias of your own email account. Emails sent to the +workaround user will arrive in your inbox.
Within the "Additional Options" sub-menu, make sure "Send invitation email" is ticked.
Press "Create User"
An email will now be sent to the email address defined in user creation, click the link in the email to activate the account and set a password for the user.
User account is now created and can be configured as the workaround user.