...
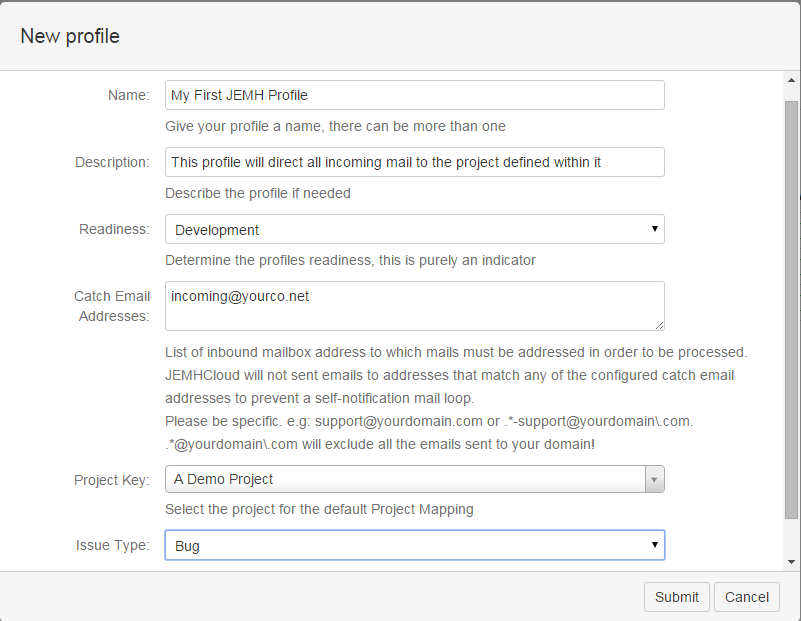
Create a Profile:

Defining the "Catch Email Address" of your inbound mailbox, the target Project, and the IssueType:
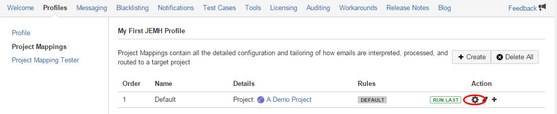
See the new Profile, configuration of which is through the cog icon, it can also be copied the + icon, as well as exported (useful for support!) and deleted.


A summary of key information in the Profile, indicating defaults, can be seen by expanding the Catch Email Address
Use the Cog Icon to access the Profile, from here it is possible to edit some profile top level settings (1), and to gain access to the Project Mappings (2).


Accessing the Project Mappings will show just the default Project Mapping, the lack of rules is shown by

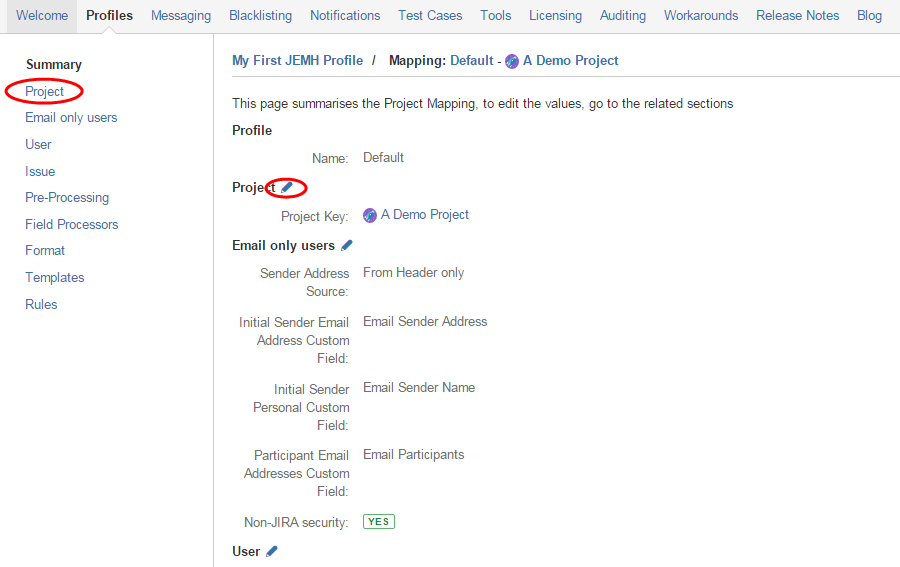
. Configure the Project Mapping via the cog icon:

The Profile view shows the vertical nav that will take you to specific sections of the Profile, in the main panel view are summaries of each section, with a Pen icon, which also takes you to the edit view of the section:
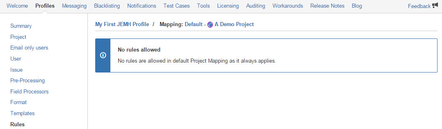
To reinforce the 'default' nature of this Project Mapping, access the Rules link from the vertical nav:
...
Once a basic Profile with default Project Mapping exists, adding a new Mapping for a new project that will route some mail to that mapped project, and all other mail to the default Project Mapping project. More information pertaining to Rules can be found here: Rules.
Types of Project Mapping Rule
...
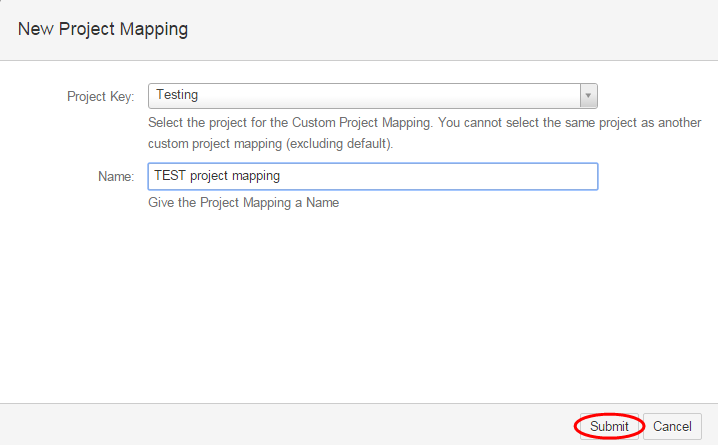
In the Profile Project Mappings view, hit Create:


Set the Project and give it a name, then hit Submit
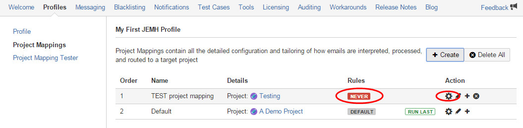
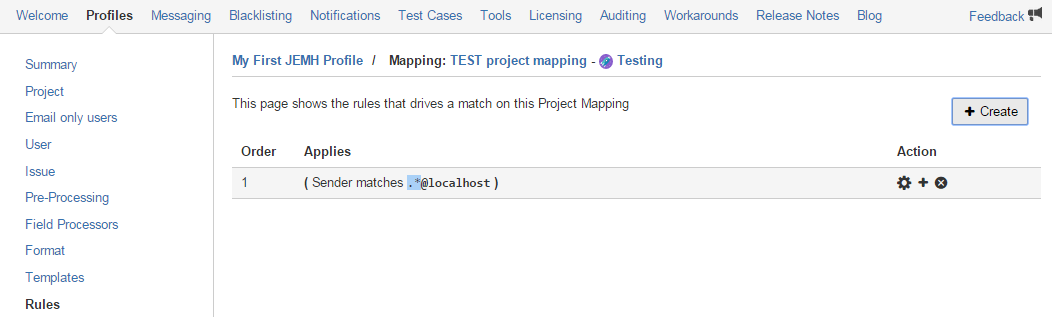
This Project Mapping doesn't yet have any Rules, so will never be used, indicated in the post-Submit view -

. Use the Cog icon to configure the Project Mapping:

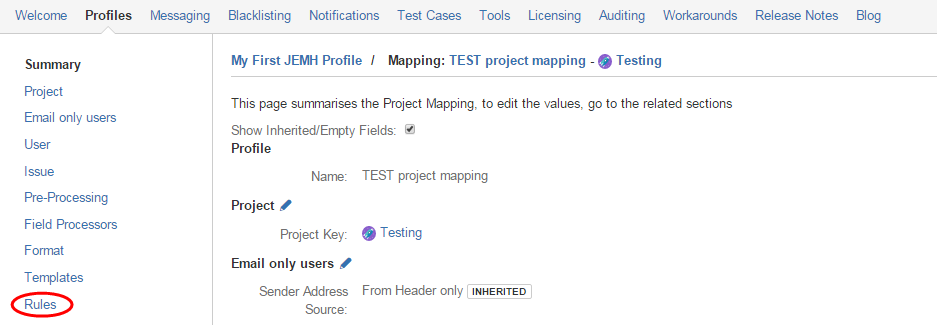
Here the TEST Project Mapping is now available for configuration, all fields marked

will without further change, automatically take on the value defined in the Default Project Mapping (by the way, this is to minimize the amount of configuration that needs to be done!). Access the Rules section now:
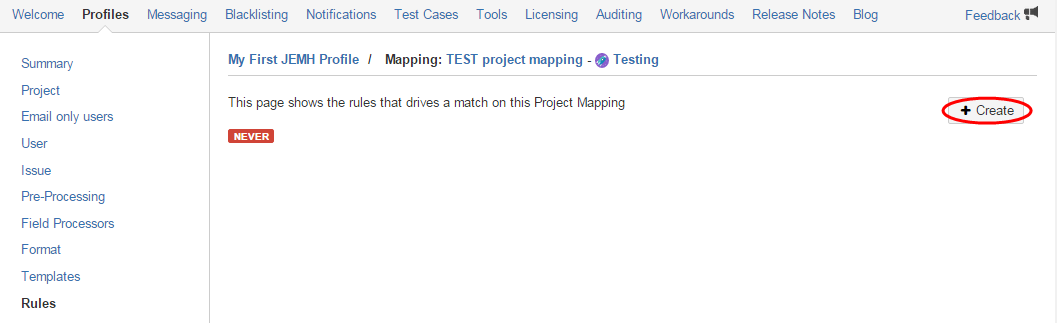
Initially, with no rules defined, again
will indicate the Project Mapping wont be used, so hit Create to define one:
Rules can be created that match using regular expressions on the From or To (recipient) addresses defined in the email, as well as keywords, in this example, we'll map any sender from the @localhost domain with the regular expression .*@localhost (in regular expressions, * means any number of the preceding character not all characters, to match any character . is used, hence
.*to match everything):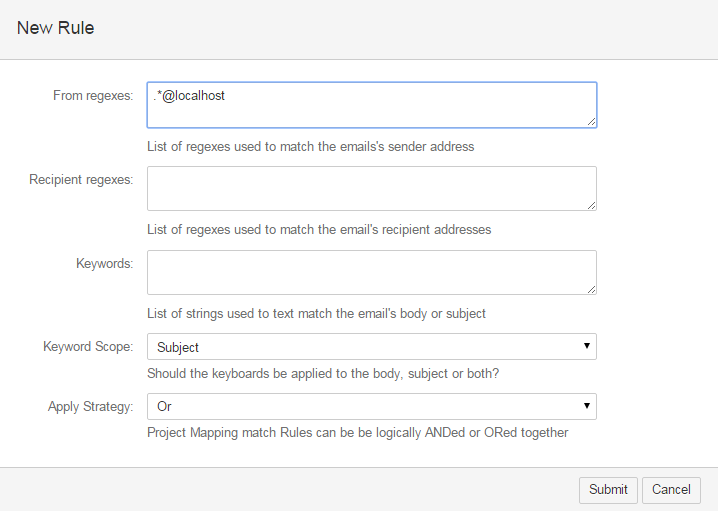
After submitting, the summary for the rule is shown:
...