...
Go to JEMHCloud > Messaging > Message Sources > Click Sign in with Google.

This will take you to the google confirmation screen


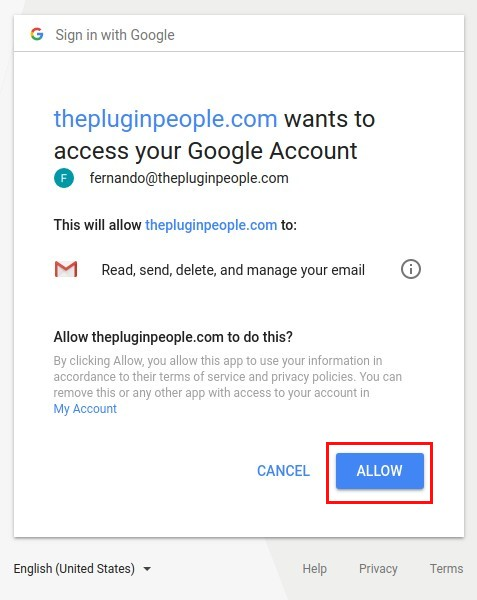
Select the Account you with to authenticate and JEMHC access to your support email account


Once accepted, close the tab and go back to JEMH Cloud.
You will then see a new message source which is connected to the gmail account.

...
Go to JEMH Cloud → Messaging → Message Outbounds → Click the Create button.
In the Create Message Source screen enter a Name and select the Type SMTP GMAIL OAuth
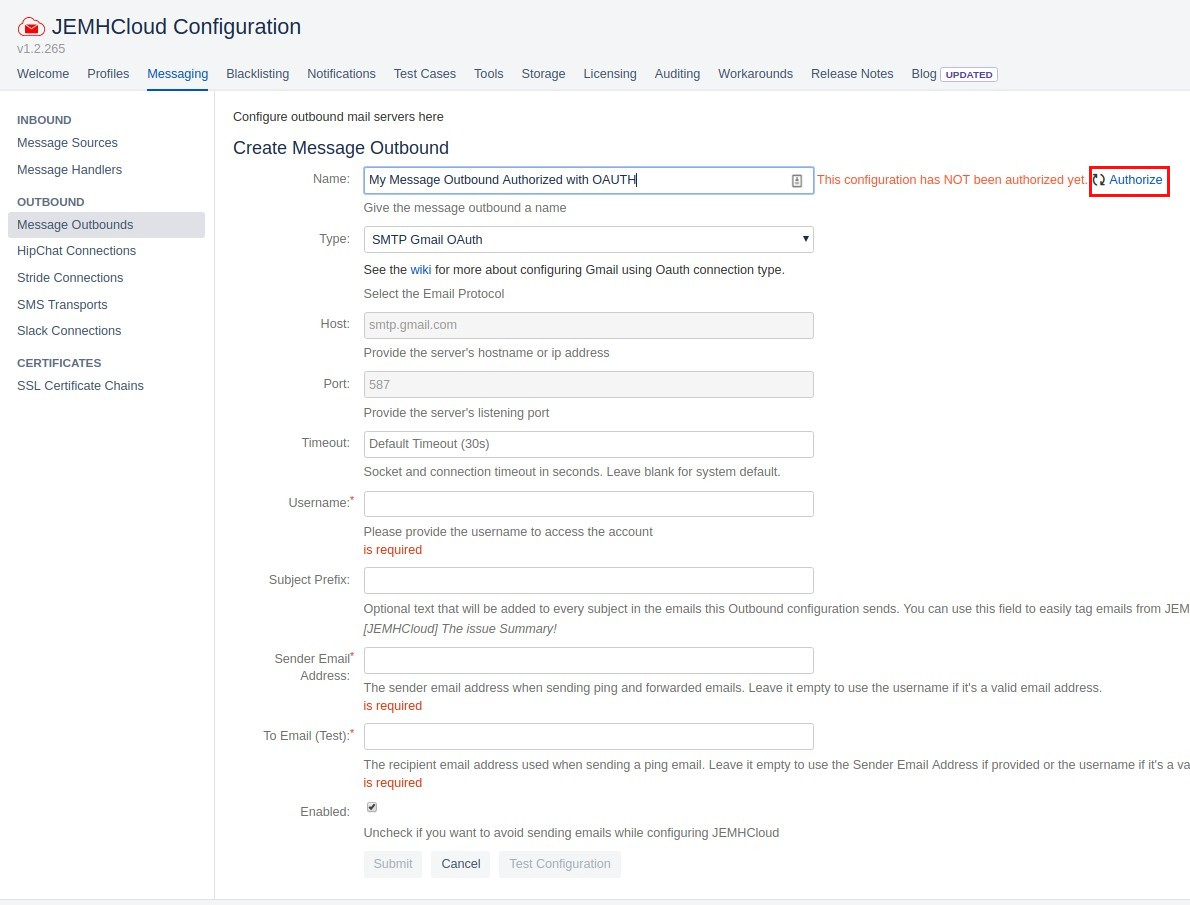
Click on the Authorize link. This will take you to the Google confirmation screen.
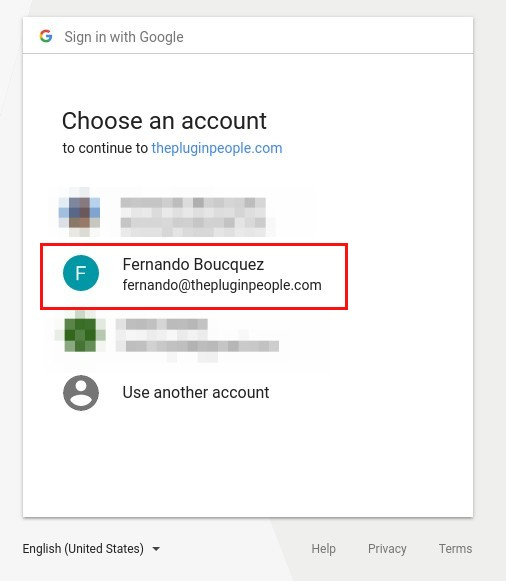
Select the email account that you want JEMHC to be able to access.
Once accepted, close the tab and go back to JEMH Cloud.
The Message Outbound should appear authorised. The Username should be automatically filled. If not, enter the same email address as the selected account.
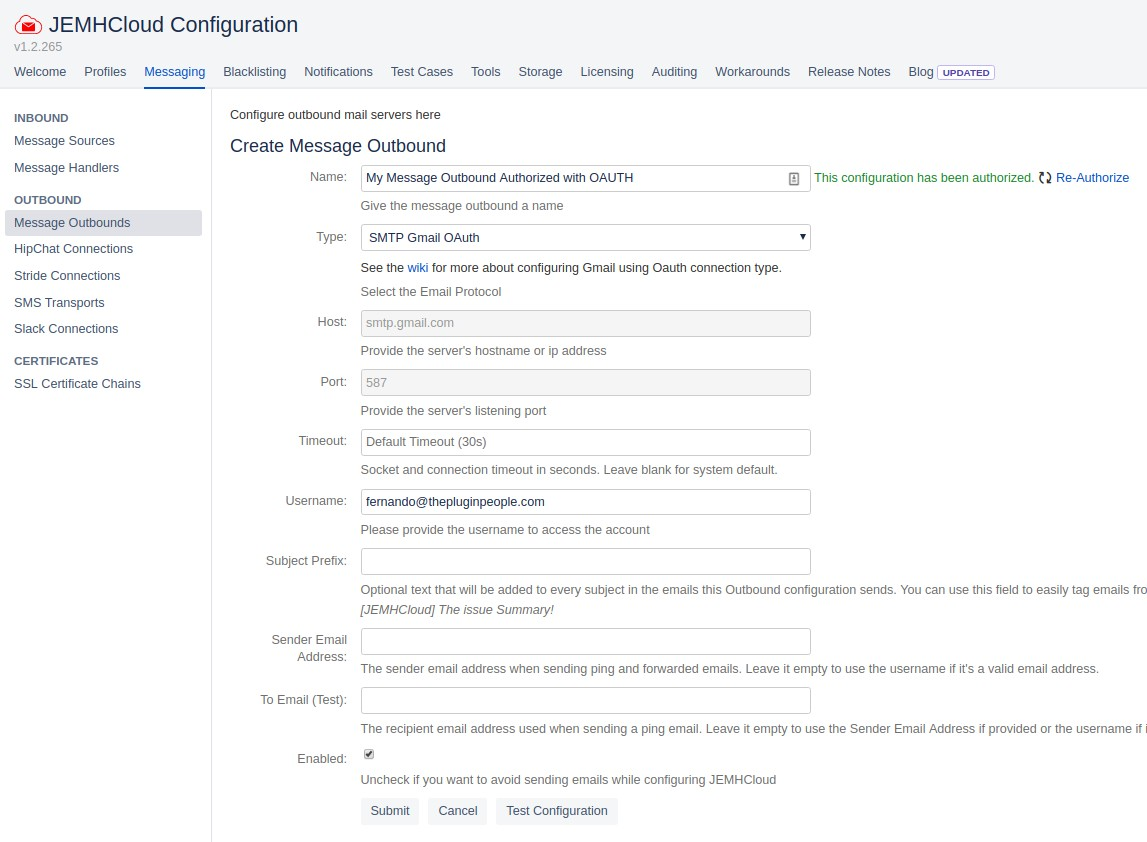
Submit the configuration. Once the configuration is tested, the connection will be created.
...
Troubleshooting
Denied authorization
During OAuth ‘authorization' its possible to get denied (below) typically this means that the account used is not a GSuite account (app not going through Verification for public use are disabled for ‘free’ accounts). To resolve this, create an ‘incognito’ browser session, login only to Jira, then follow the authorization flow.
...
Outbound mail being added as inbound mail
It appears that when you use a filter for stopping mail from going to the spam, when this is configured it will add the Sent mail into the Inbox which would cause the email to be seen as inbound mail. To solve this you would need to either remove the filter or modify the filter so that it does not match the address used for Outbound emails.
Note: This only applies if you are using the same Gmail mail server for Inbound and Outbound Mail processing.
For more info see: https://thepluginpeople.atlassian.net/wiki/spaces/KB/pages/3930390542/Gmail+is+adding+the+Outbound+Mail+as+Incoming+Mail