...
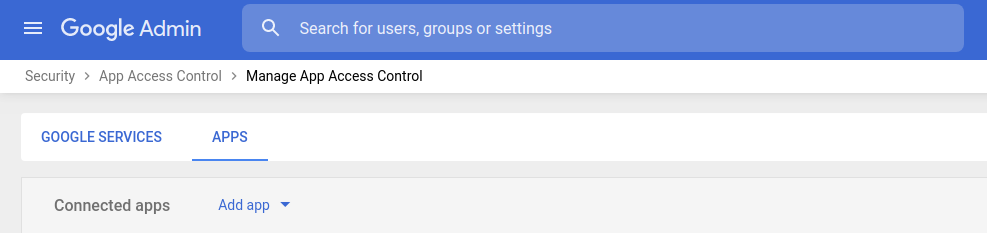
Navigate to App Access Control:
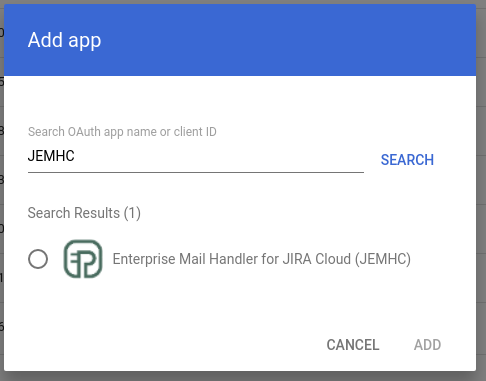
Click Add app, and search for JEMHC, select it and hit Add:
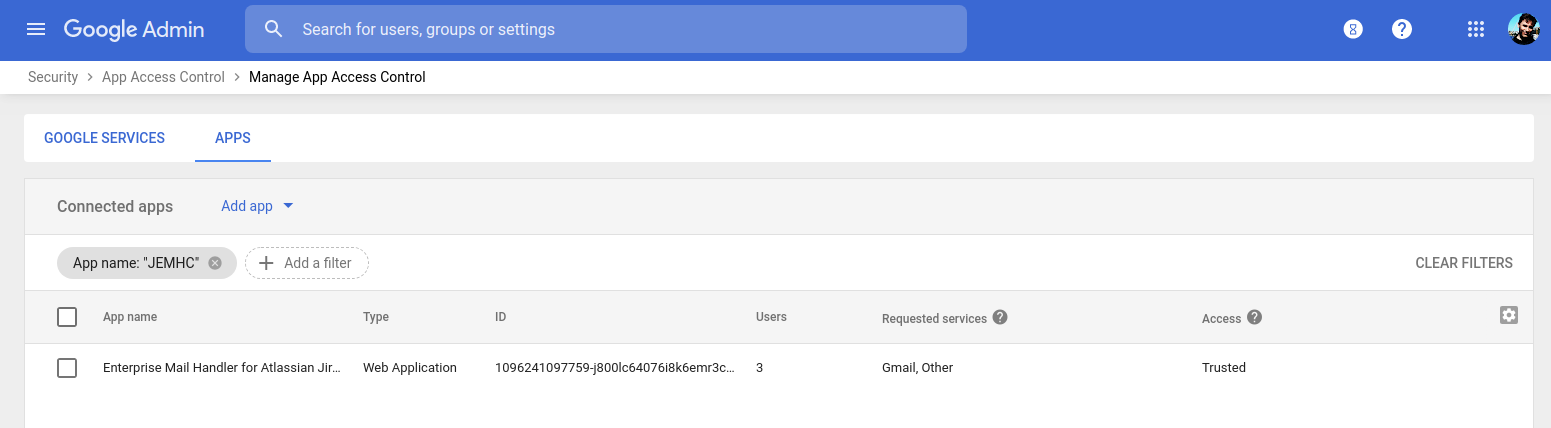
Add a filter, type JEMHC to see JEMHC listed:
Creating Message Source by Signing in with Google
...
Go to JEMH Cloud > Messaging > Message Sources > Click the Create button.
In the Create Message Source screen enter a Name and select the Type IMAP GMAIL OAuth OAuth
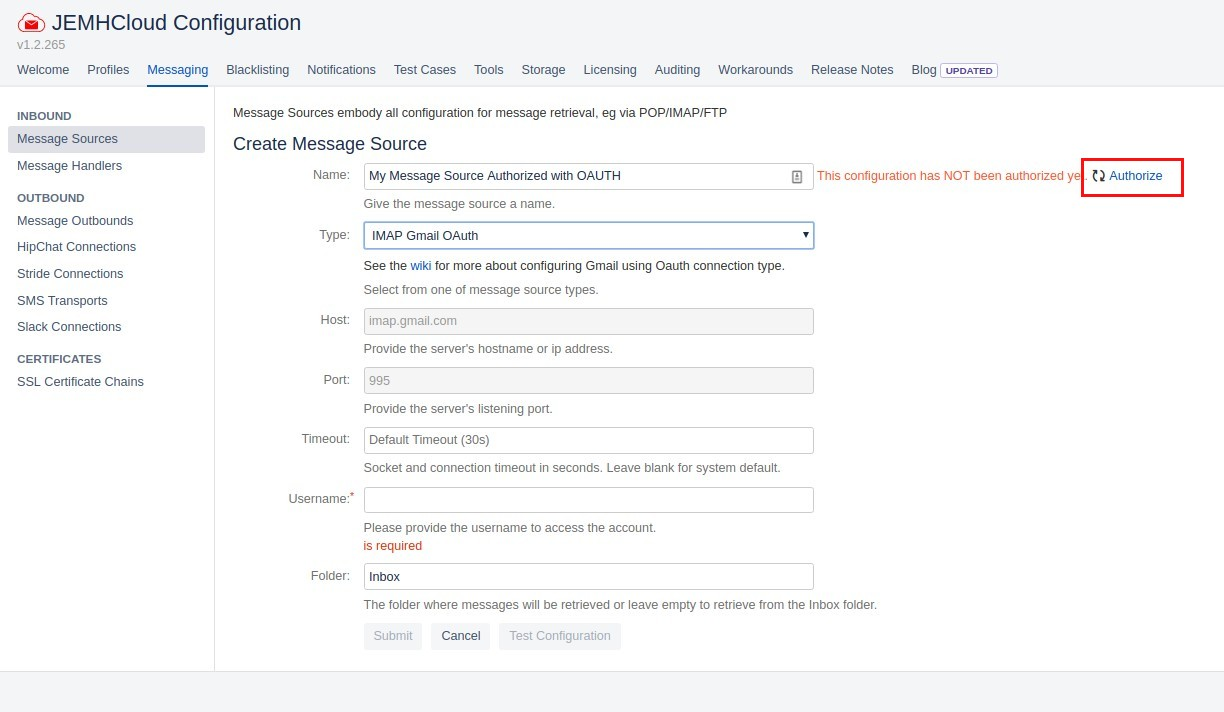
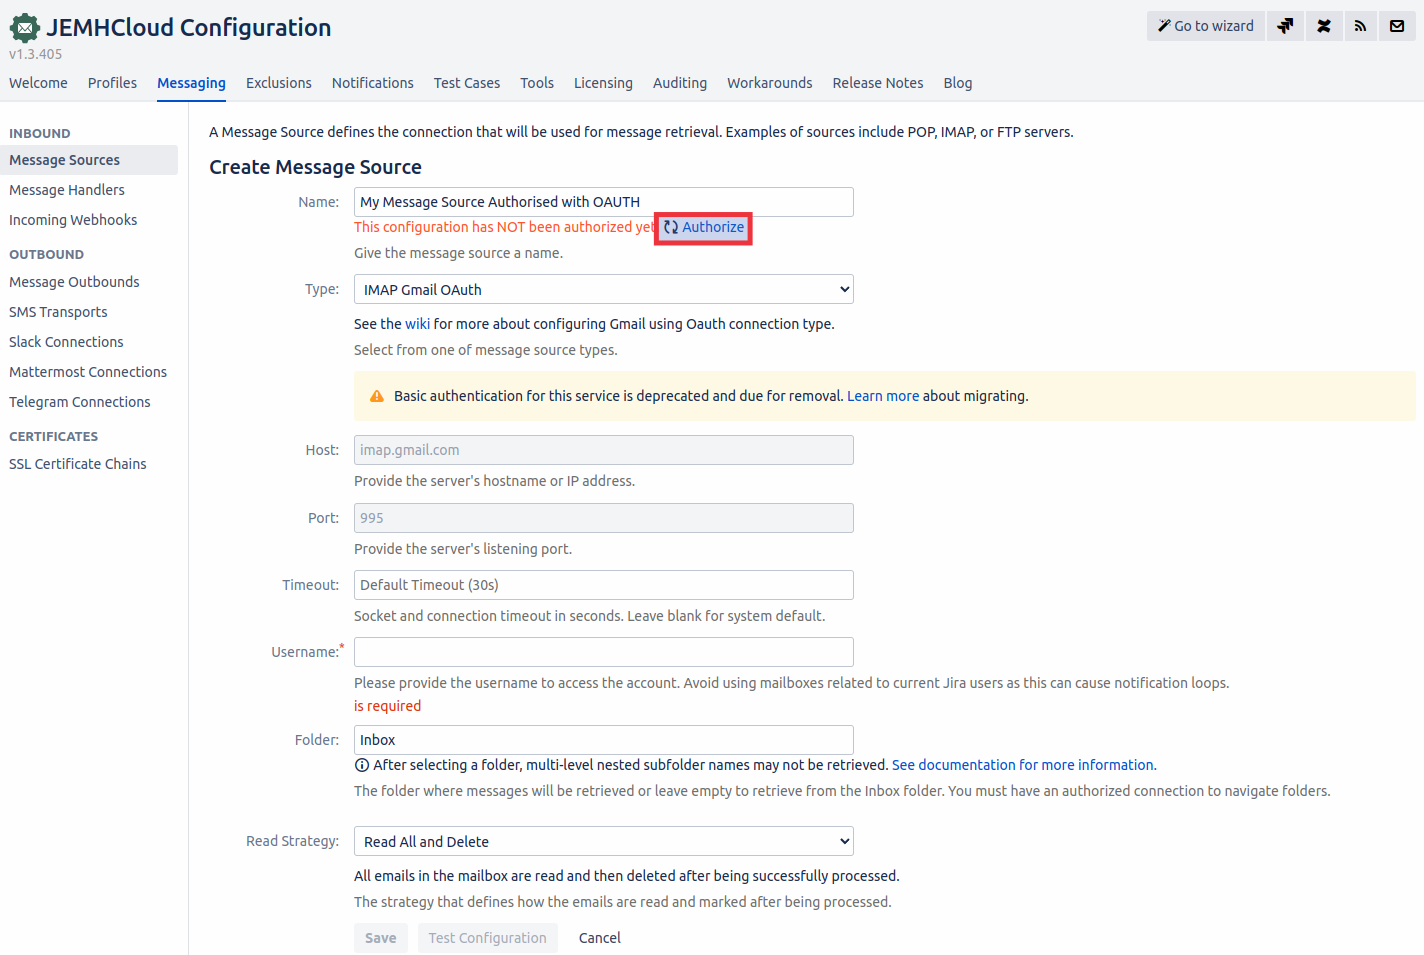
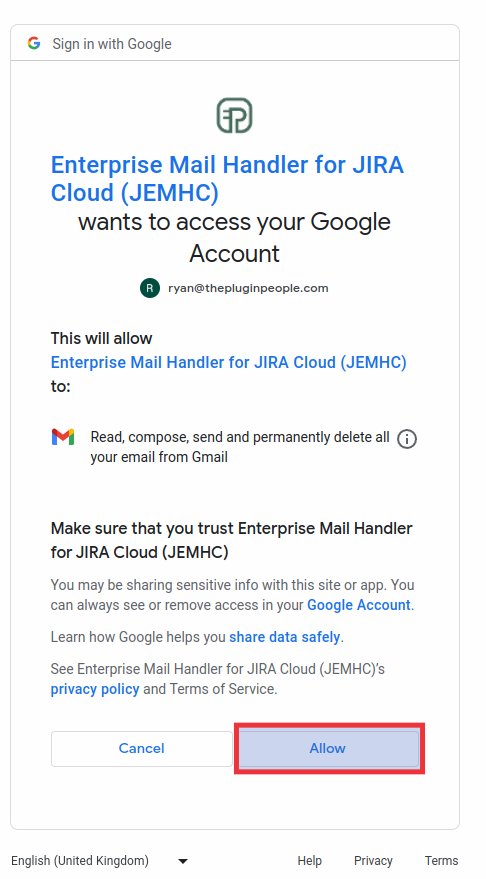
Click on the Authorize link. This will take you to the Google confirmation screen.
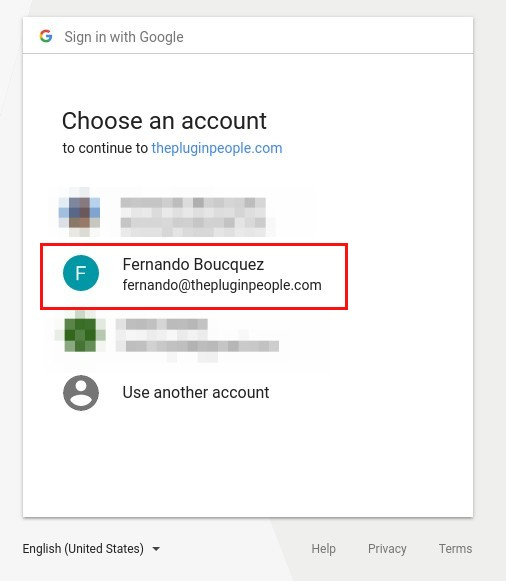
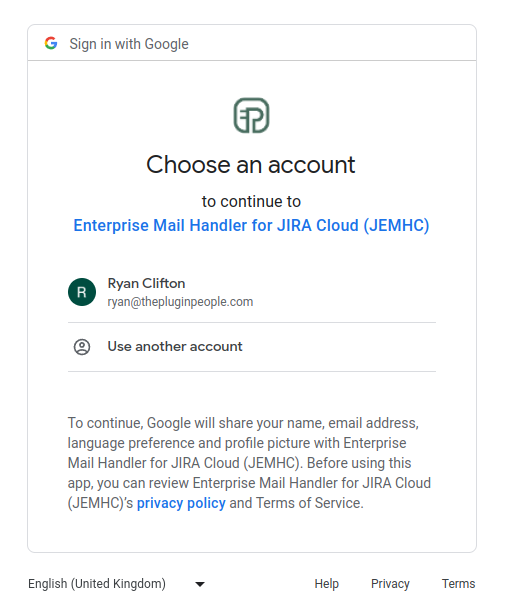
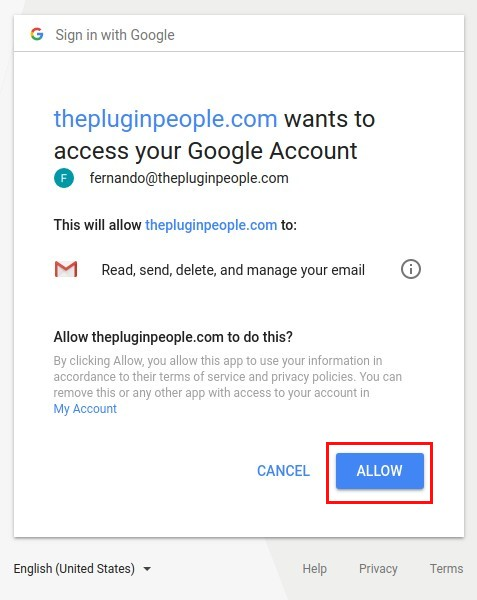
Select the account you want to authorize and allow JEMHC the access to your support email account.

Once accepted, close the tab and go back to JEMH Cloud.
The Message Source should appear authorized. The Username should be automatically filled. If not, enter the same email address as the selected account.
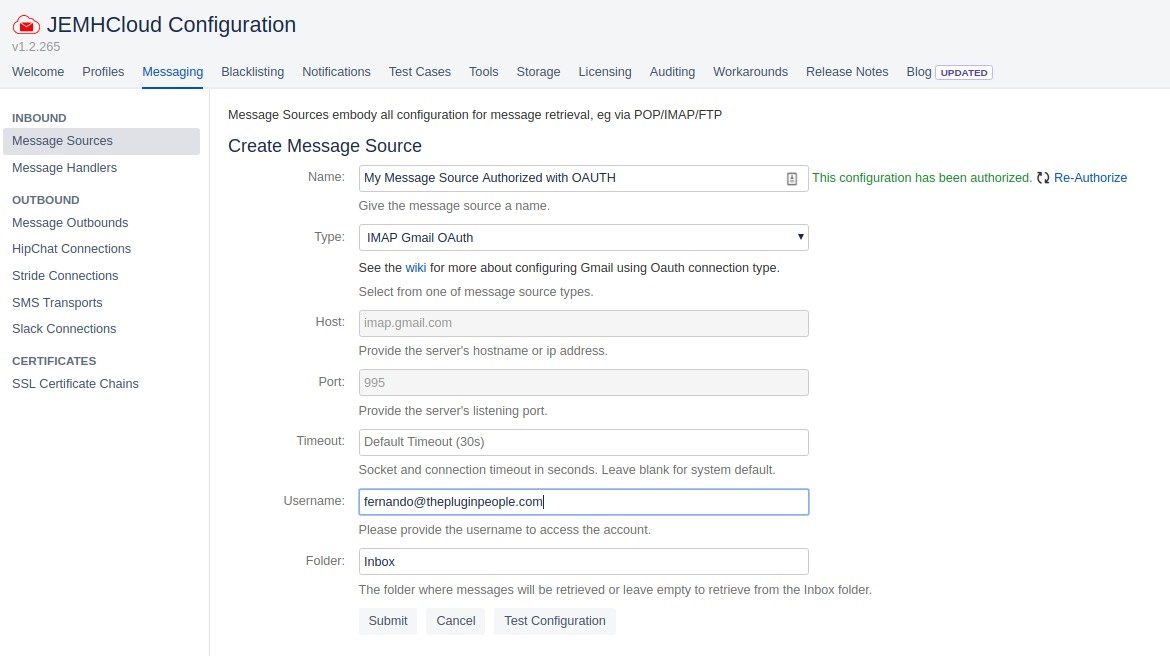
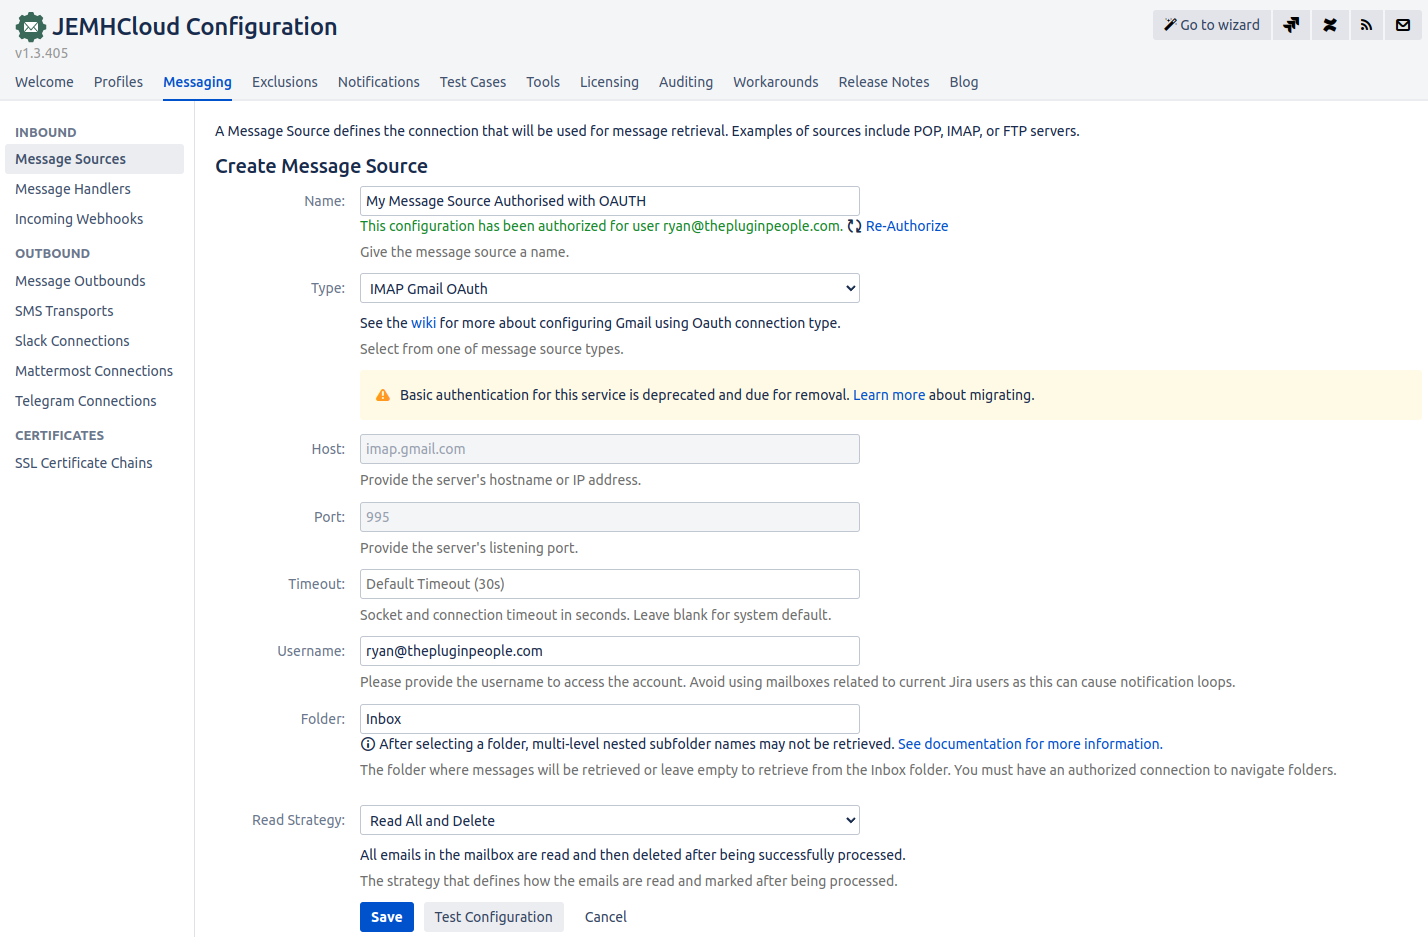
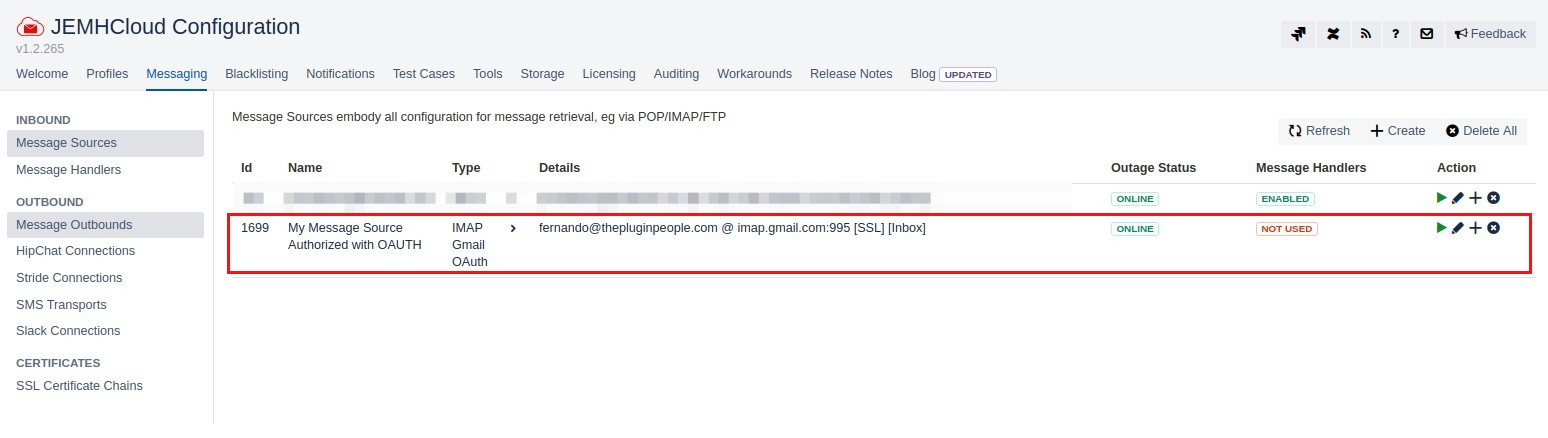
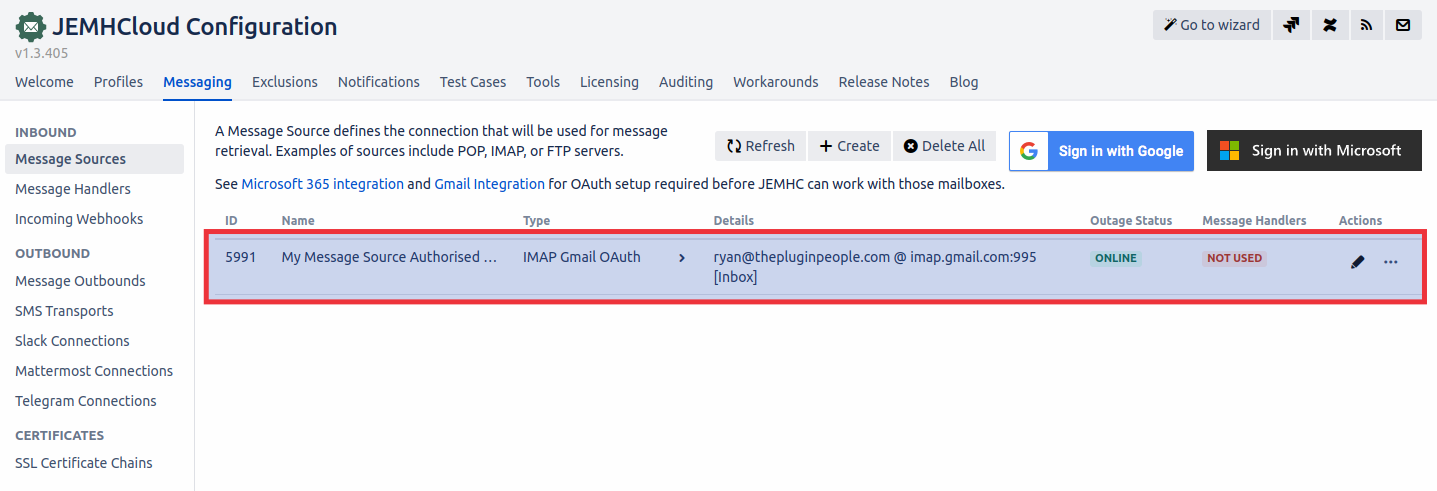
Submit the configuration. Once the configuration is tested, the connection will be created.
Create Message Outbound SMTP to Gmail using OAuth
Go to JEMH Cloud → Messaging → Message Outbounds → Click the Create button.
In the Create Message Source screen enter a Name and select the Type SMTP GMAIL OAuth
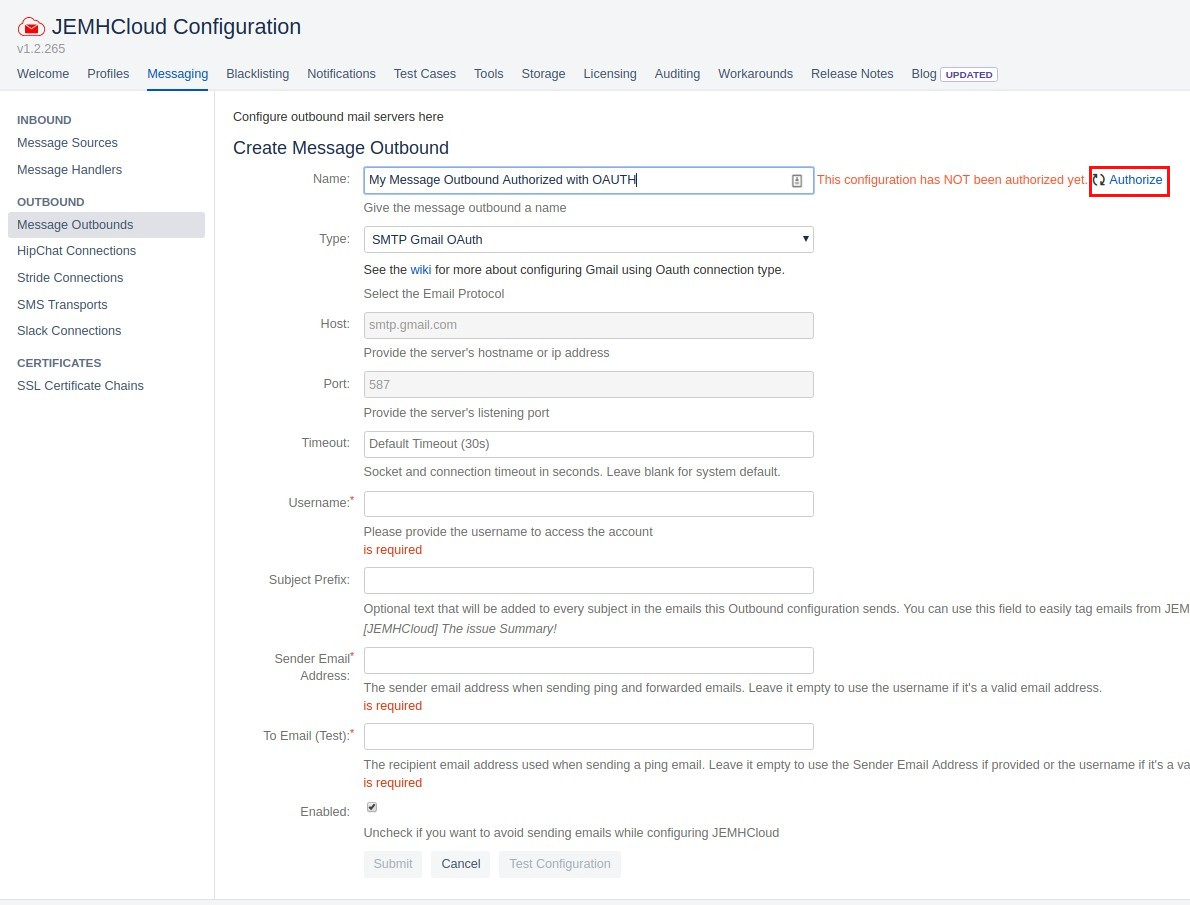
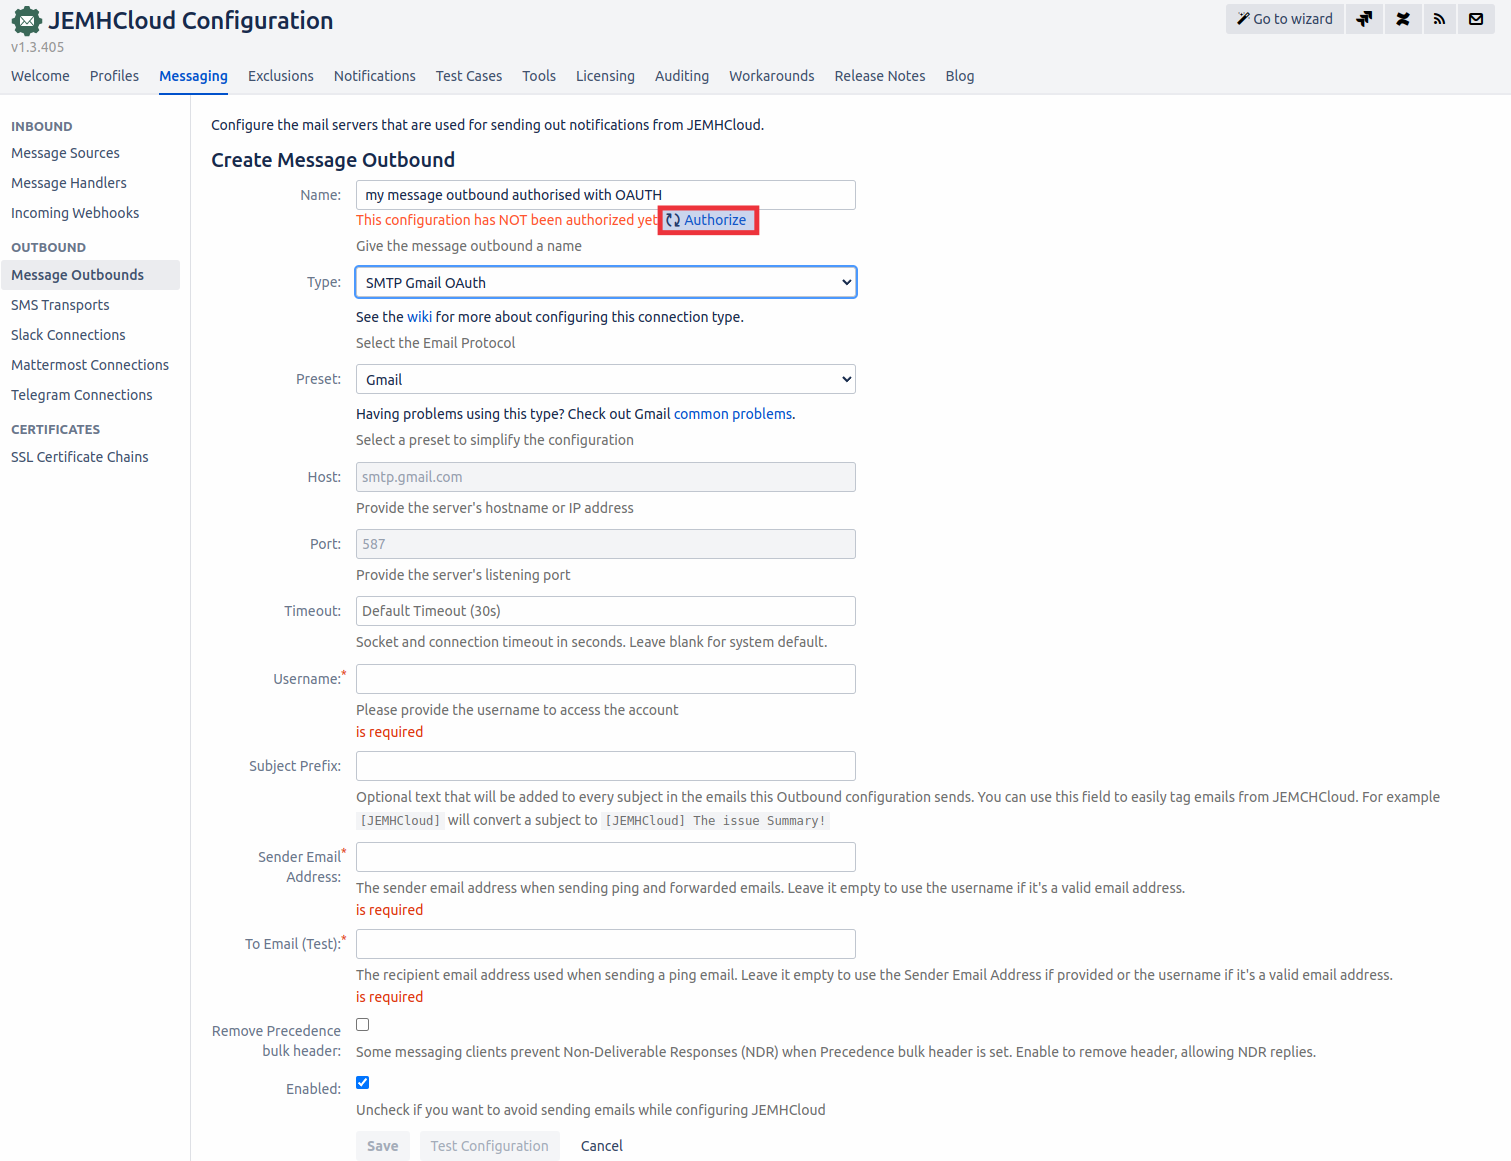
Click on the Authorize link. This will take you to the Google confirmation screen.
Select the email account that you want JEMHC to be able to access.
Once accepted, close the tab and go back to JEMH Cloud.
The Message Outbound should appear authorised. The Username should be automatically filled. If not, enter the same email address as the selected account.
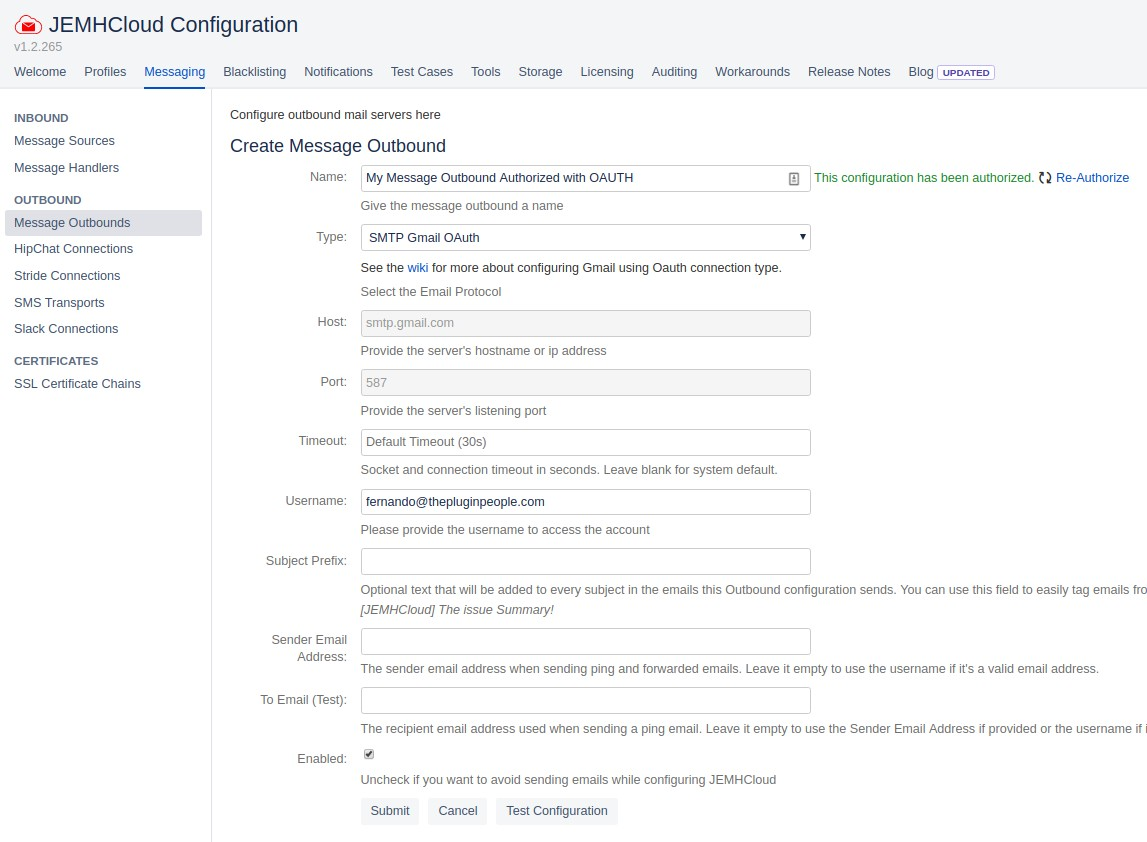
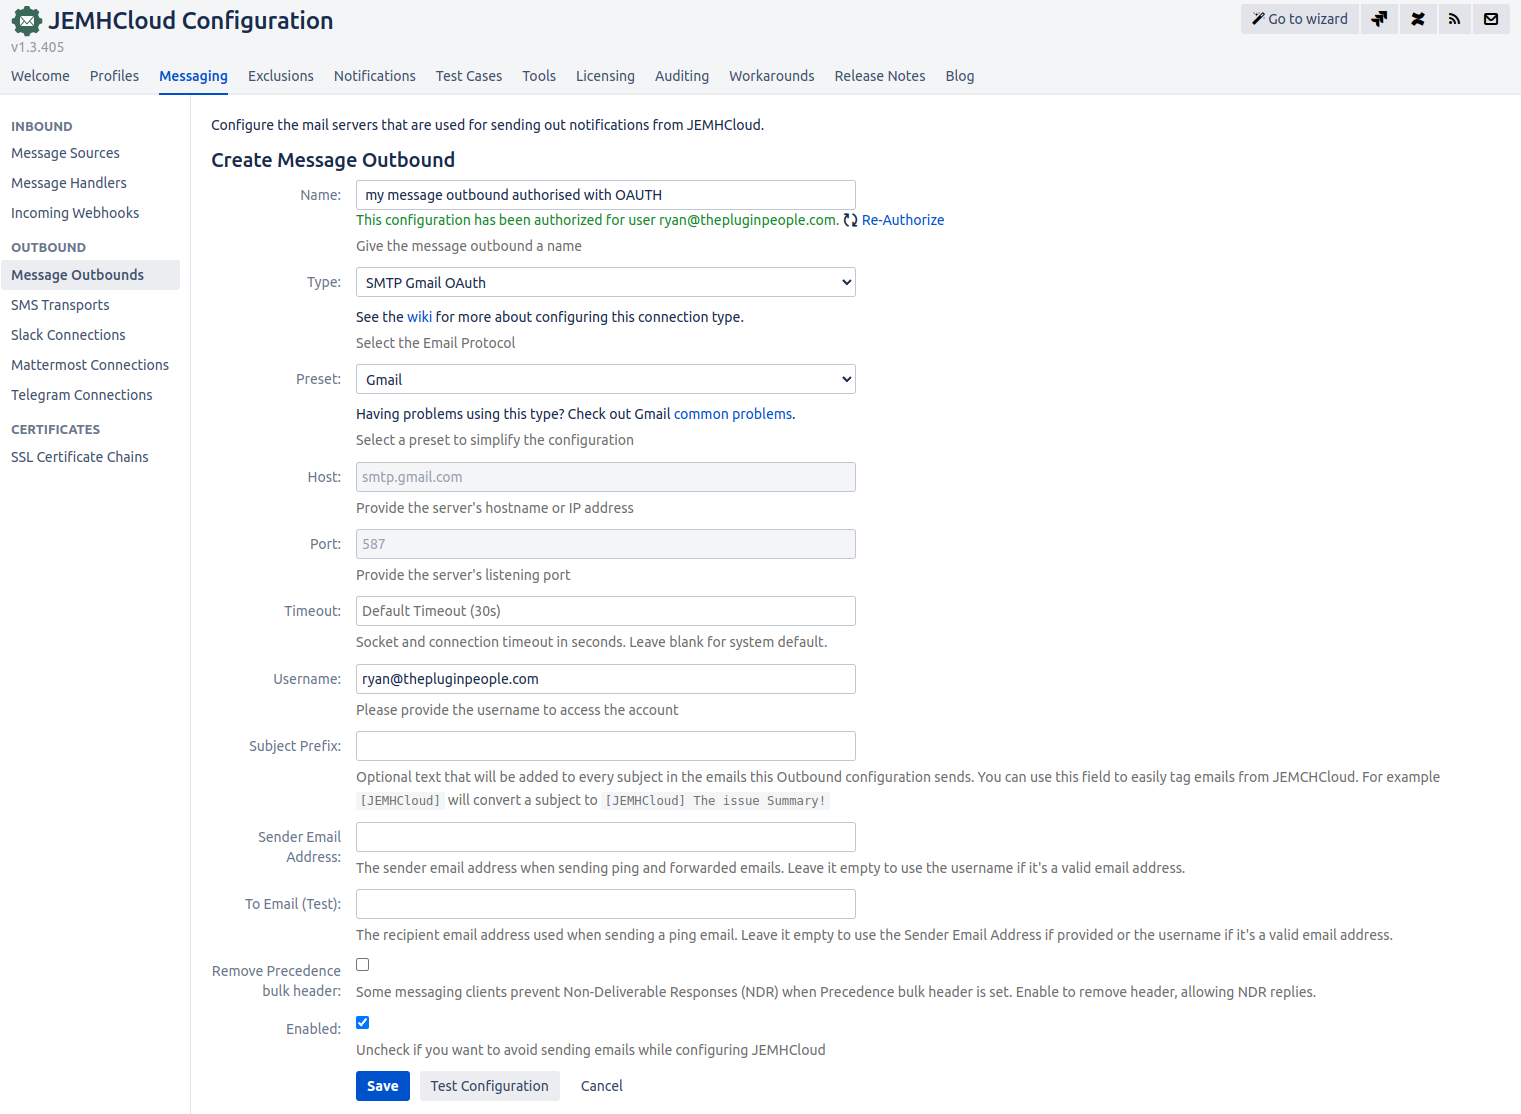
Submit the configuration. Once the configuration is tested, the connection will be created.
...

Troubleshooting
Denied authorization
...