...
...
...
...
...
...
| Table of Contents |
|---|
Summary
Jira Service Management provides a customer satisfaction feedback system that allows agents to know the opinion of their customers. JEMHCloud's email notification integrates the same Service project feedback system. Some of the JEMHCloud improvements around feedback:
...
You can select any template theme (Jira, Generic, Service Desk, or Service Desk 2) when showing the 1 to 5 stars form in emails.
...
You can customize the templates making the 1 to 5 stars form look different.
...
Advantages of using JEMHCloud’s integration include:
Customizable templates to make the feedback form look different
Customizable landing page where the customer provides an extra feedback comment.
Email-only users are allowed to set feedback, not only JSM customers.customer users
How to enable the feedback form in email notifications
...
This feature requires an email notification mapping
...
to be configured in the app. Learn how to create an email notification mapping.
Go to
...
JEMHCloud > Notifications > Notification Mappings > Email and edit a mapping
Go to the Customer Satisfaction Feedback and enable the feature
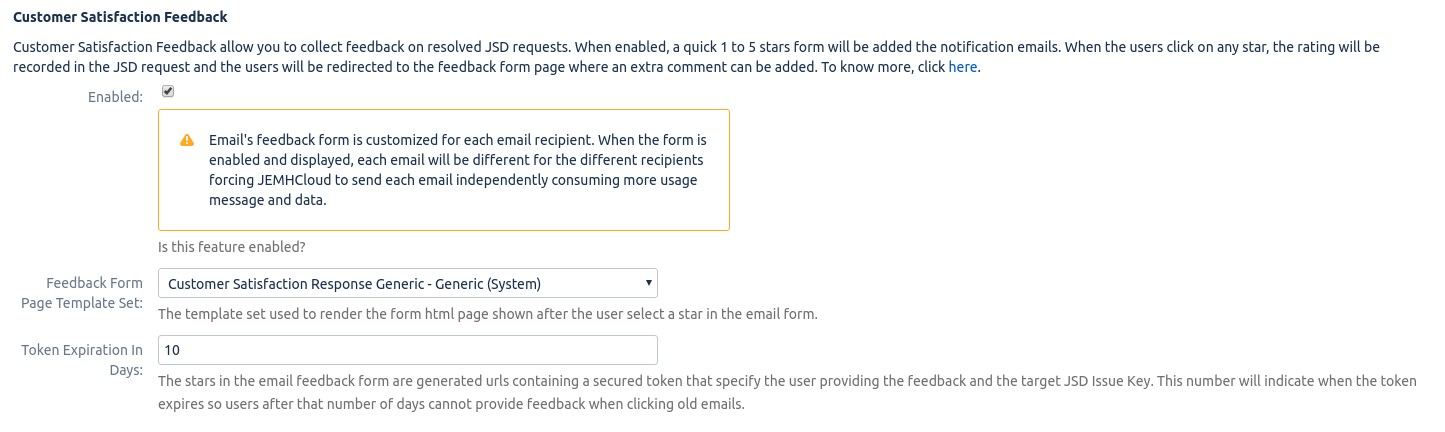
Save the notification mapping. You can confirm the feature is enabled by checking the status:
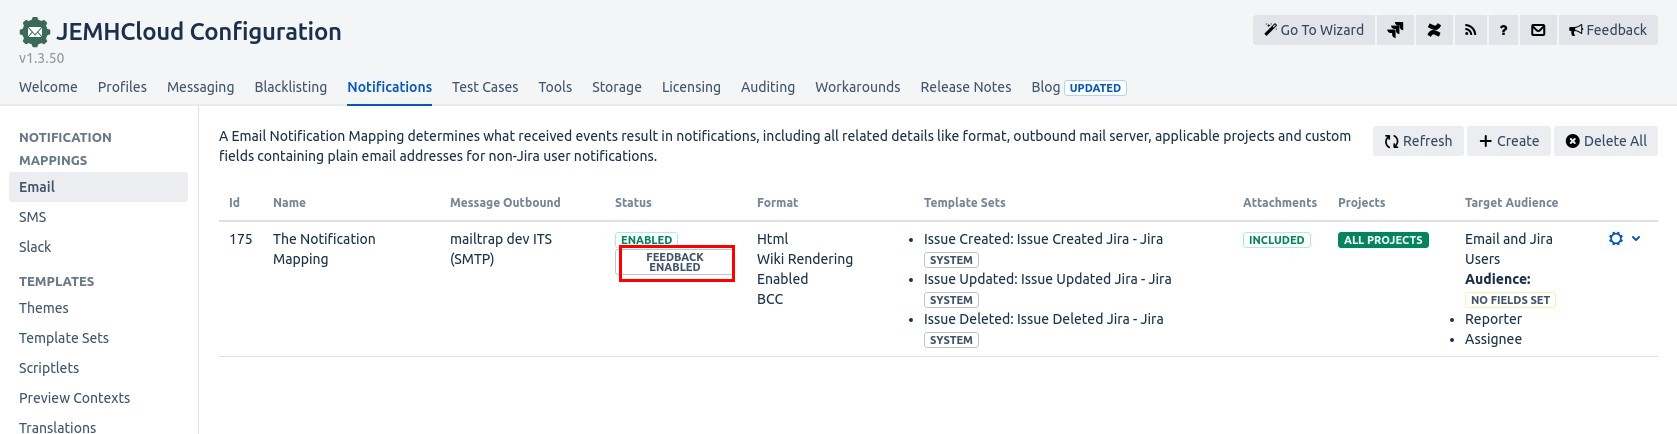
Basic At this point, basic customer feedback is now enabled. Now, JEMHCloud notifications will show the feedback form when the Service request has been resolved:
...
When the user clicks on a star, he/she they will be redirected to the feedback web - form when where an extra comment can be provided:
...
Once the comment has been added, you can see the confirmation and the comment in the JSM request. You can also use Jira Service Management's reports to see your project's overall feedback.
...
...
| Note |
|---|
If your email notification mapping |
...
uses custom template sets, |
...
make sure those templates and their |
...
unique theme |
...
are up to date with the latest system template sets and themes. You |
...
'll want to incorporate the updates from the new system templates. |
...
...
| Note |
|---|
...
The feedback form is customized for each email recipient. When you activate and show the form |
...
, |
...
JEMHCloud ensures that distinct emails are sent to every recipient. Just keep in mind, this method uses up extra usage messages and data. |
Expected flow
| Info |
|---|
Once the issue has been resolved, a notification will be sent which includes the customer feedback. After the recipients provide feedback, the issue will be updated accordingly and no notifications will be sent. Please note the following points:
In order to make any changes and send the notifications without including customer feedback, issue status needs to be changed to any other than Resolved/Completed. |
...
First, you need to create a custom Theme and Template Sets by copying one of the existing Themes. Follow this guide to create your own theme.
Once you create your own theme:
Go to
...
JEMHCloud > Notifications > Themes > Edit
Go to the Macros editor and search for the
#renderCustomerSatisfactionmacroChange the macro for the
#renderCustomerSatisfactionyou can find below this article:
...

Go to the Styles tab and edit the
.jsd-customer-satisfaction .jsd-srf-starstyle class and change with the style found below in this article.
...

Save the theme and go to
...
Notification > Email Notification
...
Mappings > Edit and change the template set for the notifications.
...

Then, the notification the customer receive will have a different feedback form:
...
...
| Code Block | ||
|---|---|---|
| ||
#macro(renderCustomerSatisfaction)
#if ( $jemhCustomerSatisfactionManager.shouldShowCustomerSatisfactionQuestion($context))
    $jemhUtils.setFieldRendered()
    <div class="jsd-customer-satisfaction">
        <ul>
         #foreach($i in [$jemhCustomerSatisfactionManager.minRating .. $jemhCustomerSatisfactionManager.maxRating])
         <li>
            <a href="$jemhCustomerSatisfactionManager.createLink($i)" class="jsd-srf-star" target="_blank">
               $messageUtils.getMessage("sd2.email.customer.satisfaction.$i")
               #foreach($j in [$jemhCustomerSatisfactionManager.minRating .. $i])  ★ #end
            </a>
         </li>
         #end
        </ul>
    </div>
#end
#end |
...
| Code Block | ||
|---|---|---|
| ||
.jsd-customer-satisfaction .jsd-srf-star {
	color: #0a4a68;
	text-decoration: none;
	border: none;
	display: inline-block;
	vertical-align: top
} |
...
When a user clicks on a star , he/she is they redirected to the confirmation page where the user can provide an extra add a comment. JEMHCloud provides a default HTML response but you can customize it.
In this how-to guide, we will we’ll change the look of the response by adding the company name. In order to customize the response:
Go to
...
JEMHCloud > Notifications > Template
...
Sets > Create
...
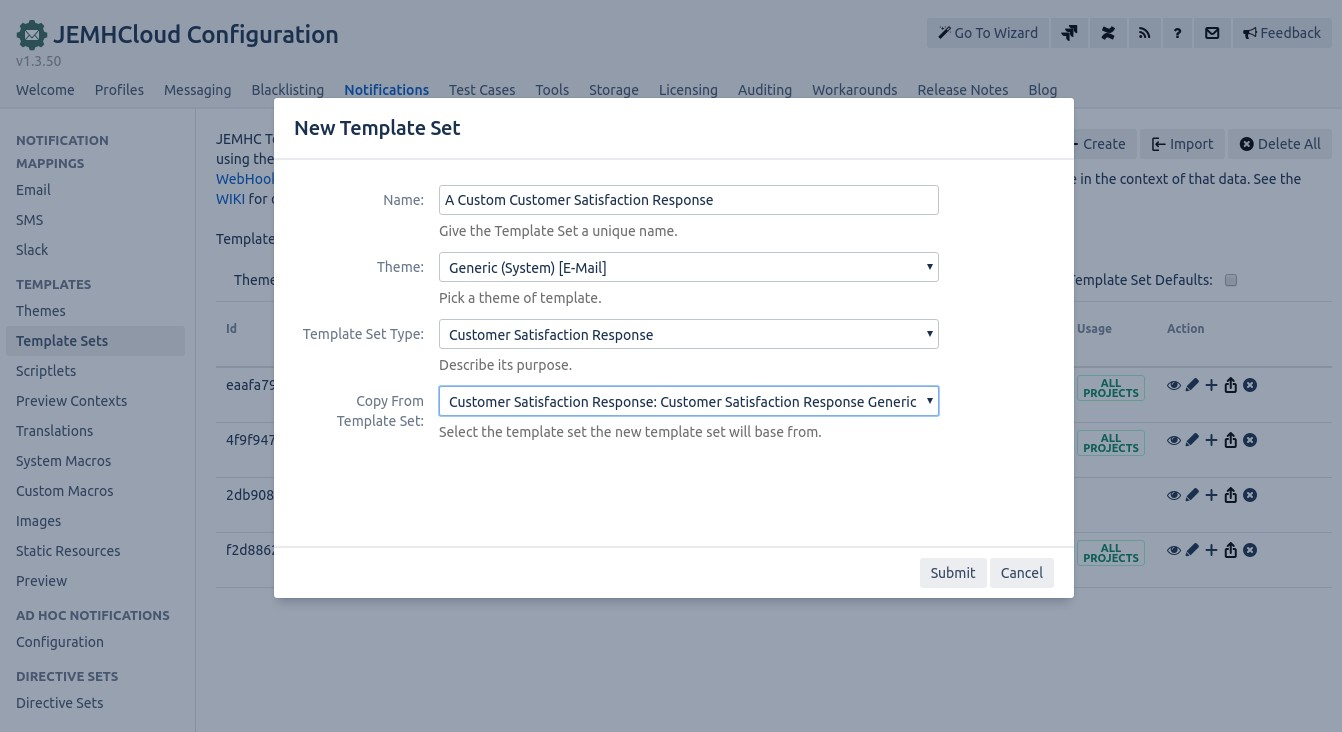
Enter the name, select the Generic Theme, Select the Customer Satisfaction Response Template Set Type and copy from the System Customer Satisfaction Response Template Set Type and copy from the System Customer Satisfaction Response.
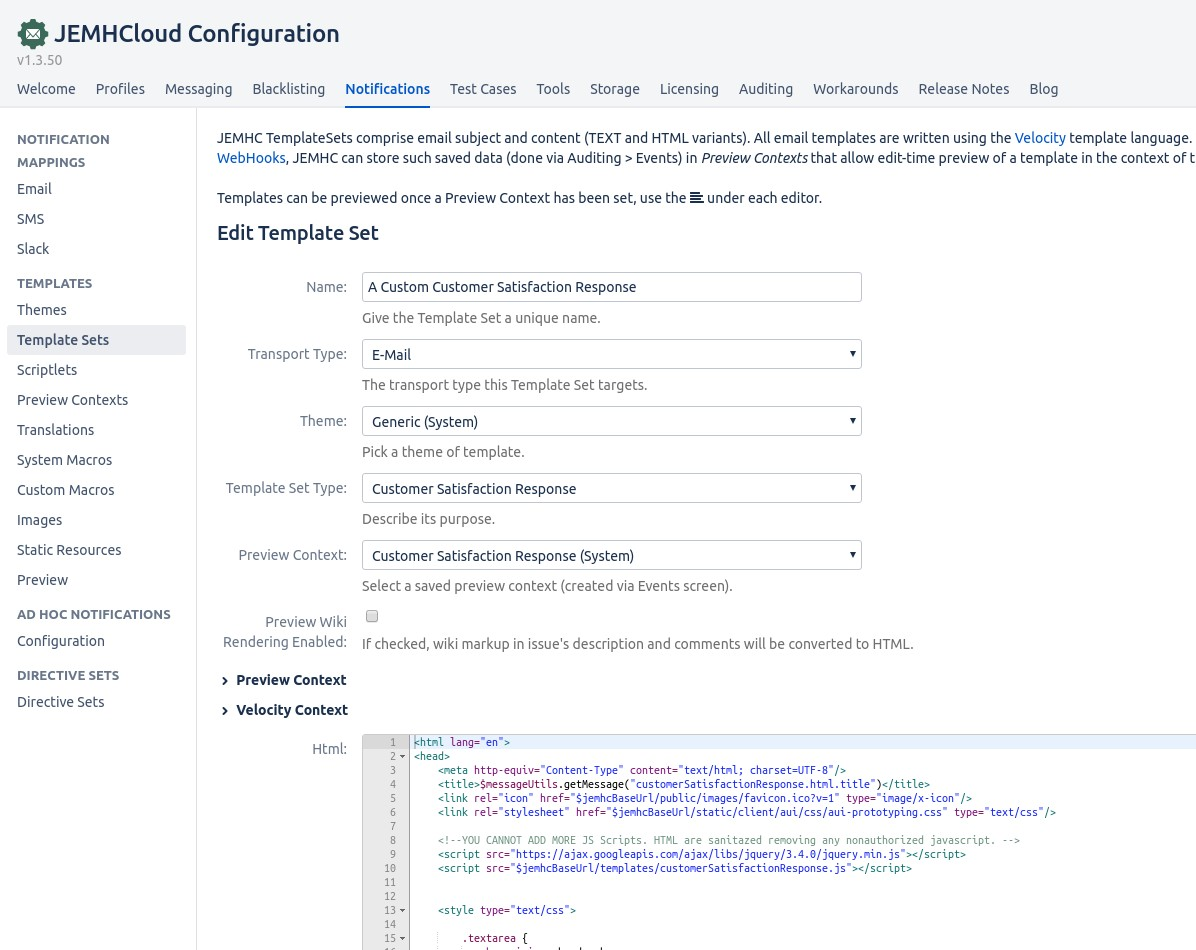
In the Edit Template Set screen, you can customize the response HTML template by changing the company name, colours, or format. The default template uses Atlassian's AUI
...
UI library.
...
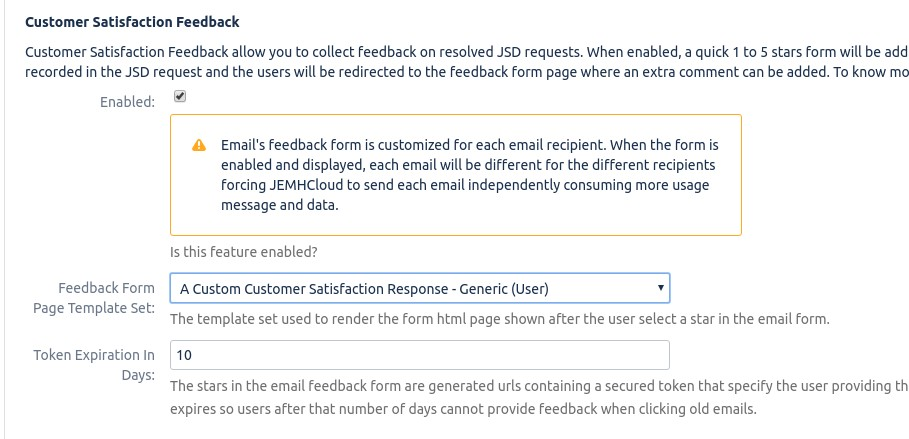
In order to select the template set for notifications, go to
...
JEMHC > Notification > Notification
...
Mappings > Edit. Select the new template in the Customer Satisfaction Feedback section
...
Now, when the user clicks the stars in the email form, the response page will use your new template.
...
Related
...
Articles
| Filter by label (Content by label) | ||||
|---|---|---|---|---|
|
...
...
|
...
...
|
...
|
...
|
...
|
...
|
...
|
...
|
...
| hidden | true |
|---|
...
|