...
| Note |
|---|
Jira's own Event Listener will try to send notifications to Jira users. If you are planning on having JEMH do this instead, you will not want that to happen. In order to prevent Jira doing so, the Notification Scheme should be removed from the Jira project itself by deselecting it via the Jira Project Administration view. This will prevent duplicate notifications from being sent. |
| Gliffy | ||||||||||||||
|---|---|---|---|---|---|---|---|---|---|---|---|---|---|---|
|
Install the add-on
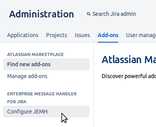
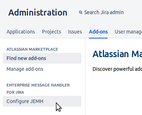
The easiest way to install JEMH is via Jira's built-in add-on management system (UPM). Go to Jira Administration > Manage apps and select Find new apps.
...
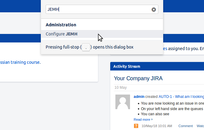
Access JEMH via Jira's Quick Operations menu

, or by going to Jira Administration > Manage apps > Configure JEMH.
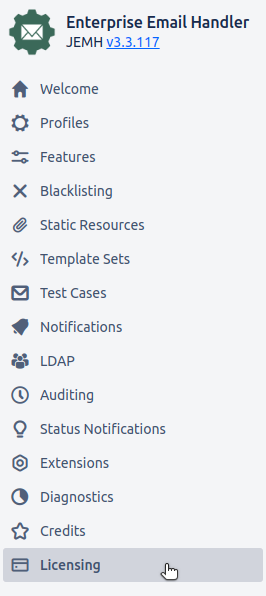
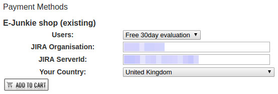
Go to the Licensing tab and from the Shop Form, select Free 30day evaluation. Follow the prompts and enter a valid email address - this is where the license key will be sent.


Check your mail, the license key should be delivered almost immediately. If you don't receive anything after 30 minutes, check you spam folder and that the entered address was correct. As a last resort, use the 'by Email' link and we will contact you with a key personally. When you do get a key, it should like similar to this:
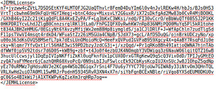
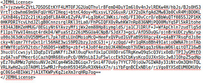
Copy the license key text, ensuring that the leading and trailing
<JEMHLicense>...</JEMHLicense>tags are also copied.Paste the key into the License Entry form and click submit
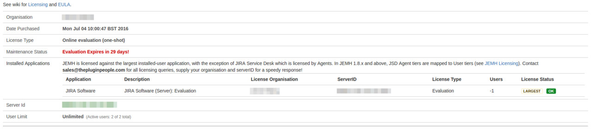
The Licensing page should now show that your license has been activated (as below) and the full JEMH navigation menu should show.

Update the JIra project Notification Scheme
...
Enabling Attachments and Inline images
Disable JIra's Notification Scheme (To prevent duplicate notifications).
Enable Include Attachments in Notifications, Inline images and Attach inline images.
Update the Jira Notification Scheme
...
Select custom fields to hold Non-Jira user details
Under Profile > Email > Sender Processing > Non-Jira user, select the custom field to hold the email sender's personal name (if present) for the setting Non-JIRA user sender name to Text custom field. Set Non-JIRA user sender address to Text custom field with the other custom field created earlier (Sender Email Address as an example).

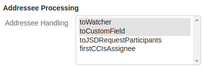
For the setting Profile > Email > Addressee Processing > Addressee Handling select both toCustomField and toWatcher options. This routes Jira users to watchers and non-Jira users to custom fields.
...
Set Assign non jira-user Email to Text CustomField with the custom field created earlier (Email Users for example).

Set the custom issue created event to fire
...
| Anchor | ||||
|---|---|---|---|---|
|
Navigate to the JEMH Configuration screen and select the Notification tab.
Go to Issue Events section, edit, and check the 'Enable' field.
...

Select the Non-Jira custom fields created earlier for the setting Fallback email Custom Fields. Setting it as the fall-back just means it doesn't need adding for each mapping later.
Submit the changes, at which point the Issue Event Listener is enabled but is as yet not listening to any specific projects.
Create a Notification Project Mapping
...
Enter your target mail server's connection details. If your mail service provider is listed under Service Provider, select it and some settings will be set for you. Once done, select Test Connection to validate your settings. This set up process is also covered by Atlassian here (step 1 only): https://confluence.atlassian.com/display/JIRA/Creating+Issues+and+Comments+from+Email.
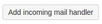
Add a JEMH Mail Handler
With an inbound mail server defined, select Add incoming mail handler.
Provide a name for the handler, and select the mail server that you previously configured. Make sure that the handler setting is set to Enterprise Message Handler for Jira.
...
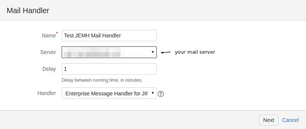
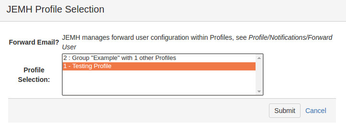
Click Next, and then select your JEMH profile from the list that is shown. Press Submit to save your configuration.
...
From this point onwards, any unprocessed email found in the mailbox that has a "to" address matching your profile's catch email address(es) will be processed.
Related articles
| Filter by label (Content by label) | ||||||||||||||||||
|---|---|---|---|---|---|---|---|---|---|---|---|---|---|---|---|---|---|---|
|
...