...
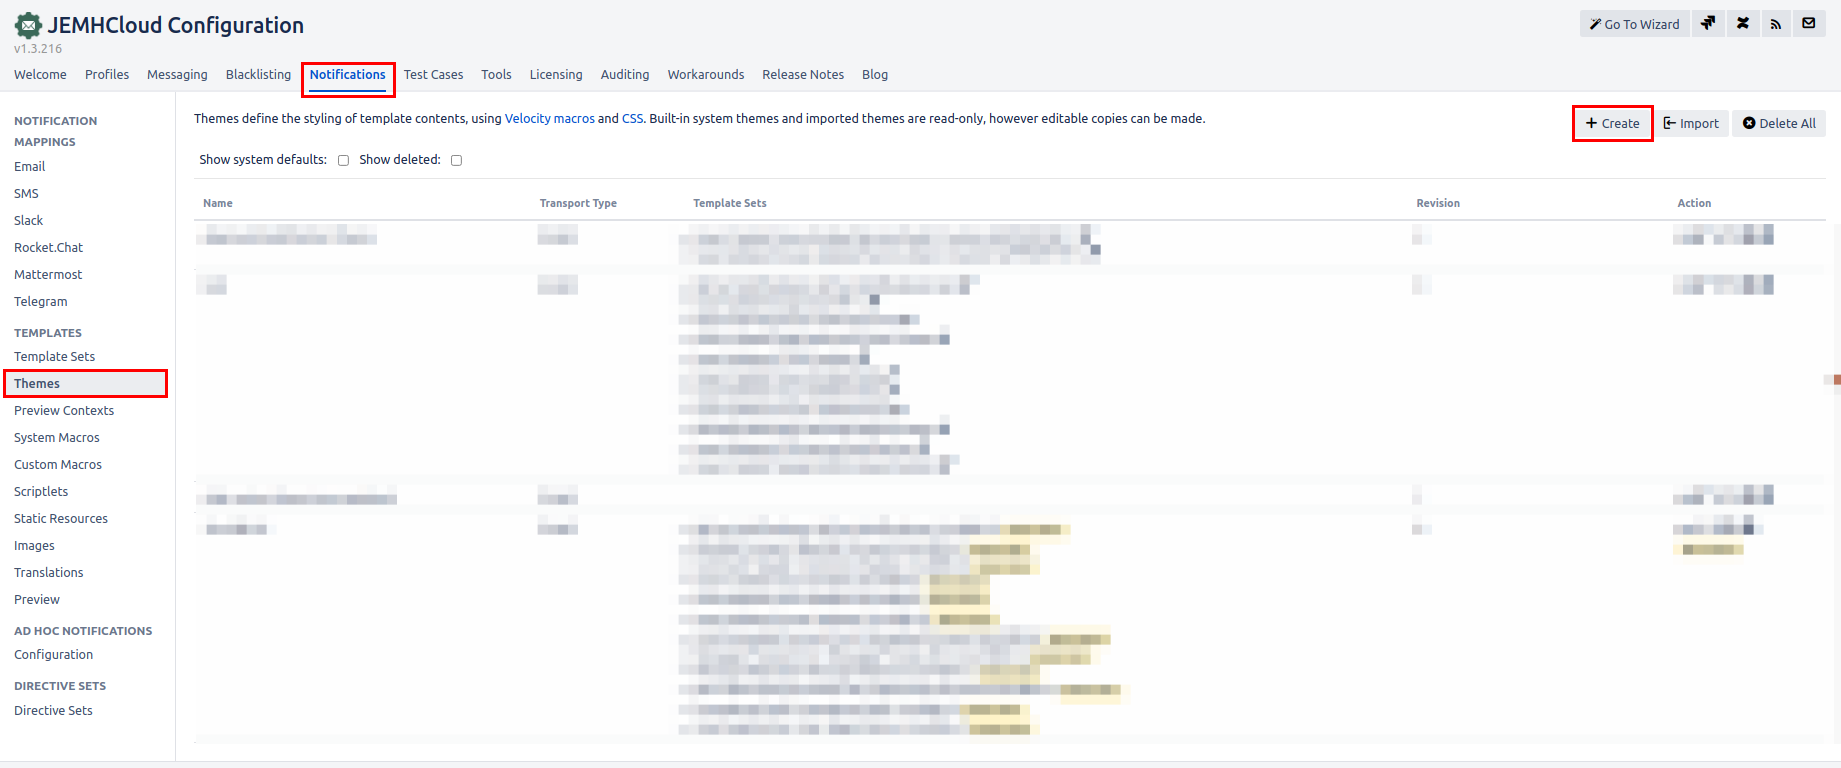
Make a copy of your JSM Theme via JEMHC Configuration > Notifications > Themes > Create as shown below. More information how to do this here: Create custom Theme and Template Sets.
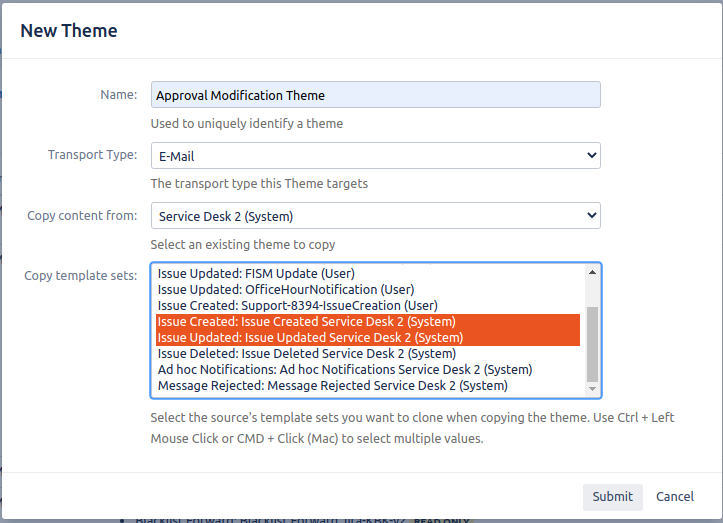
A create pop up should appear. Select your Issue Updated and/or Issue Created template sets (dependant on when you approvals occur) and click submit. Example below:
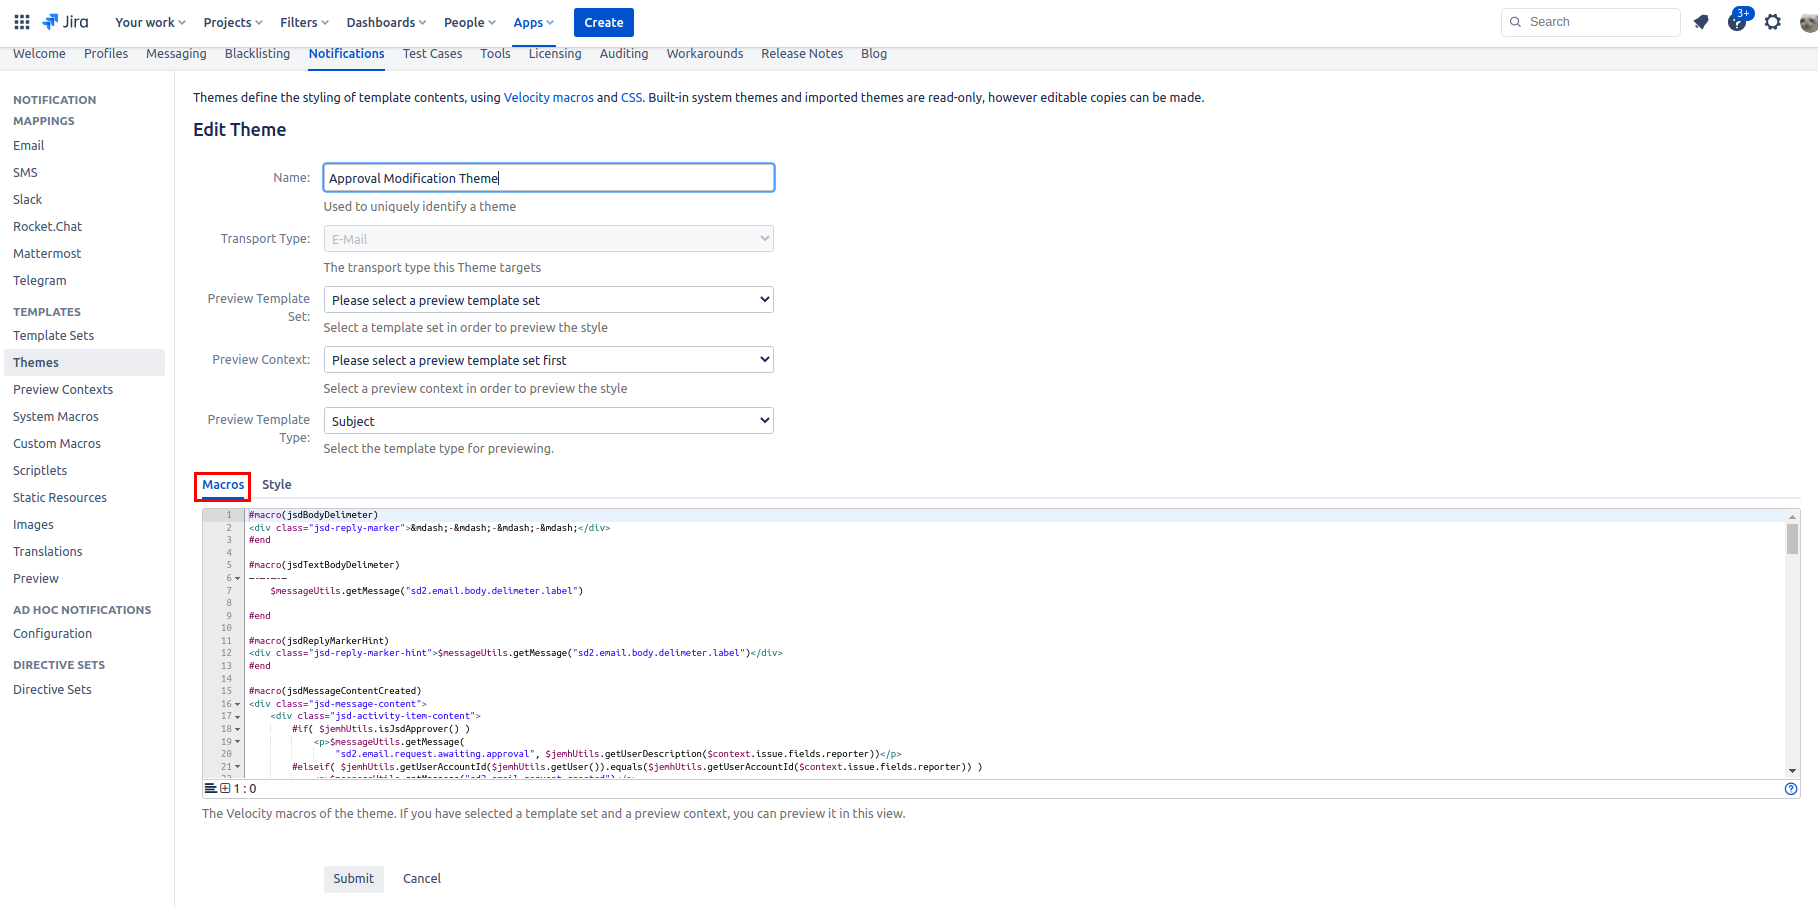
Select the Macro tab to view Theme Macros. Hint: If you need further changes to the CSS click the style tab.
Then look for
renderApprovalsmacro add a condition to only render the velocity snippet when approval buttons are present:Code Block #$approvalButtons = $jemhApprovalsManager.getApprovalButtons())set( #if($approvalButtons.size() > 0) ##Your custom stuff## #end
Example below: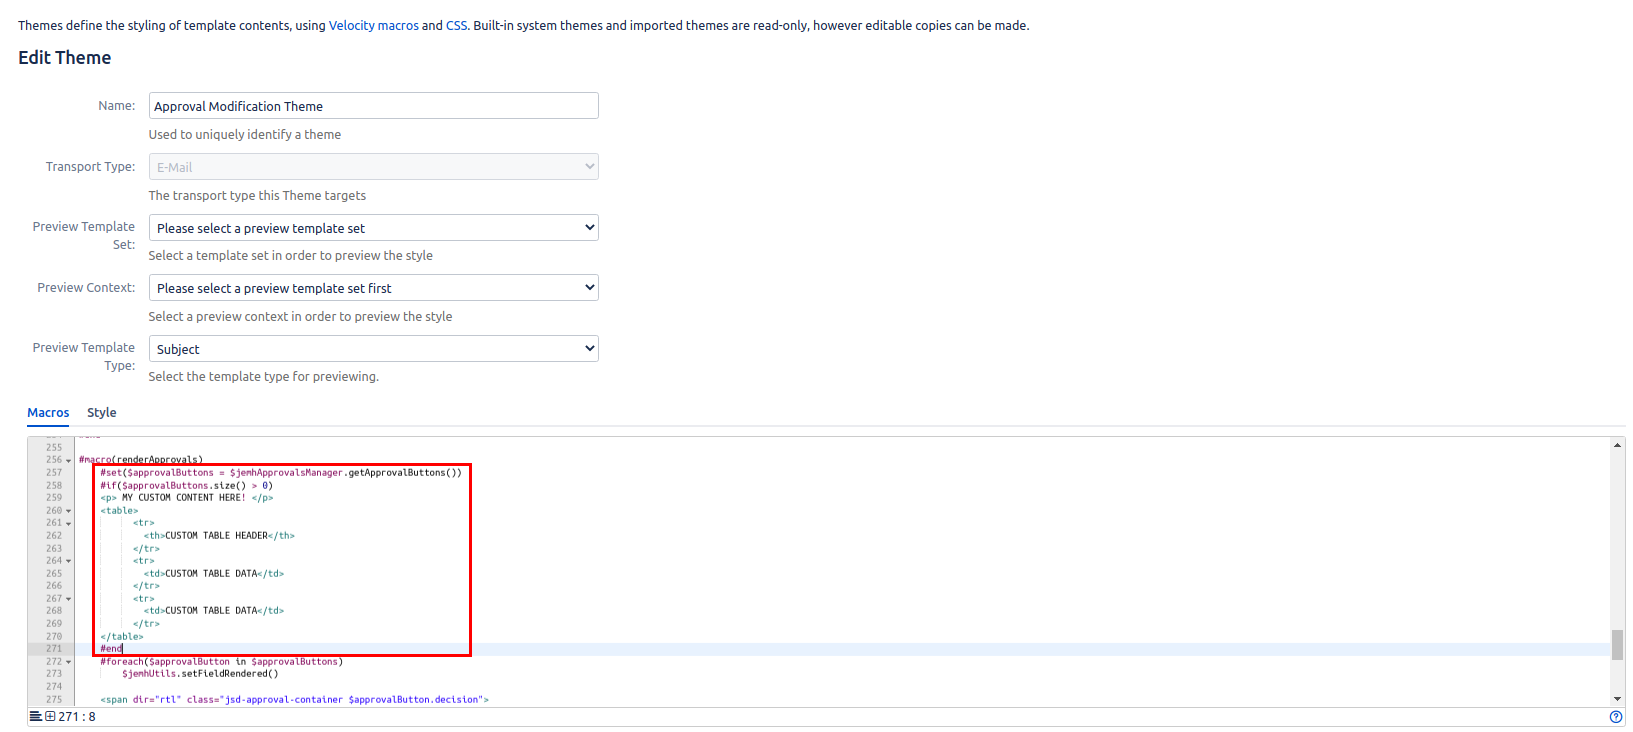
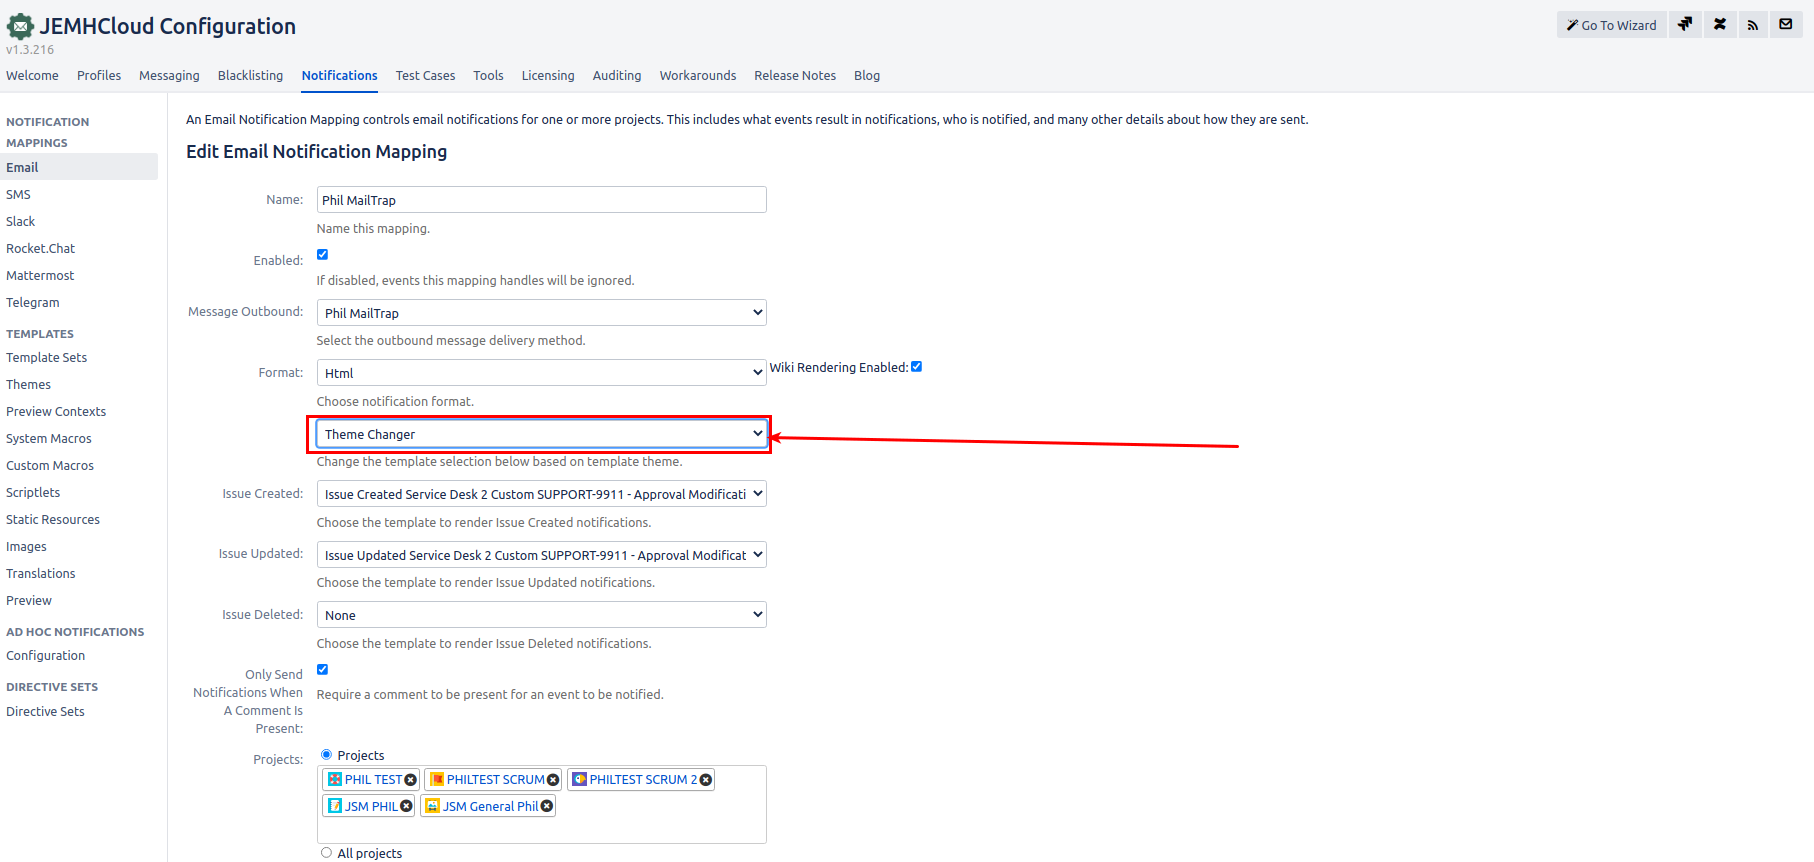
Ensure your outbound notifications configuration page has been setup to handle JSM Approvals as per Approving requests via email.
Update your outbound theme to reflect the theme with your Approval Macro Modifications and Submit changes.
To Preview the approvals buttons, currently, you have to use JEMHC > Notifications > Preview where the recipient is picked, there you can see what Customers would see vs Agents for a given Event.
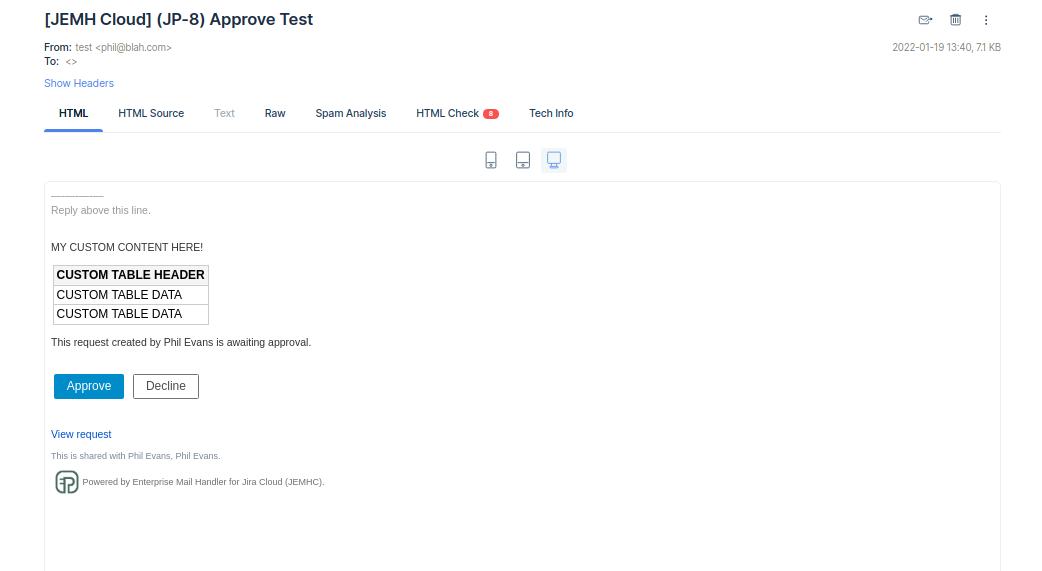
Validate that your changes have been made in a an actually sent test email.
Related Articles
...