...
When you see the below banner it means that the User that is running the Jira Instance does not have the correct permissions/access to write to the JEMH folder within JIRA_HOME/data/jemh. Without Write/, Read and Execute permissions on this folder it means that JEMH will not be able to process any emails as JEMH is not able to save an audit copy of the email within the folder.
...
Below is a screenshot that show the correct permissions that the JEMH jemh Folder would have:
...
Change owner/permissions within Windows
In order for a user to be have the Read, Write and Execute permissions then you will need to grant the user Full Control of that folder and it’s sub-folders.
In order to change the Owner and Permissions,
Go to <Jira_home>/data and then Right Click on jemh and then select Properties.
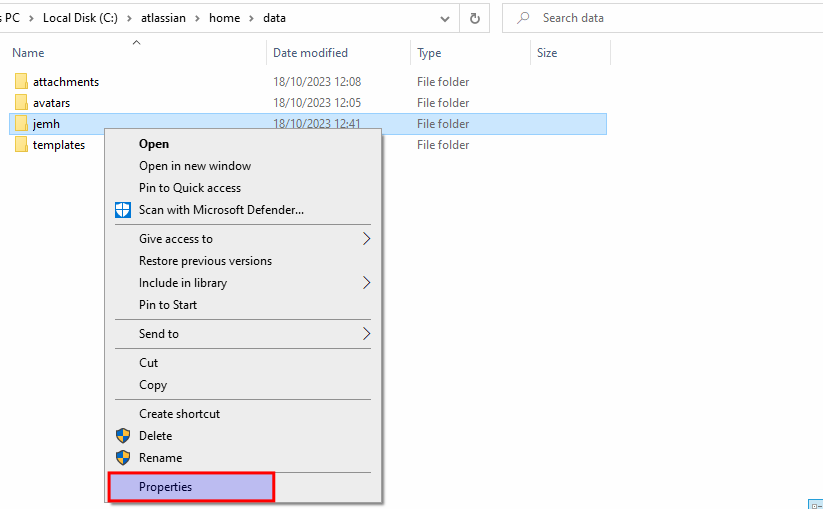
This will show the Properties for that folder, once here go to the Security tab
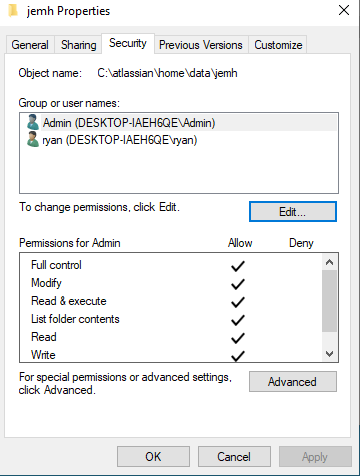
Then to change the Permissions and Owner Press Advanced.
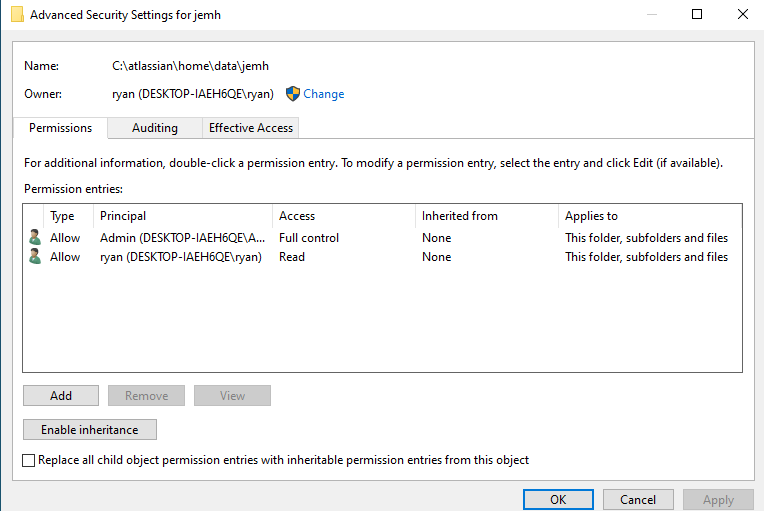
This will then show the current owner and the current Permissions, here you can now modify the Owner and any Permissions. See the following to change the relevant sections.
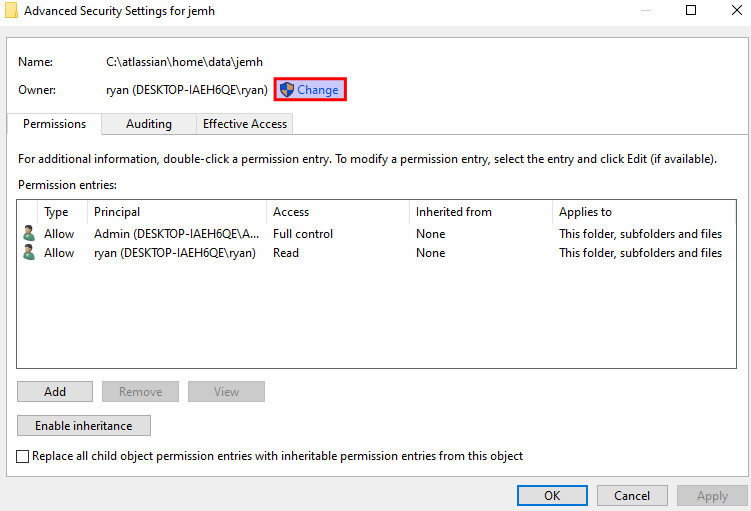
Change Ownership:
In order to change the Owner of the Folder and any sub-folders you will require the windows Administrator permission to make the change.
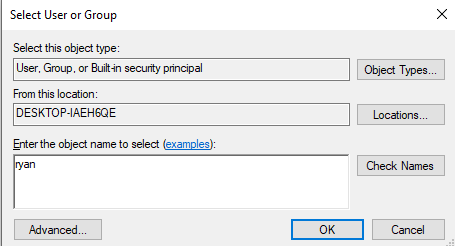
If you have the Permission to change this then you will need to press Change (next to the current owner)
Here you are then able to set the new owner
Once this is set you will then able to set this change to affect the sub-folders.
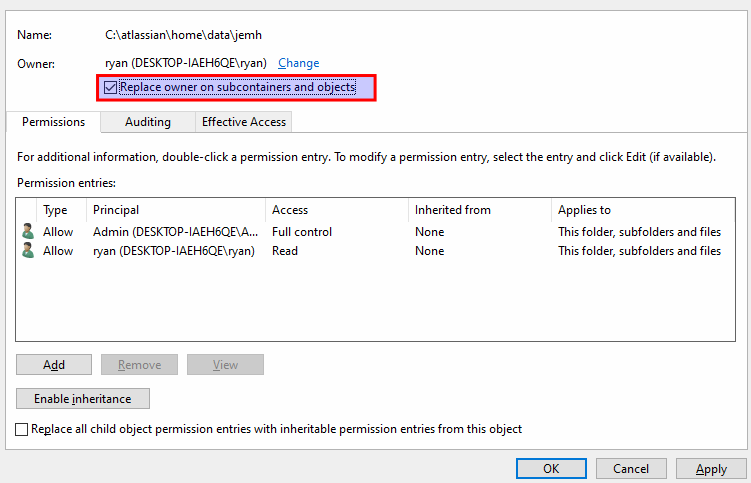
To save this you will then need to Press Apply.
Change/Add permissions:
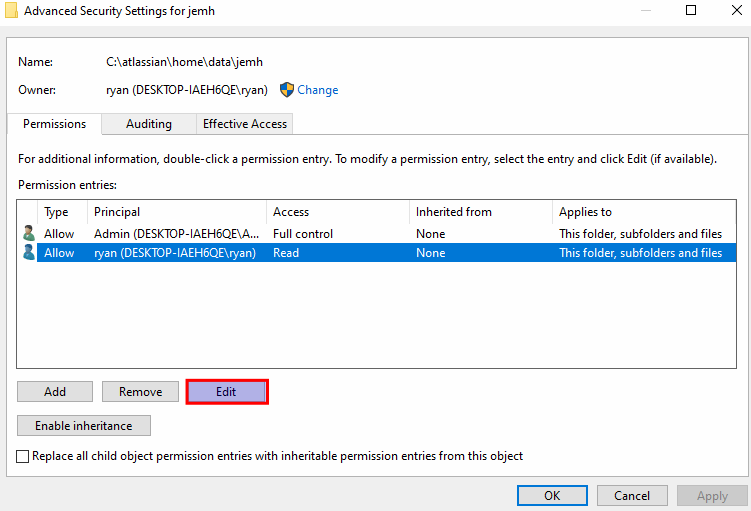
To change the Permissions for a User/Group,
You will need to select the relevant Permission entry and then Press Edit
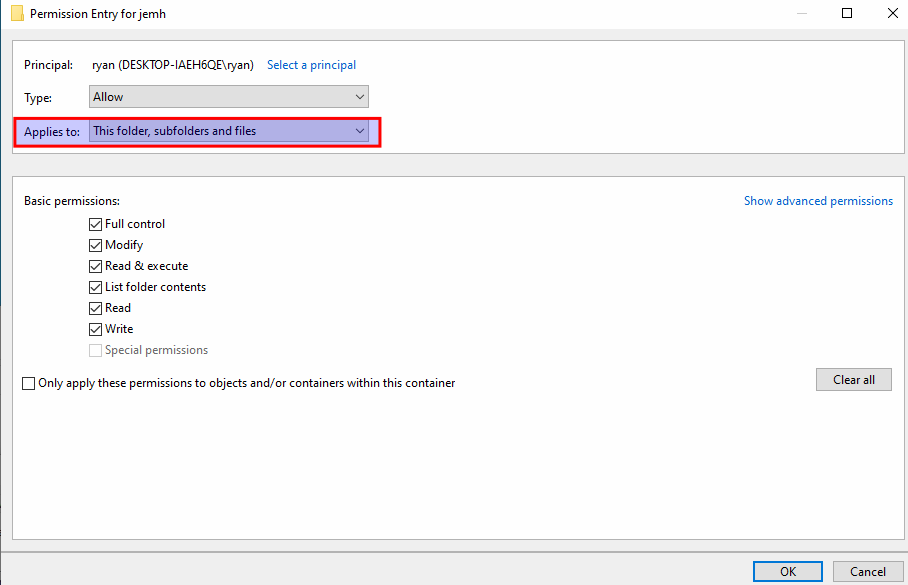
Then select the relevant Permissions that should be granted (Read, Write and Execute) or Press Full Control to grant all Permissions. Example below shows Full control.
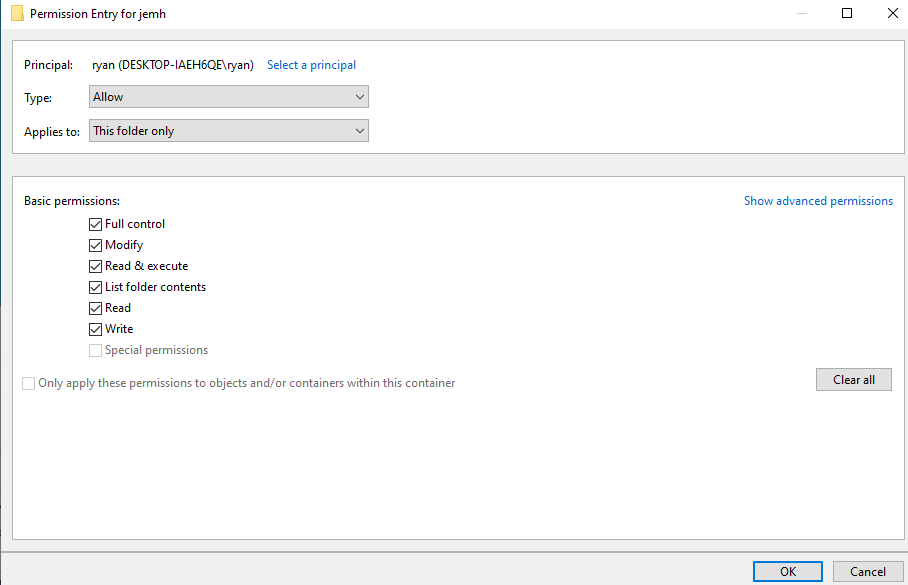
To apply for all sub-folders you will need to select “This folder, subfolders and files” for Applies to:
Once all is configured select, Ok and then press Apply, and this will then set all of the new permissions for this folder and its sub-folders.