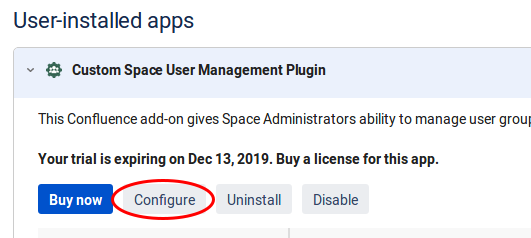
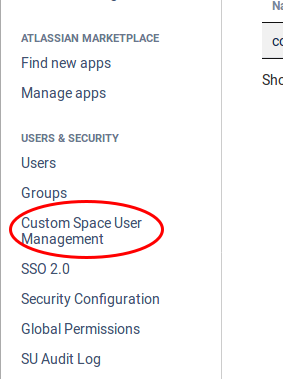
There should be a link to configure the add-on in the Manage add-ons UI in Confluence after you install it. Click this to open the main CSUM configuration page. Another option is to select Confluence Space User Management from the side Navigation bar in the Confluence Administrator section.
 |  |
Space Group Configuration
You should now see the main configuration screen for CSUM (shown here, v3.0.16)
 |
Data Centre instances of Confluence will see an additional section:
 |
Group
Setting | Description |
|---|---|
Group Actions Permitted | Options are Yes or No. Choose whether you want to allow Space Administrators the ability to perform add/remove operations on groups specified via group matching (see below) |
Delegated Group Actions Permitted | Options are Yes or No. Choose whether you want to allow Administrators the ability to delegate management of a group to other groups/users, or Space Administrators the ability to add/remove users from said delegated groups in the space view. |
Space group pattern | Specify a group name prefix and/or suffix for all groups that are to be manageable by Space Administrators. These fields should include spacekey somewhere, which is a special term replaced with the contextually available Space key when admins use CSUM. Changing this key will be immediate, and will prevent admins from finding and managing any group matching the old format. |
Max Number of UserIds to Act On at One Time | Sets the limit of how many users a Space Administrator can create at one time. |
Max Number of GroupIds to Act On at One Time | Sets the limit of how many groups a Space Administrator can create at one time. |
User
Setting | Description |
|---|---|
Disabled User Visibility | Choose whether to hide disabled users in CSUM tables or show them but add a “deactivated” flag to the end of their table entry. |
User Group Filter | Select which group you would like to visually filter by in CSUM table views, any users not belonging to a selected group will have a “Not in group” flag added to their table entry. |
Auto join groups | possibly refer groups here that any user who is added to a CSUM group should be also added to |
User Search Enabled | Options are Yes or No. Setting this to Yes allows Space Administrators to perform user searches when defining users for an operation (adding to a group for example). This is useful as it means Space Administrators do not have to rely on knowing the exact details of the users they are looking for. However, you may want this set to No if there may be security measures in place meaning that you do not want Space Administrators to see all users in Confluence. |
Personal Space User/Group Administration Allowed | Options are Yes or No. Choose whether or not you want users that have personal spaces to be allowed to administer users/groups for their space. This is not recommended, so if you are unsure choose NO. |
Customize User Search Directories | By default, CSUM will use Confluence default search for users that includes all configured User Directories. Its possible that a broken directory (intentional or other) will cause the search to fail. New in 3.0.16 is the ability to select from defined User Directories, those which should be queried for users. If a custom search is set, at least one User Directory needs to be set, otherwise default search behaviour will result. |
Cache Expiry is a Data Centre feature only.
Cache Expiry
Setting | Description |
|---|---|
Configuration | Set the duration of which the Configuration cache will expire. The default value is 24 hours. |
Space Groups | Set the duration of which the Space Groups cache will expire. The default value is 12 hours. |
Delegated Groups | Set the duration of which the Delegated Groups cache will expire. The default value is 5 minutes. |
General
Setting | Description |
|---|---|
Personal Space User/Group Administration Allowed | Options are Yes or No. Choose whether or not you want users that have personal spaces to be allowed to administer users/groups for their space. This is not recommended, so if you are unsure choose NO. |
Use Redirects to Refresh Group Membership | Options are Yes or No. Choose whether redirects occur when refreshing group membership views in your browser. |
Add-on Deactivated | Prevents usage of the add-on. While this may sound like an unnecessary duplication of the standard way of disabling the add-on, it can be useful as this way allows you to specify a downtime message which is not currently possible through normal disabling. |
Add-on Downtime Message | The message that is shown when the add-on has been disabled using the Plugin Deactivated setting mentioned above. If left blank, a default message will be used. The field does not currently support wiki syntax. |
Once you are happy with the configuration, click the Save button located at the bottom of the configuration page.
Delegated Group Configuration
As a system admin you can delegate the management of groups to users, either by direct authorization or by authorizing a group of users.
Adding a delegated group and authorizing users/groups
This is the view of the delegated group config, the table on the left stores groups that you would like other users/groups to manage. The table on the right shows users and groups that are authorized to manage a group, this table will populate only when a delegated group is selected on the left.
 |
To add a delegated group click the Add Group button:
 |
A dialogue box will appear, once you’ve typed 3 letters the selection box will search confluence for groups. Many groups can be added, simply select a group then continue typing the next group. Click submit when you're finished.
 |
When you’ve submitted a valid Confluence group, it will appear in the Delegated Groups table, upon selecting the group the right hand side table will populate with the current authorized users/groups. Currently there are none so the table is empty.
 |
Circled above is an indicator that shows which delegated group is selected.
To Authorize a user make sure the delegated group is selected and press the Authorize button
 |
A dialogue box will appear, here you can authorize confluence users and groups in one action, once you're happy with your selections press the submit button.
 |
Once you’ve submitted your groups and users will appear in their appropriate tables:
 |  |
In this example the user “Sir Admin” and all the users in the group “animals” are now able to add and remove users from the group “colours”. Such management can be done from Space > Space tools > Custom Space User Management > Delegated Groups. The instructions for how to do this can be found here
Removing authorized users and groups
To remove the authorization of any users or groups you need to select the delegated group, then you can either select the users and groups (these tables feature multi select) or don't and fill in the users/groups manually in the dialogue box afterwards, then press the ‘De-authorize’ button.
Now the de-authorize dialogue box will appear.
 |
The red ring surrounds the fill all groups and clear all groups buttons, these can be useful when de-authorizing a large number of groups. There are matching buttons for users as well.
When you’re happy with your selection(s) press the De-authorize button.
Removing a delegated group
You can remove one delegated group from the config at a time, just select the group to remove and press the remove group button.
 |
Once clicked a dialogue box will open informing you of the authorisations that will also be removed:

Click Remove to confirm the removal of the delegated group.