JEMHC can be configured to communicate with your Microsoft 365 mail accounts in order to send notifications or receive email for processing.
Prerequisite setup in Azure Portal
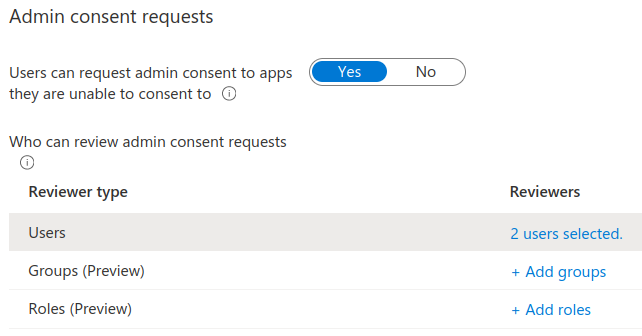
As an Azure admin, ensure that users of JEMHC can request permissions via Microsoft Azure > Enterprise Applications > User settings. You will also need identify Users/Groups/Roles who will authorise admin consent requests from users configuring JEMHC.
Granting consent
In order for JEMHC to access your mail accounts, it needs specific permissions. These permissions are delegated type permissions, meaning that JEMHC is delegated with the permission to act as a signed-in user when it interacts with mail accounts.
Consent needs to be given for JEMHC to use these permissions. Consent can be granted either by a single user (user consent) or for all users by an administrator (admin consent).
User consent
Usually you will want to grant consent on a per-account basis. Below is an example of a user consent screen that will be shown when creating a Microsoft 365 message source for JEMHC. The checkbox is only seen when when signed into an admin account, and changes the consent to an organization-wide admin consent.

Note that legacy EWS type connections don’t work with user consent. These connections must use admin consent. The default and recommended Graph type connections work with both consent by individual users and admins.
Admin consent
Once the JEMHC application is listed in Azure Portal as an Enterprise Application, you can choose to consent for all accounts in your organization. This means the above user consent screen will not be shown when connecting JEMHC to Microsoft 365. This can be done via Azure Portal > Enterprise applications > Enterprise Mail Handler for Jira Cloud (JEMHC) > Permissions.
Creating a connection
The following can be done via the Message Sources or Message Outbounds page under the Messaging tab, depending on whether you want to process or send emails respectively.
From the top right of the screen, select Sign in with Microsoft

At this point, you may be asked to grant consent to JEMHC acting on behalf of the signed in user. See the previous section on granting consent for more information.
After granting consent to the request, a screen confirming successful authorization is shown:

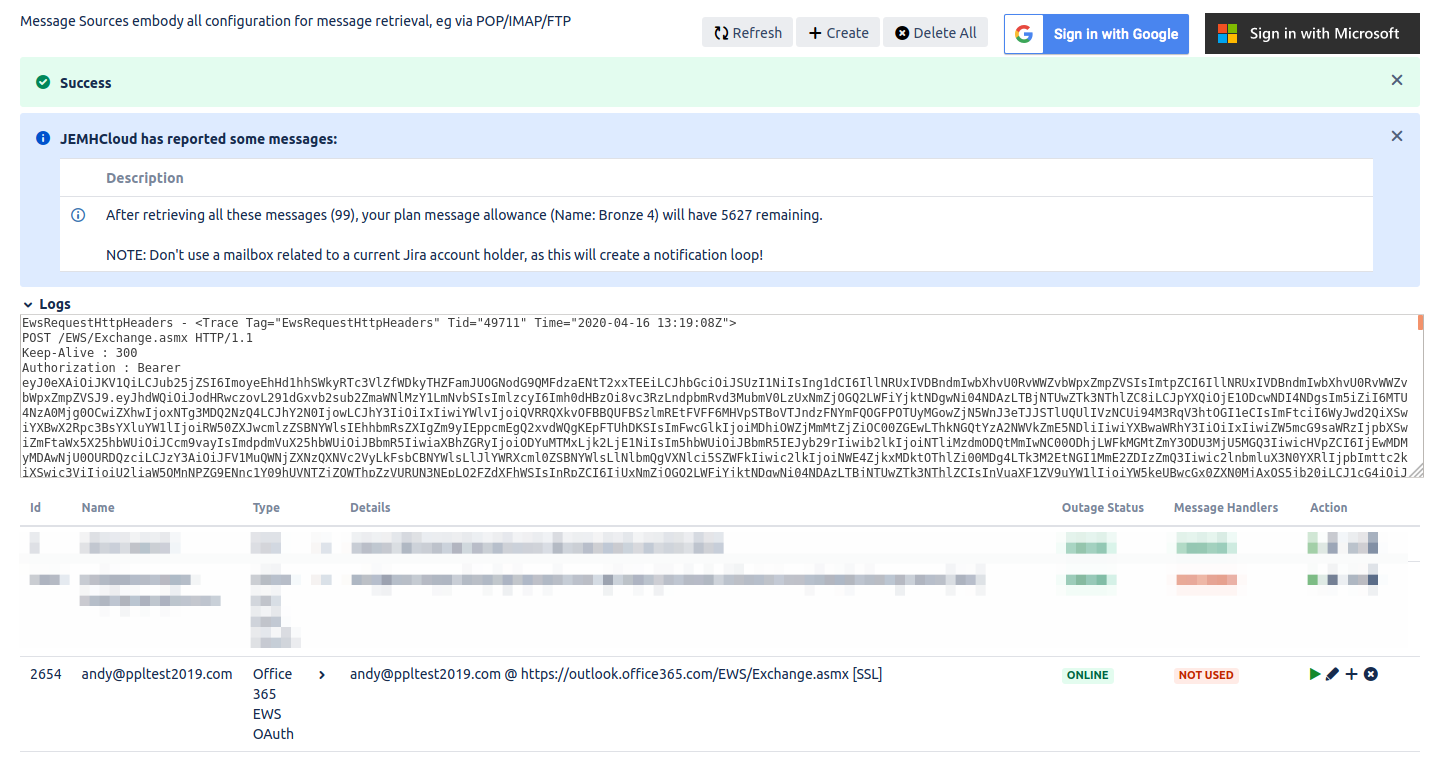
Returning to JEMHC, you should now see the new connection:

Clicking the green ping icon will then test the connection. A successful test will look similar to this:
The mail connection is now ready for use. These steps are identical for setting up both Message Sources and Message Outbounds.
Connection types
There are currently 2 types of connection JEMHC can make with Microsoft 365. Graph API connections make use of the Microsoft Graph API in order to access resources. These are recommended, and the default when the “Sign in with Microsoft” button is used inside the JEMHC UI.
Before addition of Graph API connections, EWS API connections were used. This connection type can still be created via the “create” button in the JEMHC UI, but will be removed at a later date.